
Introduction
Want to programmatically use the Twilio voicemail feature? While I was building a burner phone with Twilio voicemail, I had to look up so many tutorials to find out how to use Twilio’s API programmatically, so here’s a comprehensive guide on how to use Python and Twilio to set up voicemail. We’ll go over how to:
- Request a phone number from Twilio
- Build a custom webhook with Python Flask, ngrok, and Twilio to set up voicemail
- Change a phone number’s webhook to your custom one
- Download your Twilio voicemail recordings
- Delete your Twilio phone number
Okay before we do any of this, you will need a Twilio account to follow along. You can find your account sid and auth token where I’ve indicated in the picture.
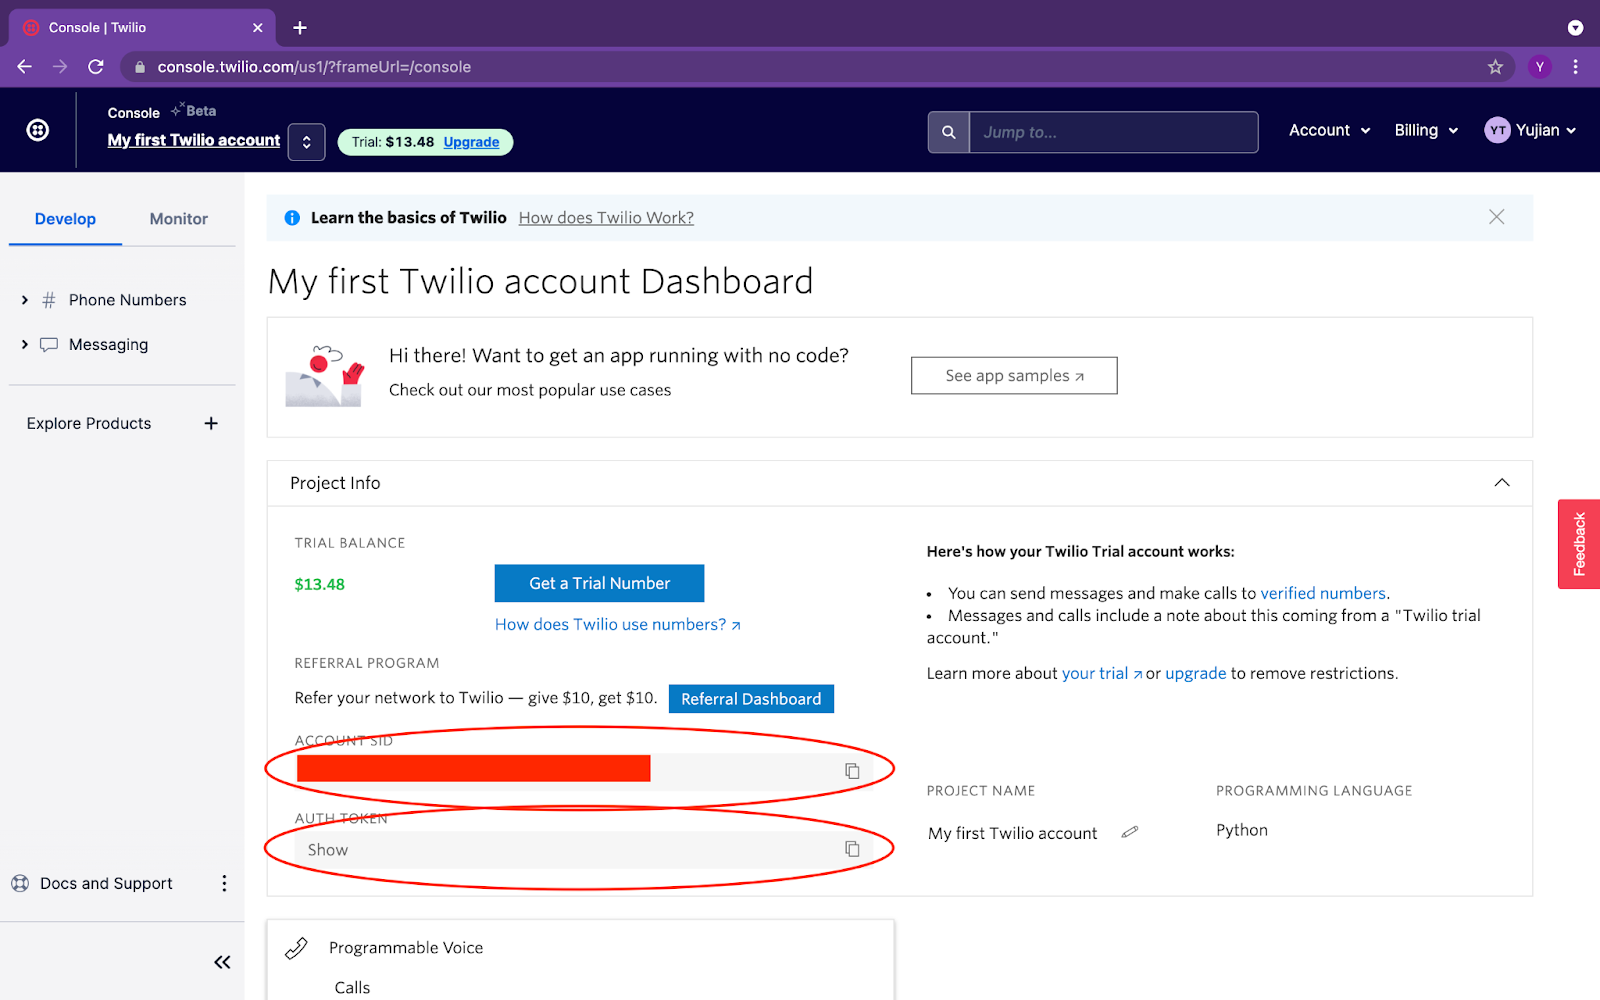
Copy your credentials and either save them in your environment variables or save them in a configure.py file in the folder you’re working in.
acct_id = '<your account sid>'
twilio_auth_key = '<your twilio auth token>'
Request a phone number from Twilio
Now that we have a Twilio account, the first thing we’ll want to do to set up our voicemail is get a phone number. We’ll create a Python script that will request 20 local numbers with whatever area code you’d like, and allow us to pick one of them.
from configure import acct_id, twilio_auth_key
from twilio.rest import Client
client = Client(acct_id, twilio_auth_key)
US_avail_phone_numbers = client.available_phone_numbers('US').fetch()
# lists 20 available local numbers with an area code of your choice
list_20 = US_avail_phone_numbers.local.list(area_code='<your area code>', limit=20)
for num in list_20:
# only list the number if it has voice capability
# they all should
if num.capabilities['voice'] == True:
print(num.phone_number)
_number = input("Which phone number do you want?")
# request your new number
new_number = client.incoming_phone_numbers.create(
phone_number= _number)
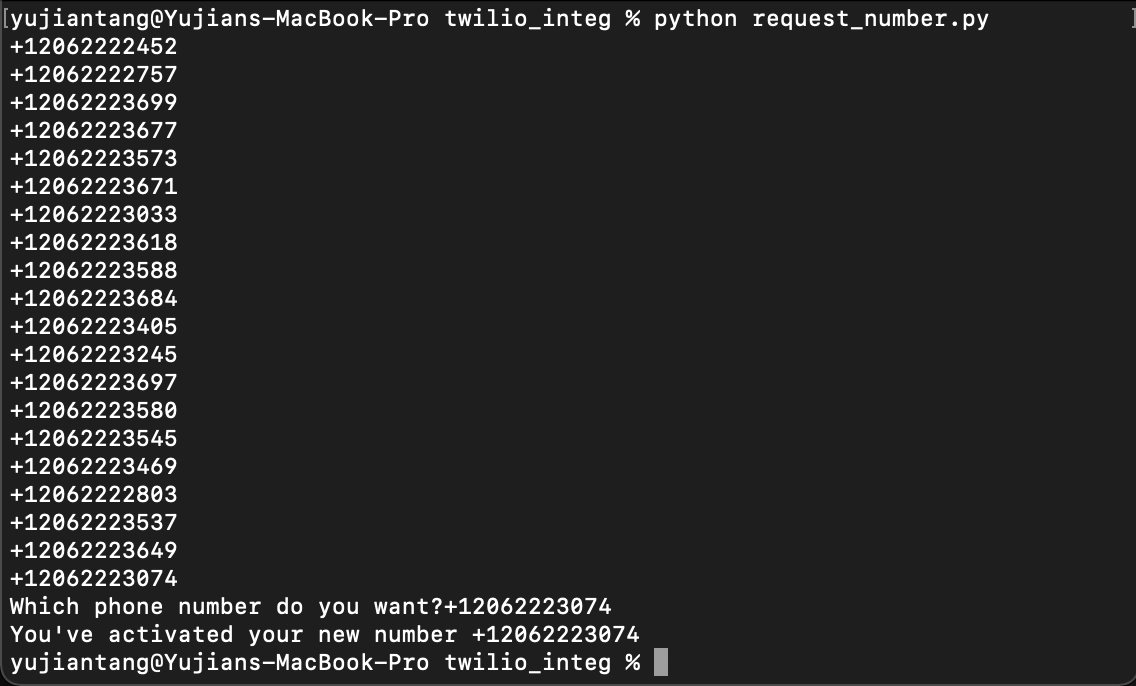
print("You've activated your new number", new_number.phone_number)When we’re done, our terminal output should look like:
Build a custom webhook with Python Flask, ngrok, and Twilio to set up voicemail
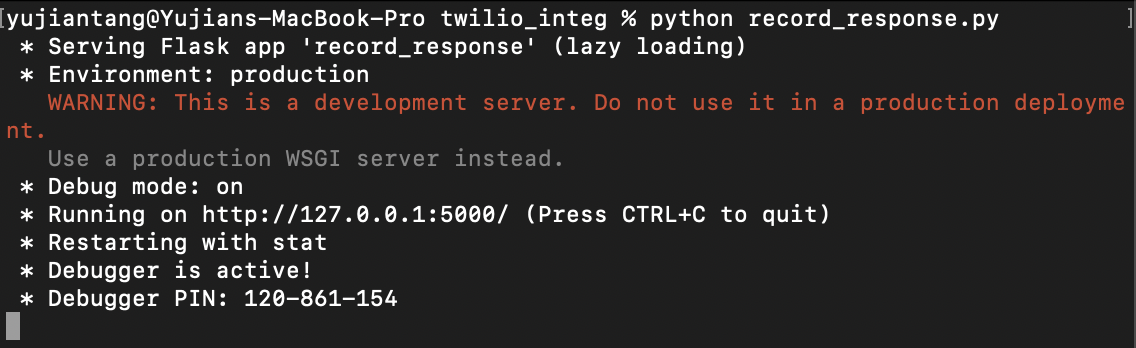
This is the part where we use Twilio to set up voicemail. We’ll build a Flask application that will use Twilio to go straight to voicemail and record phone calls. We’ll create a custom Twilio voicemail endpoint that will tell the caller to record their call and then record the call with a 10 second time out. We’ll download and run ngrok on our port to expose it to the internet. Note that we need two open terminals to do this. Run a file with this code in the first terminal
from flask import Flask
from twilio.twiml.voice_response import VoiceResponse

app = Flask(__name__)

@app.route("/voice", methods=["GET", "POST"])
def voice():
   """Read a message aloud"""
   resp = VoiceResponse()
   resp.say("Please leave a message")
   resp.record(timeout=10, transcribe=True)
   resp.hangup()
   return(str(resp))

if __name__ == "__main__":
   app.run(debug=True)
We should see an output like this:
After our flask app is up and running in our terminal, we also need to download and run ngrok. You can download ngrok here. After downloading ngrok and copying it into our working folder, we’ll open a second terminal and run
./ngrok http 5000Note that the “5000” can be replaced with whatever port you’re running your Python Flask application on. As you can see above, ours is running on port 5000. Ngrok should expose and return an endpoint we can hit. We’ll need to keep track of the https forwarding link, that is going to be our updated webhook URL for Twilio to hit when we call.

Change a phone number’s webhook to your custom one
Alright, now that we have an app that will record phone calls, let’s update our webhook on Twilio via their Python REST API. This will make it so that when we call the number, Twilio will send us straight to voicemail.
from twilio.rest import Client
from configure import twilio_auth_key, acct_id
client = Client(acct_id, twilio_auth_key)
phone_numbers = client.incoming_phone_numbers.list()
for record in phone_numbers:
print(record.sid)
_sid = input("What phone number SID do you want to update?")
_url = input("What do you want to update the webhook URL to?")
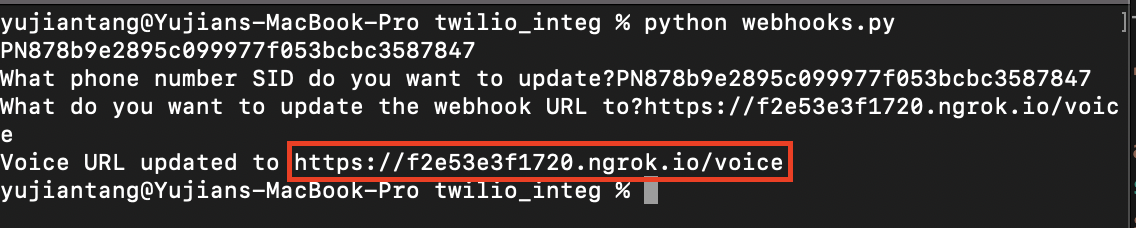
updated_phone_number = client.incoming_phone_numbers(_sid).update(voice_url=_url)
print("Voice URL updated to", updated_phone_number.voice_url)When we run this, we should get this output in the terminal. Notice that I added a “/voice” to the end of the URL provided by ngrok, that is because I defined “/voice” as the endpoint in our Flask application above.
Download your Twilio voicemail recordings
To test out our voicemail, make some calls. If everything is set up correctly, you should hear a female voice say “Please leave a message”. For the purpose of this tutorial, I made 3 phone calls and left 3 messages.
The message I left are:
"This is a third and final recording that I’m going to use for testing transcription services. So yeah, I should have been a cowboy""This is a test recording for transcriptions. Sally sells seashells down by the sea shore""A B C D E F G This is a test call for recording transcriptions with Twilio and AssemblyAI"Now let’s check out our recordings on Twilio and download them.
from configure import acct_id, twilio_auth_key
from twilio.rest import Client
import requests

twilio_url = "https://api.twilio.com"
client = Client(acct_id, twilio_auth_key)
recordings = client.recordings.list(limit=20)
for record in recordings:
   print(record.sid)

_rid = input("Which recording ID would you like?")

request_url = twilio_url + "/2010-04-01/Accounts/" + acct_id + "/Recordings/" + _rid + ".mp3"
response = requests.get(request_url)
with open(_rid+'.mp3', 'wb') as f:
   f.write(response.content)

print("File saved to", _rid+".mp3")
When we’re done, the output in the terminal should look like:
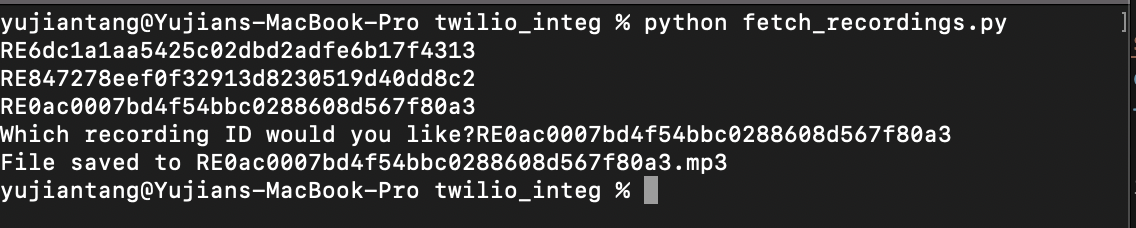
I ran this three times to pull down all three recordings. You can alternatively execute the code below to download all of them at once.
from configure import acct_id, twilio_auth_key
from twilio.rest import Client
import requests

twilio_url = "https://api.twilio.com"
client = Client(acct_id, twilio_auth_key)
recordings = client.recordings.list(limit=20)
for record in recordings:
    _rid = record.sid
    request_url = twilio_url + "/2010-04-01/Accounts/" + acct_id + "/Recordings/" + _rid + ".mp3"
    response = requests.get(request_url)
    with open(_rid+'.mp3', 'wb') as f:
        f.write(response.content)
    print("File saved to", _rid+".mp3")
Delete your Twilio phone number
One last thing that I wanted to do after setting up my burner voicemail with Twilio was to be able to delete my number programmatically.
from configure import acct_id, twilio_auth_key
from twilio.rest import Client

client = Client(acct_id, twilio_auth_key)

phone_numbers = client.incoming_phone_numbers.list()

for record in phone_numbers:
   print(record.sid)

_del = input("Which phone number SID would you like to delete?")

client.incoming_phone_numbers(_del).delete()
It should run like this:

Wrapping Up
In this tutorial we covered how to use Twilio’s API to get and download voicemails. Here is a full tutorial on how to build a burner phone to get voicemail transcripts. For more information about AssemblyAI, check out our blog for tutorials and updates. Follow us on Twitter @assemblyai or the author, @yujian_tang, to stay updated.