
Ironclad recently announced they are open-sourcing Rivet, their IDE for developing AI applications, and we announced the AssemblyAI plugin for Rivet so you can transcribe audio and use LeMUR in Rivet.
In this tutorial, you'll use Rivet to develop a graph (more on that later) that transcribes a podcast episode, and a graph that takes your question and generates an answer using LeMUR. You'll then call these two graphs from a Node.js application.
Before you begin
You'll need the following prerequisites to follow along:
Sign up for an AssemblyAI account to get an API key for free, or sign into your AssemblyAI account, then grab your API key from the dashboard.
Set your Rivet project
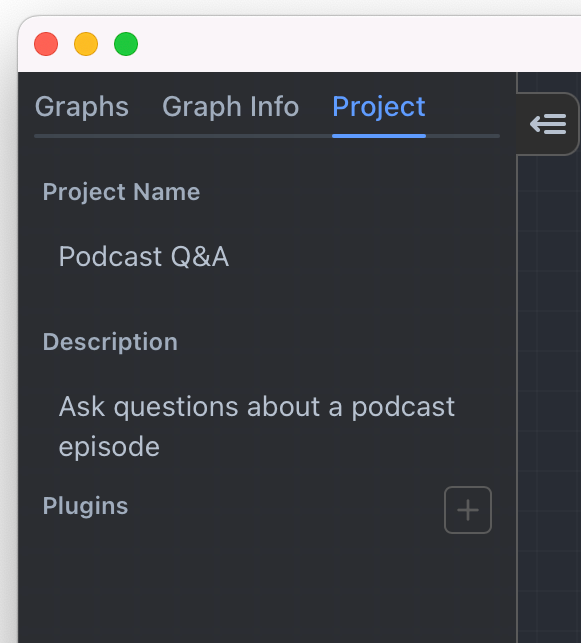
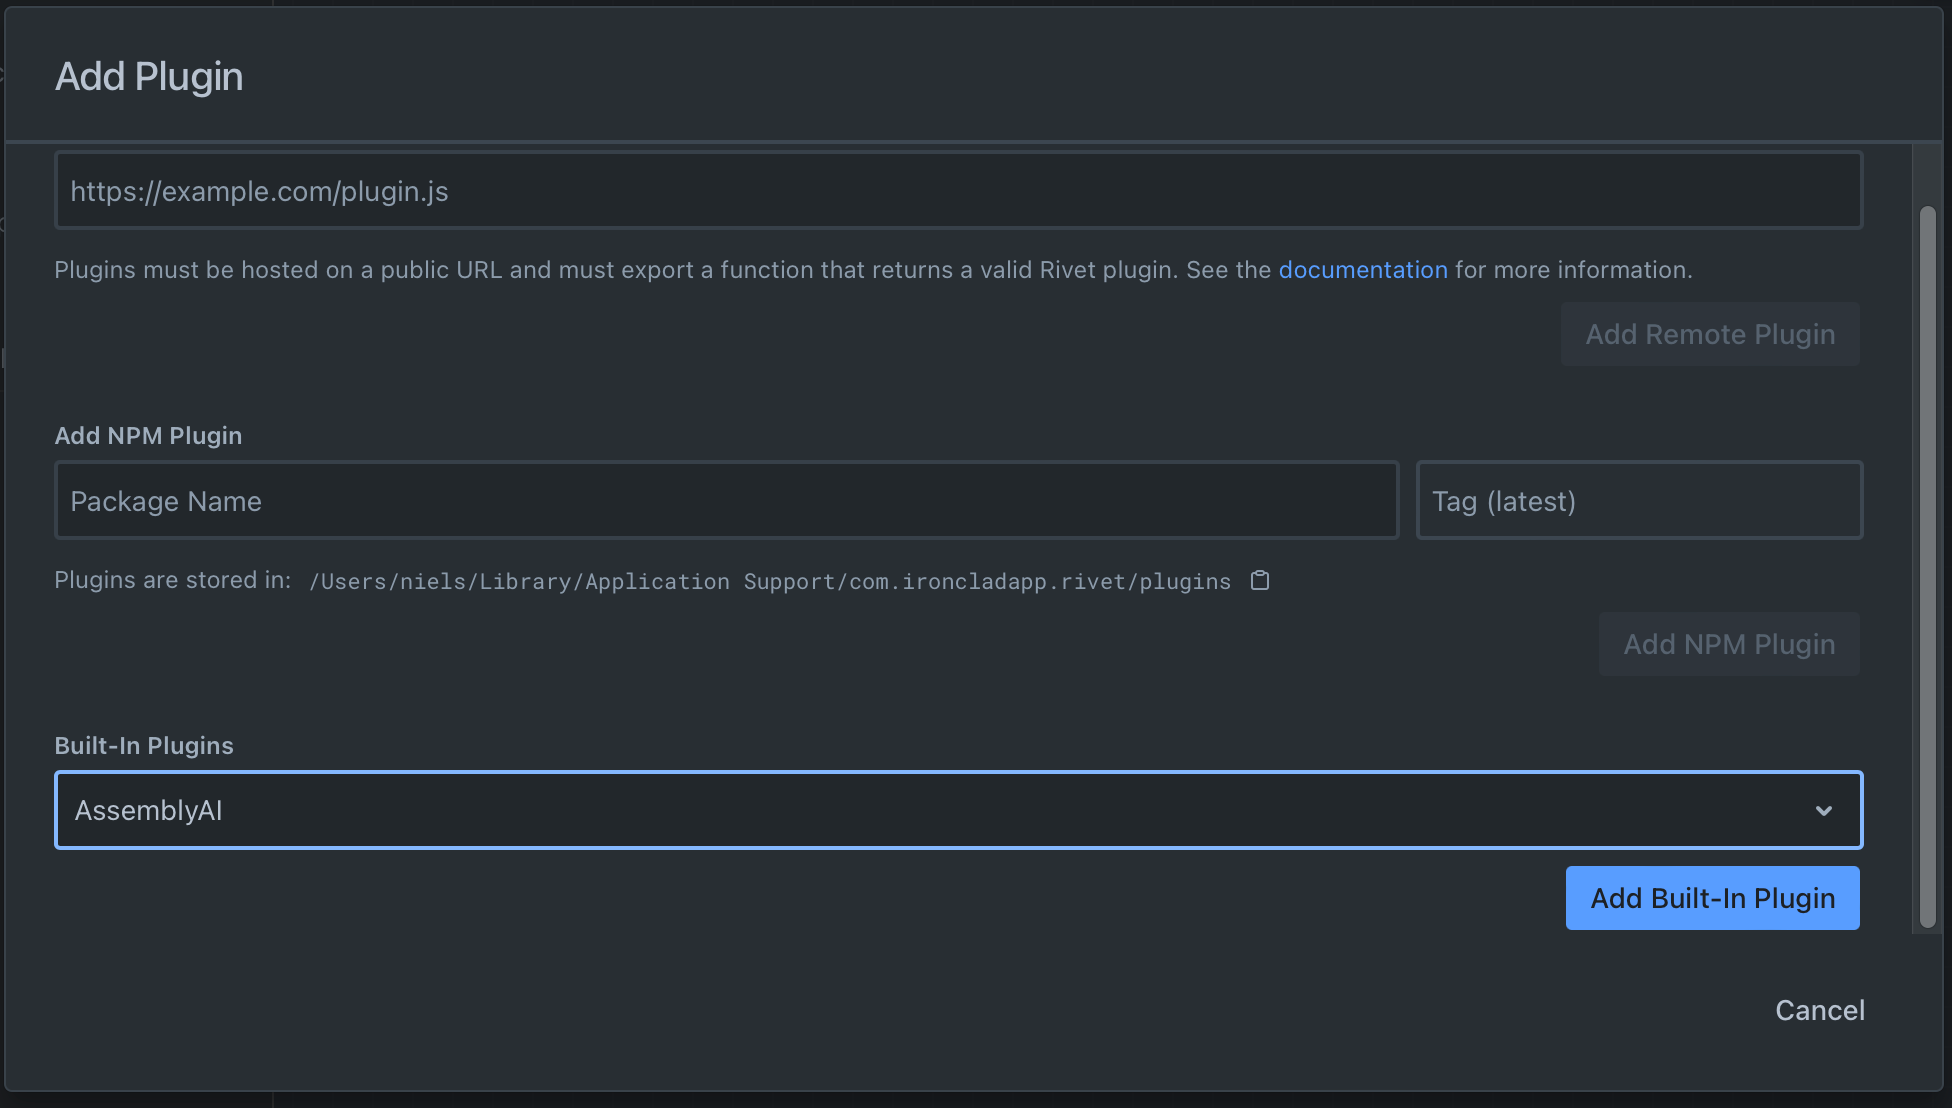
Start Rivet and navigate to the Project tab. Give your project a name and description if you'd like, then click on the plus-icon next to the Plugins label.
In the modal, find the Built-In Plugins field, select the AssemblyAI plugin, and click Add Built-In Plugin.
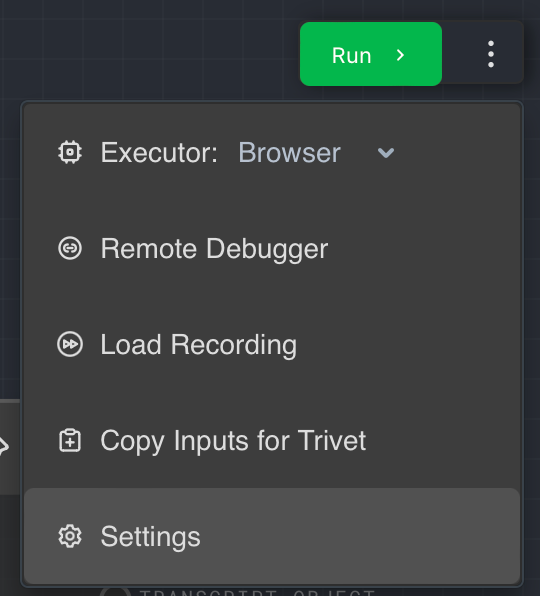
Next, click the three-dotted button at the top-right of the canvas, and click Settings in the context menu.
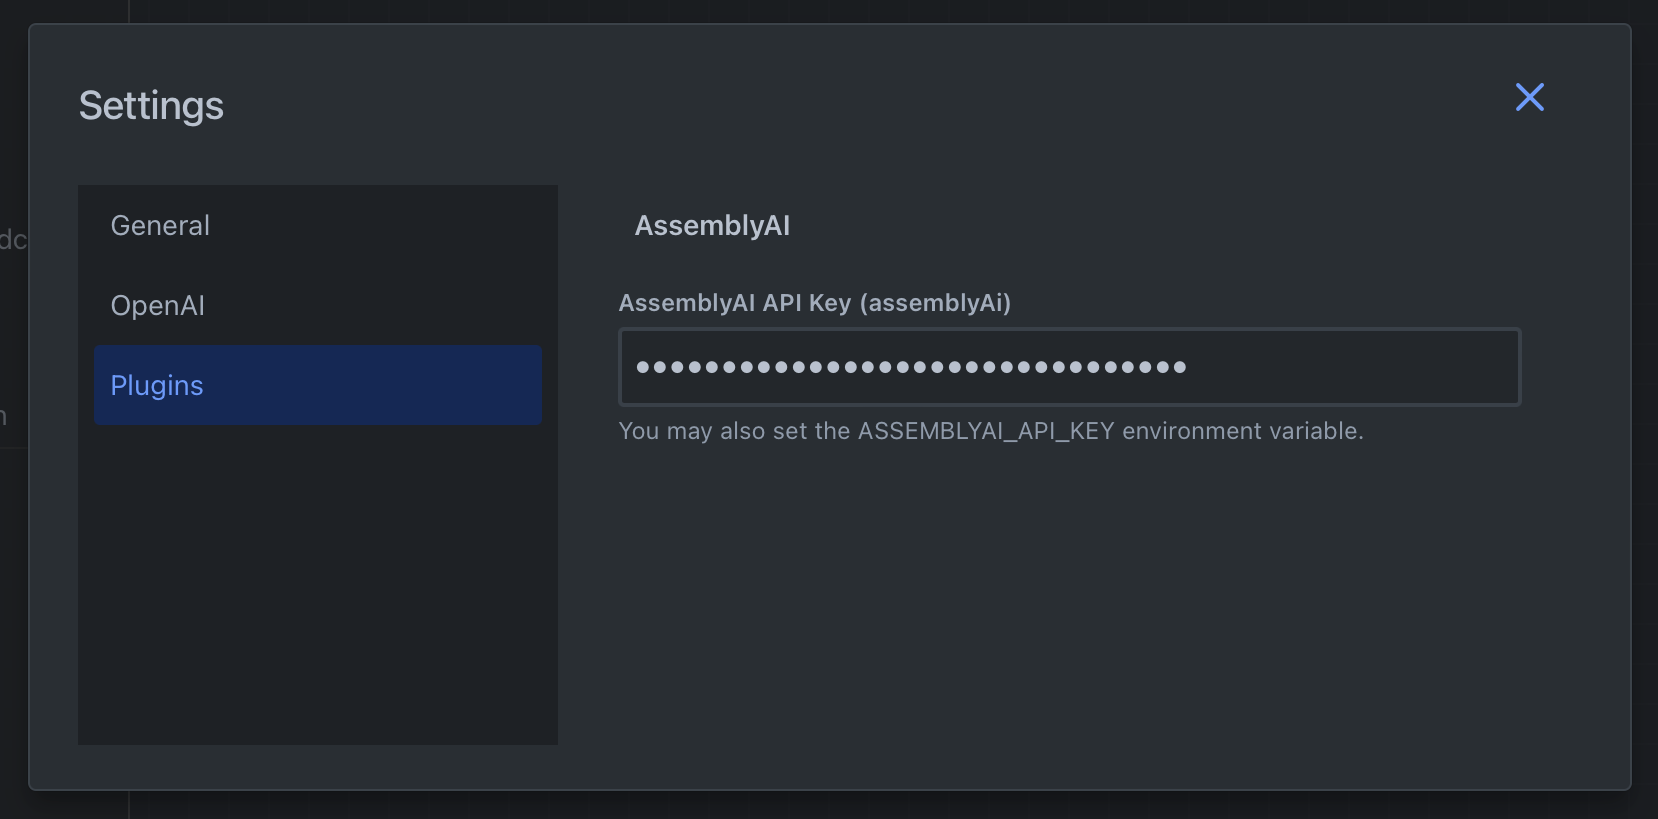
In the settings modal, click on Plugins and enter your AssemblyAI API key. Alternatively, you can configure the ASSEMBLYAI_API_KEY environment variable.
Exit the modal, and right-click on the canvas to reveal the context menu to add nodes. Add the Audio node via Add > Data > Audio.
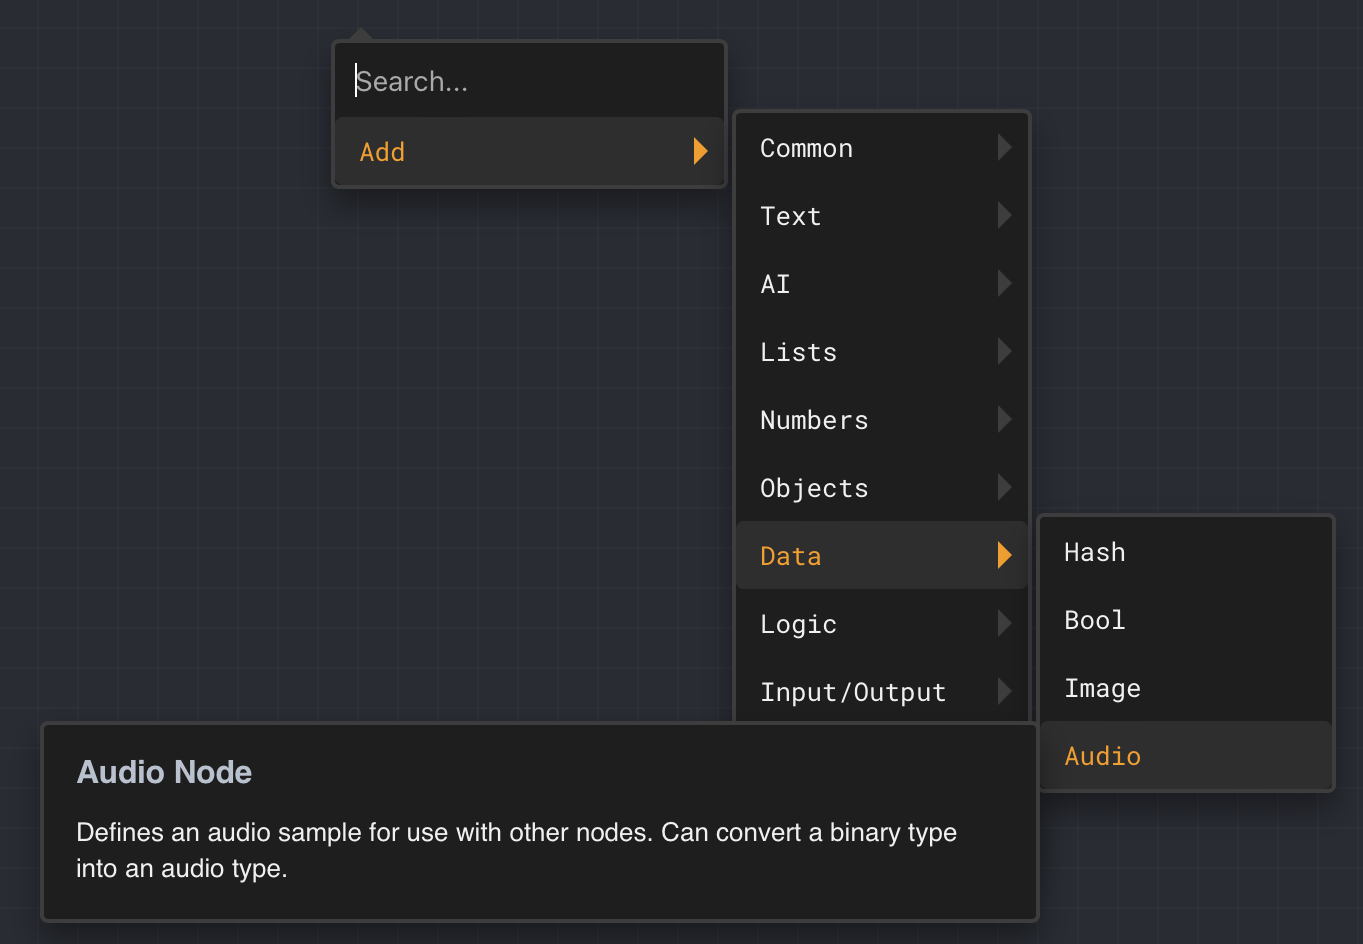
Click the settings icon on the Audio node, then inside the node configuration, click the Pick File button and select an audio file of your choice containing spoken words. If you don't have an audio file handy, download this podcast audio file.
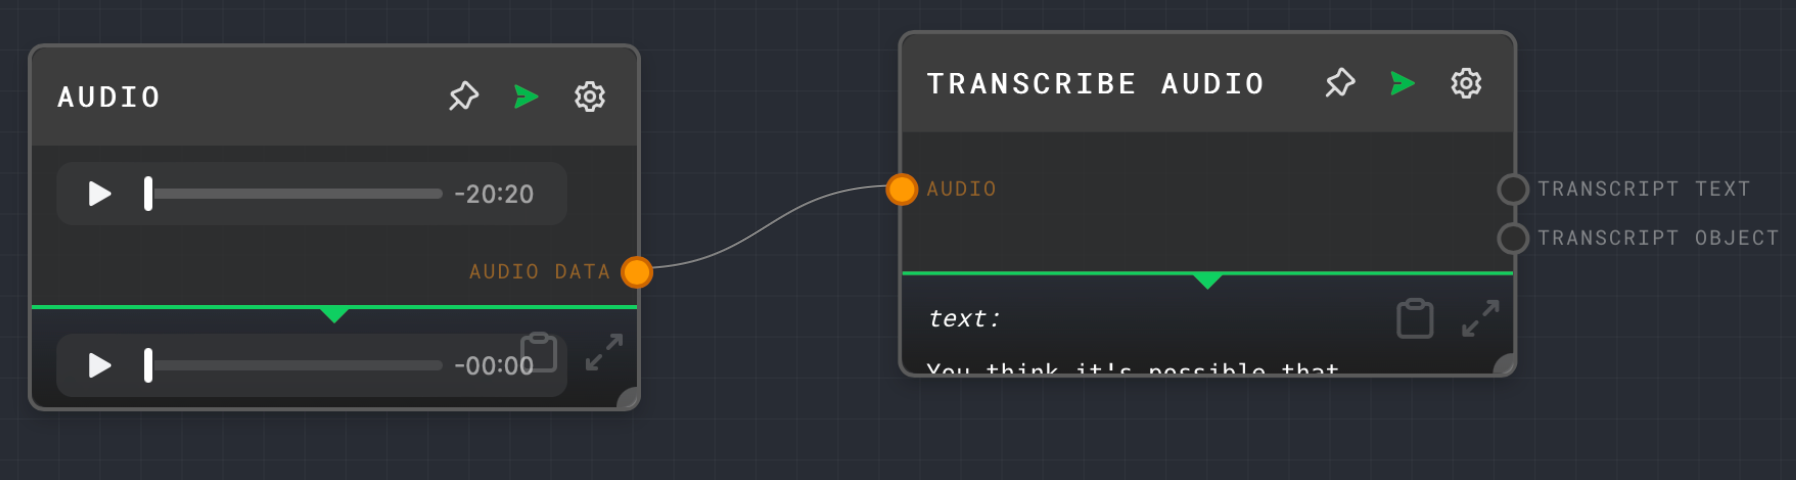
Next, add the Transcribe Audio node (Add > AssemblyAI > Transcribe Audio), and connect the output of the Audio node to the Transcribe Audio node's input.
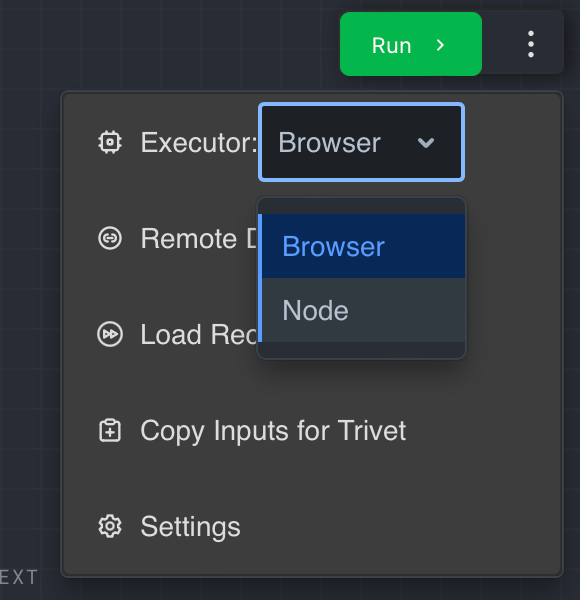
By default, Rivet runs in the browser context, but it can also be run in Node.js. Some of AssemblyAI's nodes cannot be run inside the browser context for security reasons, so you must switch to the Node executor. Click the three-dotted button at the top right, and change the Executor dropdown from Browser to Node.
If you see any unexpected errors in the future, verify that you're still using the Node executor.
Now, click the Run button to try out your first Rivet graph.
When the graph has been executed, you should see the transcript text at the bottom of the Transcribe Audio node.
Build your Rivet project
You just created your first Rivet project and your first graph. Rivet projects can have multiple graphs, and you add nodes to graphs to build your workflow. Graphs can also be executed as subgraphs which you'll take advantage of in this tutorial.
You'll create three graphs in this project:
- Create transcript: This graph is a subgraph to create a transcript from an audio file URL.
- Ask question: This graph is a subgraph to ask a question about the transcript using the LeMUR framework.
- Q&A: This is the main graph from which you'll call the other two subgraphs. In this graph, you'll be prompted for the audio file URL and for a question to ask.
You may be wondering: Why split up this fairly simple project into multiple graphs? Well, in the next section, you'll call the Create transcript and Ask question graphs from a Node.js project.
The Q&A project is to test the subgraphs from within Rivet conveniently. You could also use Trivet tests to test your graphs.
Let's start with the Create transcript graph.
Create transcript graph
Start by switching to the Graphs tab in the left sidebar, then right-click in the empty tab, and click New Graph in the context menu.
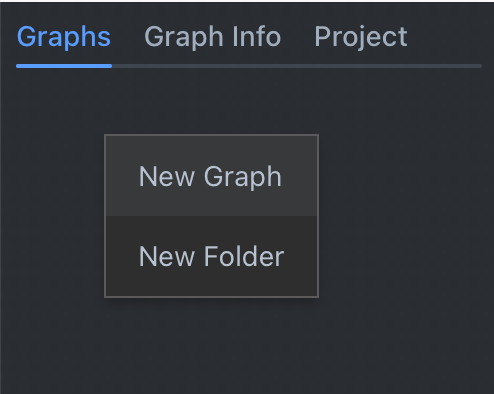
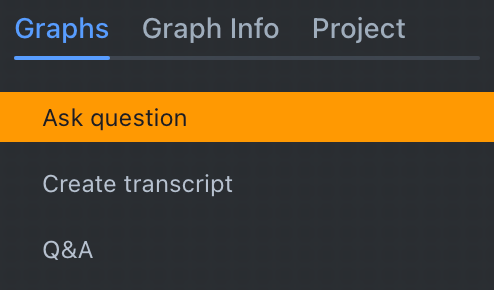
Name the graph Create transcript, and repeat the process for the Ask question and Q&A graph.
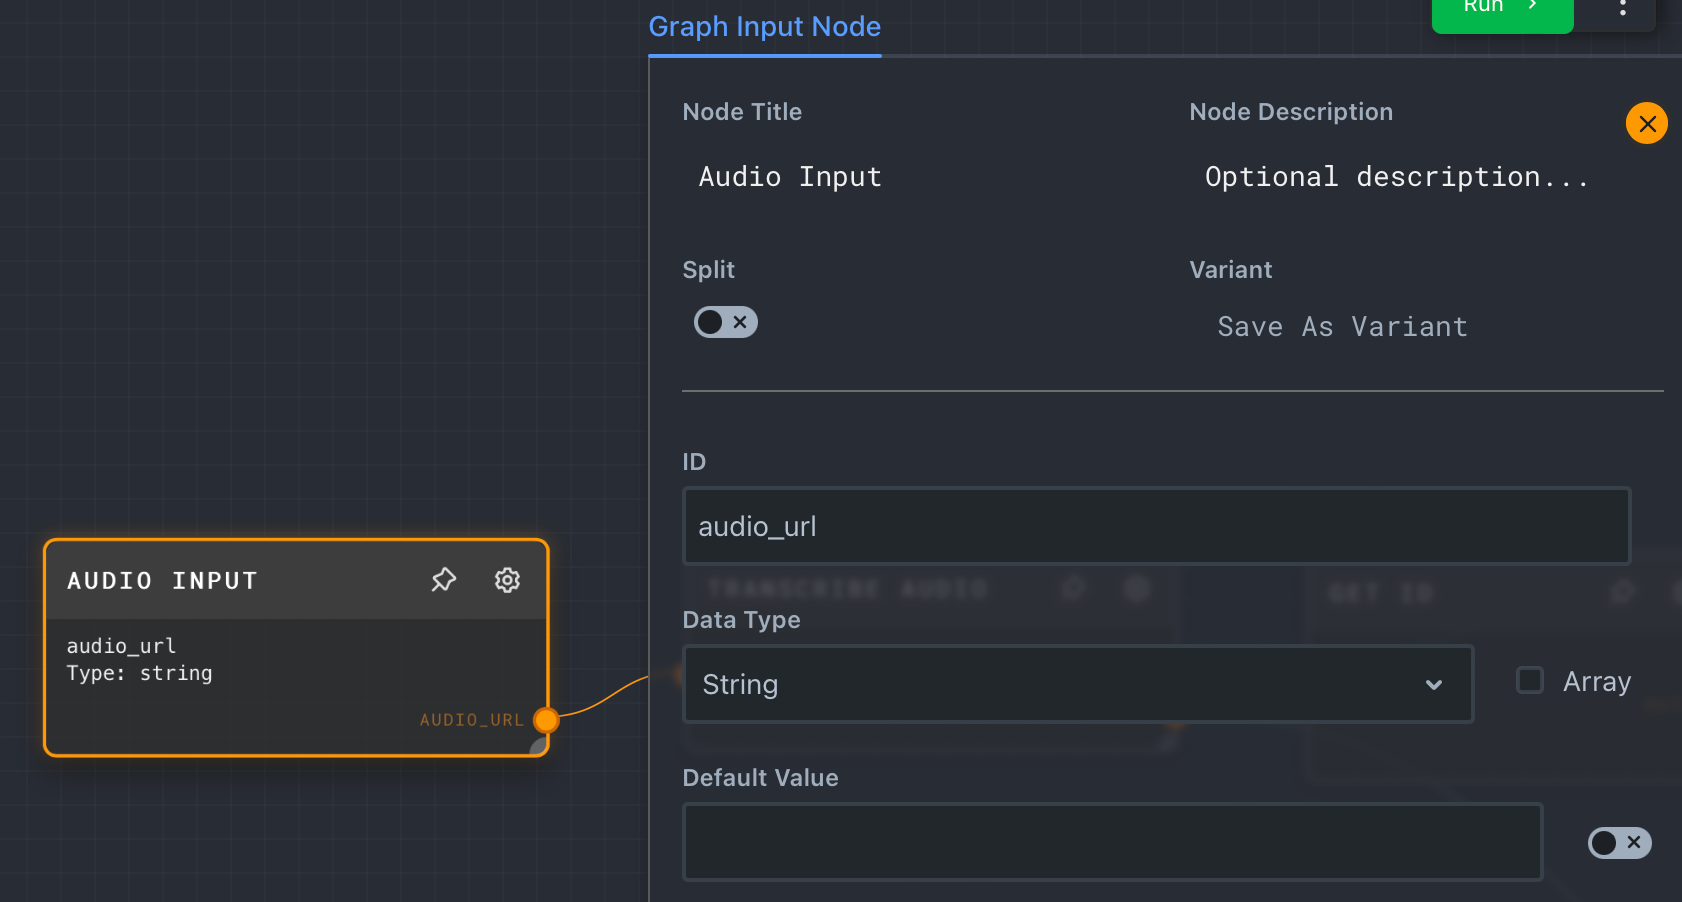
Click on the Create transcript graph to select it, and then add a Graph Input node (Add > Input/Output > Graph Input). You can use Graph Input nodes to receive parameters from whatever is calling your graph, whether it is another graph or a Node.js application.
Configure the Graph Input node with Node Title Audio Input, ID audio_url, and Data Type String.
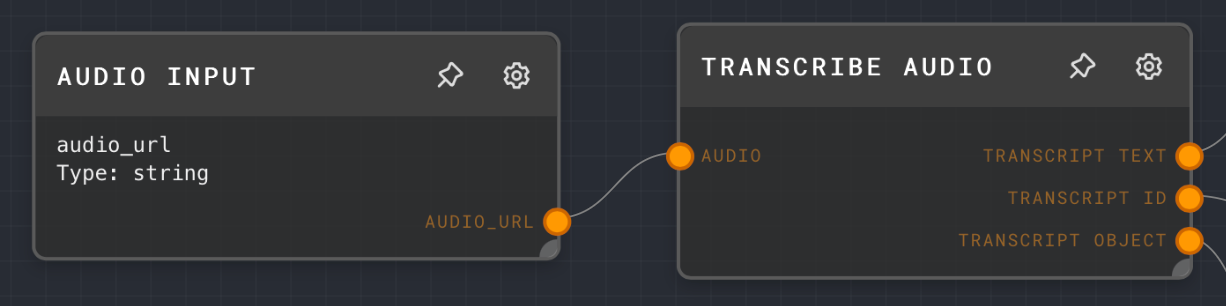
Next, add a Transcribe Audio node (Add > AssemblyAI > Transcribe Audio) and connect the output of the Audio Input node with the new Transcribe Audio node.
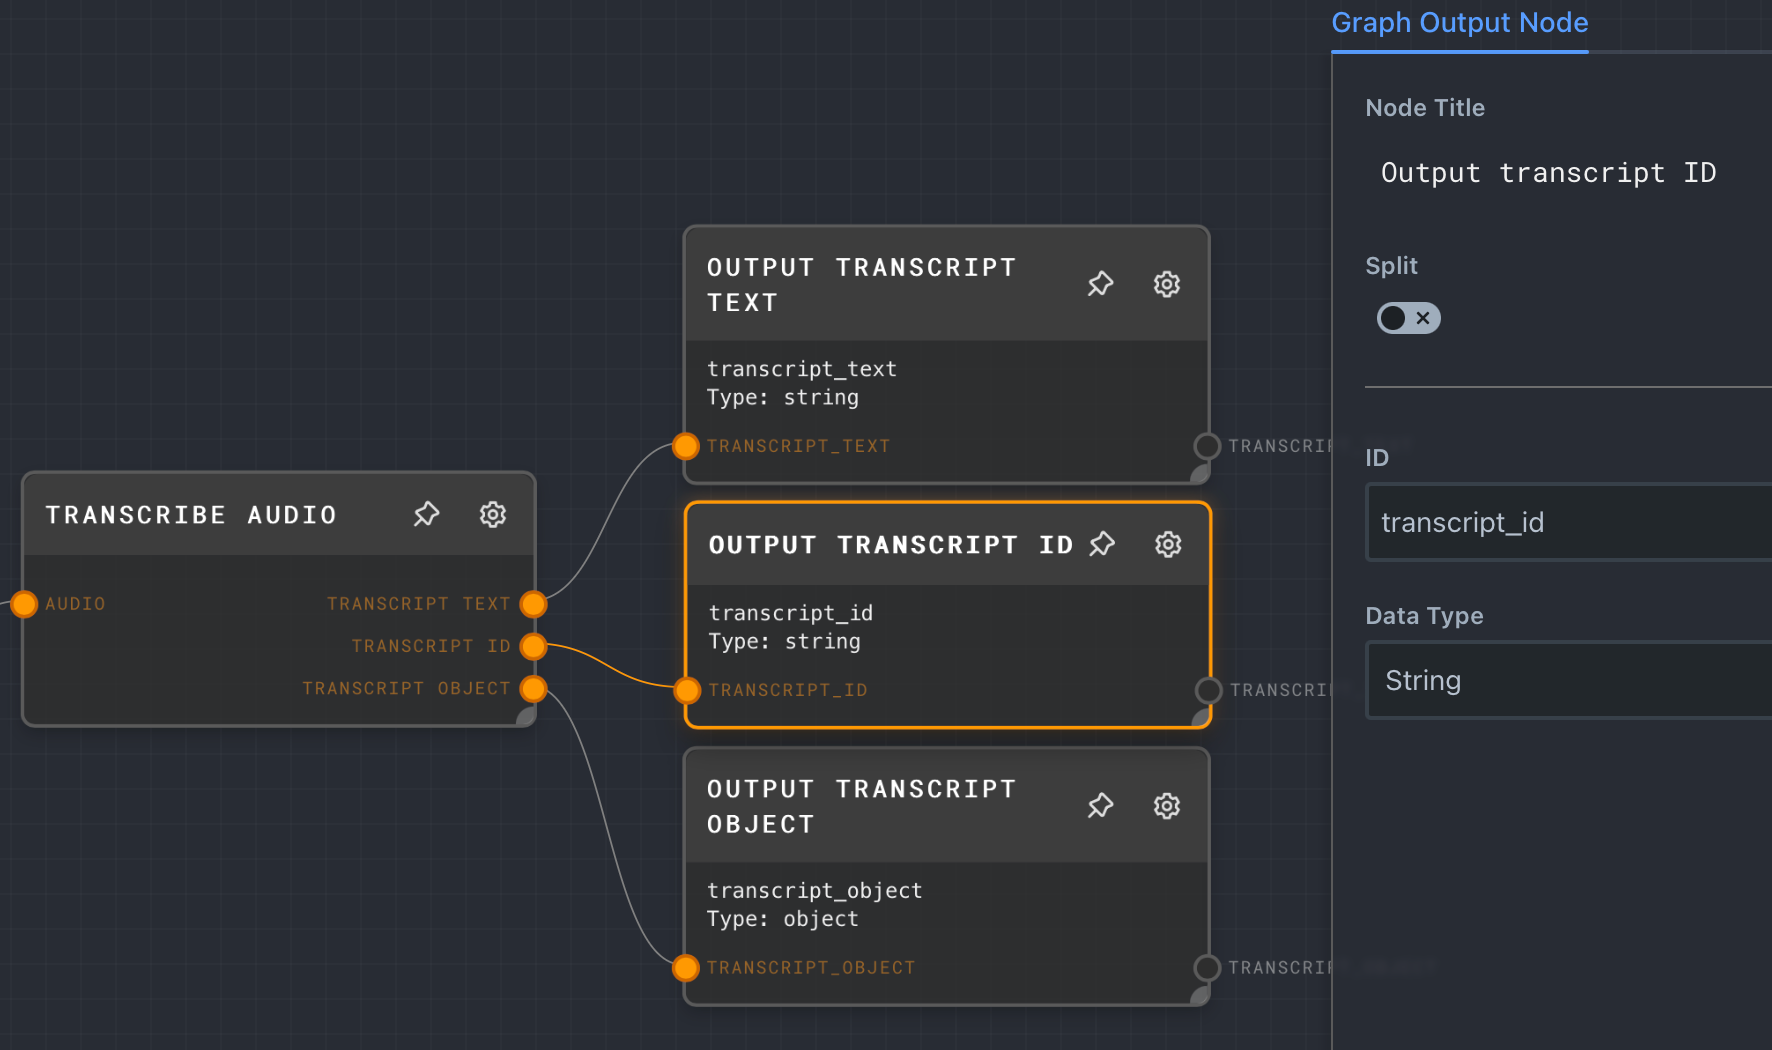
Just like you can receive data from outside the graph using Graph Input nodes, you can also return data using Graph Output nodes. You'll only need the ID of the transcript, but you can create a Graph Output node for each of the outputs coming from the Transcribe Audio node.
Configure the output nodes like this:
- Connect the Transcribe Audio node's transcript text output to the Graph Output node's input.
- Node Title:
Output transcript text - ID:
transcript_text - Data Type:
String
- Node Title:
- Connect the Transcribe Audio node's transcript id output to the Graph Output node's input.
- Node Title:
Output transcript ID - ID:
transcript_id - Data Type:
String
- Node Title:
- Connect the Transcribe Audio node's transcript object output to the Graph Output node's input.
- Node Title:
Output transcript object - ID:
transcript_object - Data Type:
Object
- Node Title:
If you wanted to, you could give the Graph Input nodes a default value to quickly test out the graph.
Ask question graph
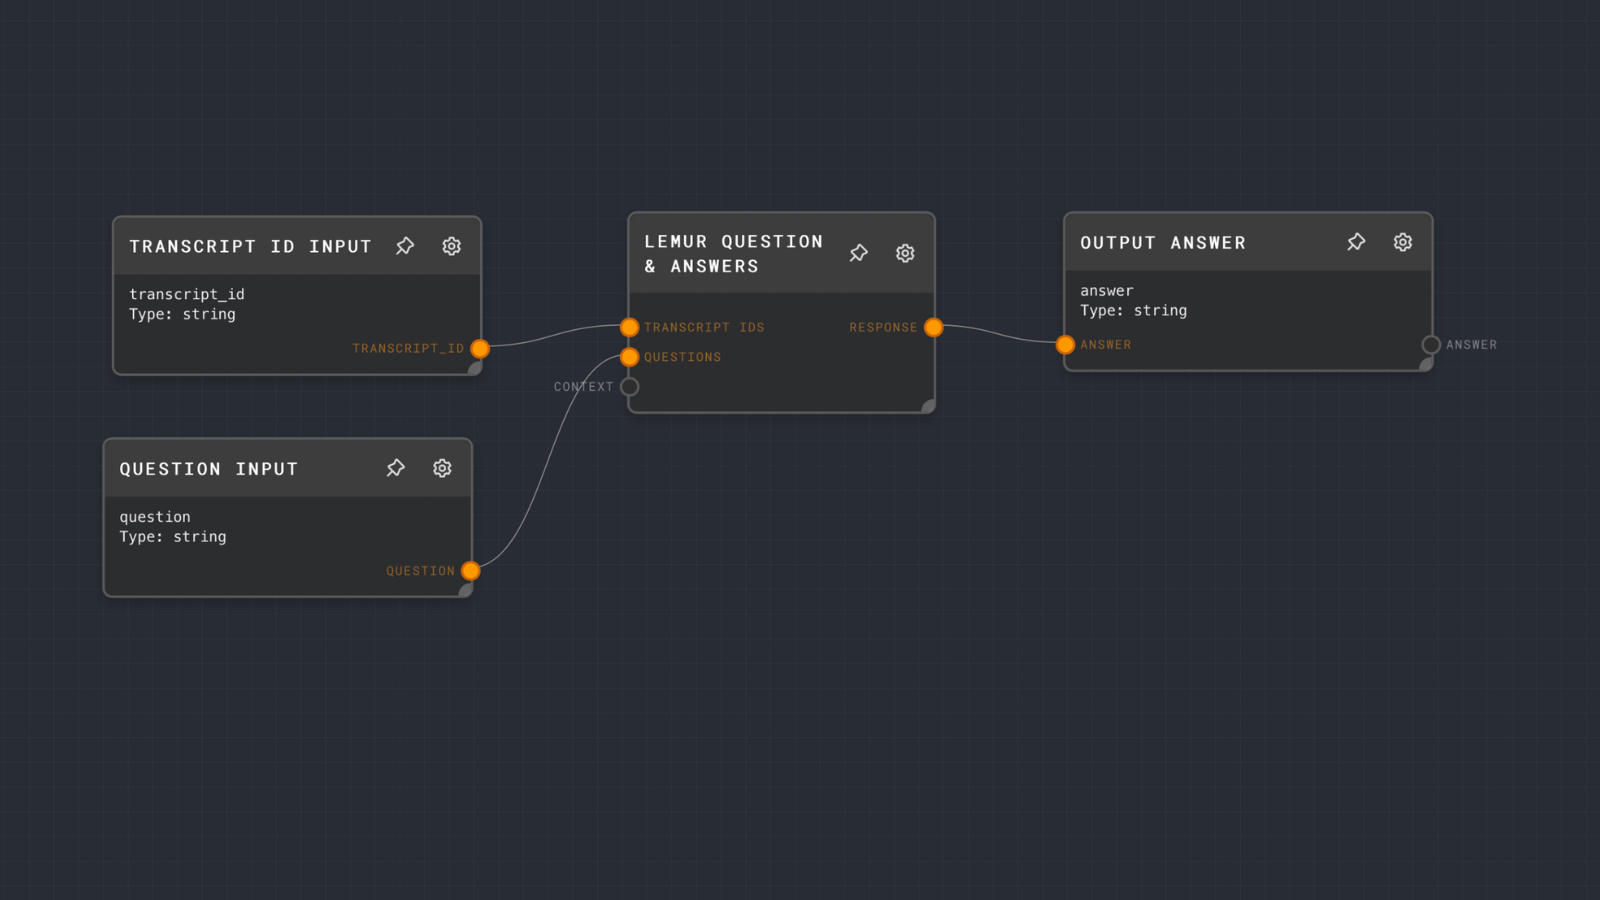
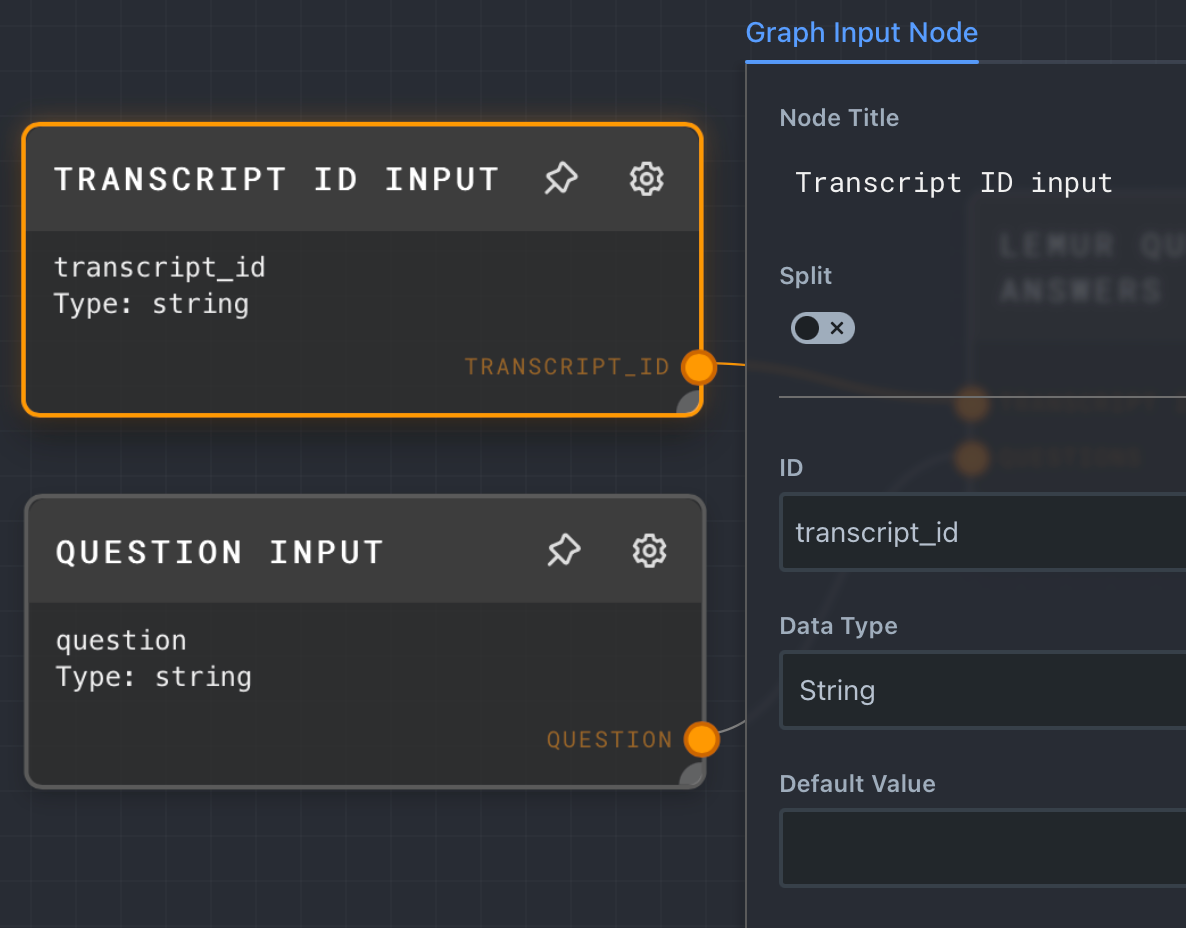
Open the Ask question graph and add two Graph Input nodes to the canvas.
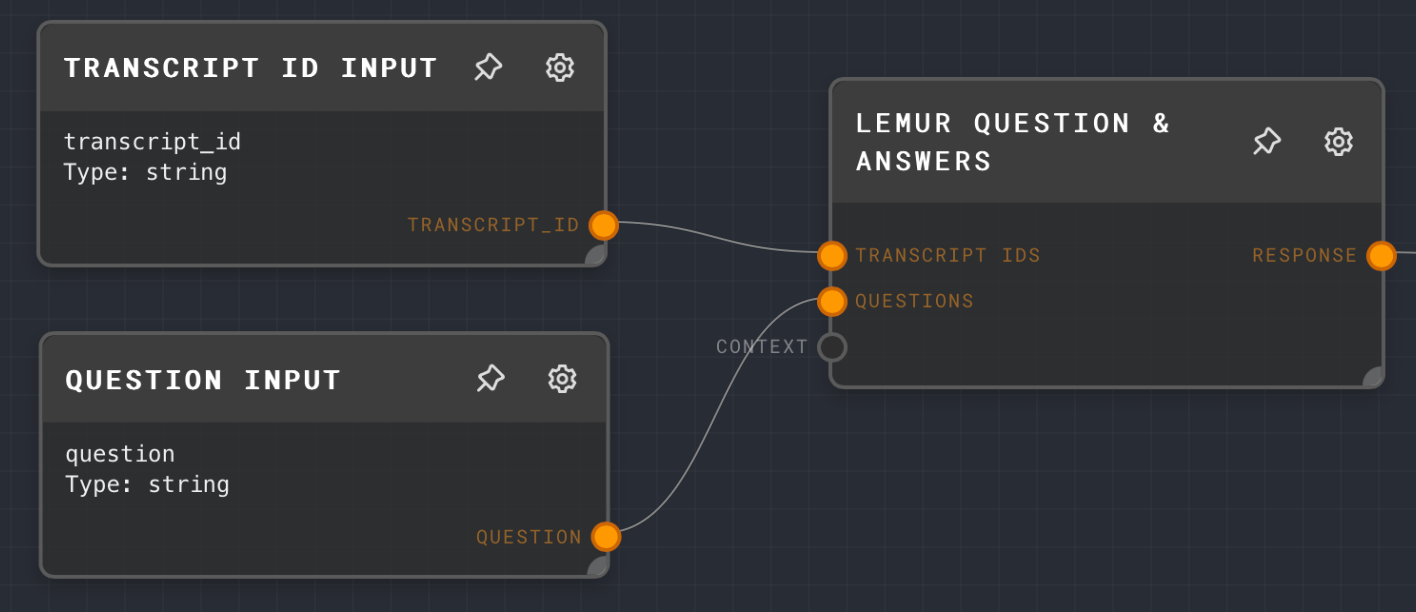
Configure the first Graph Input with Node Title Transcript ID input, ID transcript_id, and type String.
Configure the second Graph Input with Node Title of Question input, ID question, and type String.
Next, add a LeMUR Q&A node (Add > AssemblyAI > LeMUR Q&A), then connect the output of Transcript ID input to LeMUR Q&A's TRANSCRIPT IDS input, and connect the output of the Question input to LeMUR Q&A's Questions input.
The LeMUR Q&A node will return an array of answers along with the questions you passed in. You can use the Extract Object Path to extract data from arrays and objects. Add a new Extract Object Path node (Add > Object > Extract Object Path), and configure the Path option with $[0].answer. This query will select the answer property of the first item in the array.
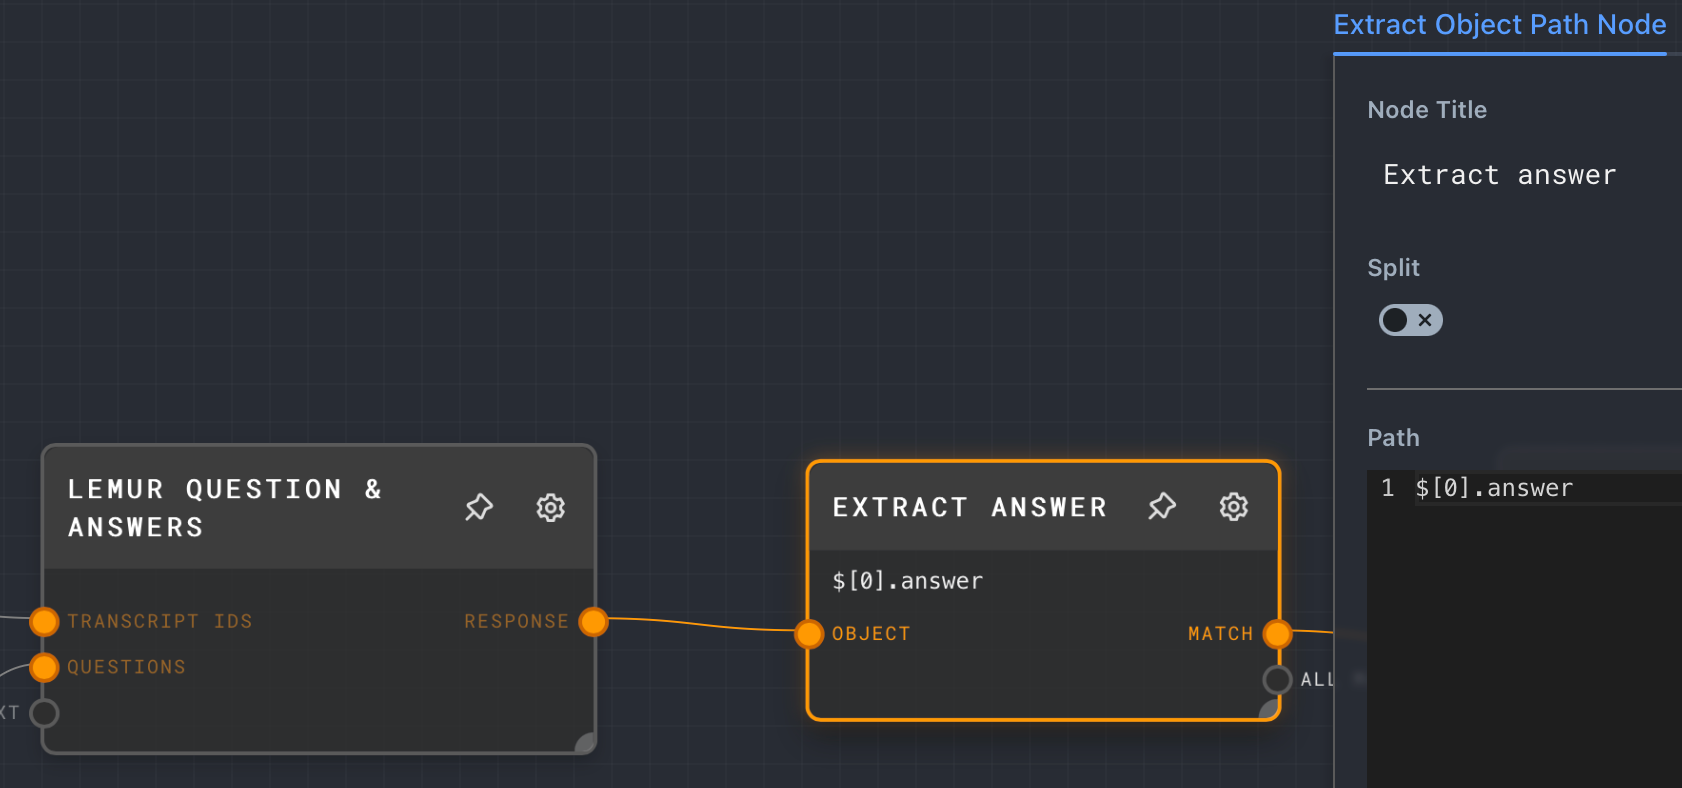
Note: The Extract Object Path node uses jsonpath-plus. Check out their examples to learn more about how to query data with JSONPath Plus syntax.
Next, add a Graph Output node with Node Title Output answer, ID answer, and Data Type String.
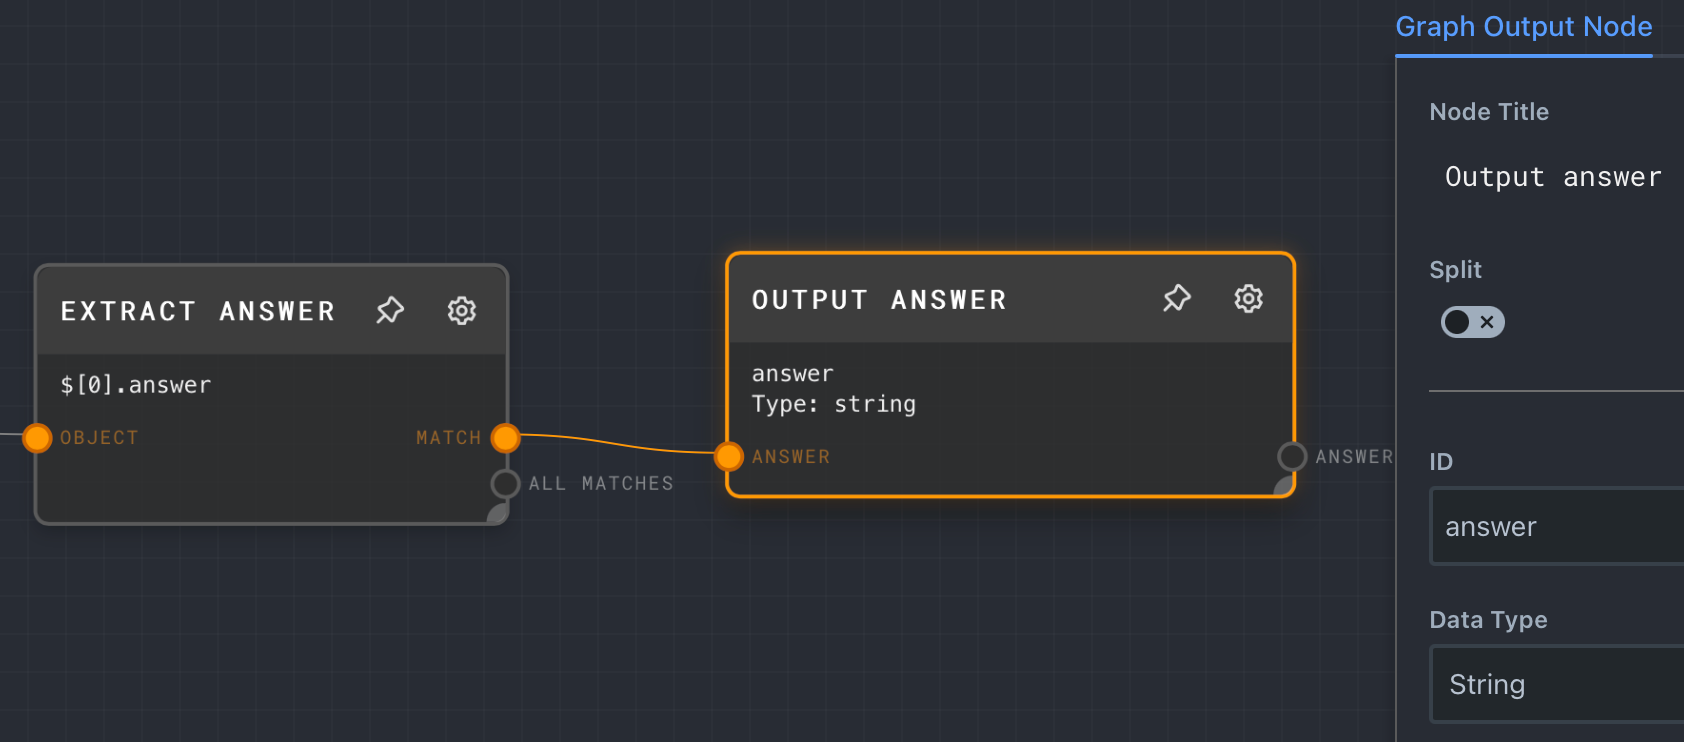
That's it for the Ask question graph.
Q&A graph
The Q&A graph will prompt you for the audio URL of the podcast episode and a question.
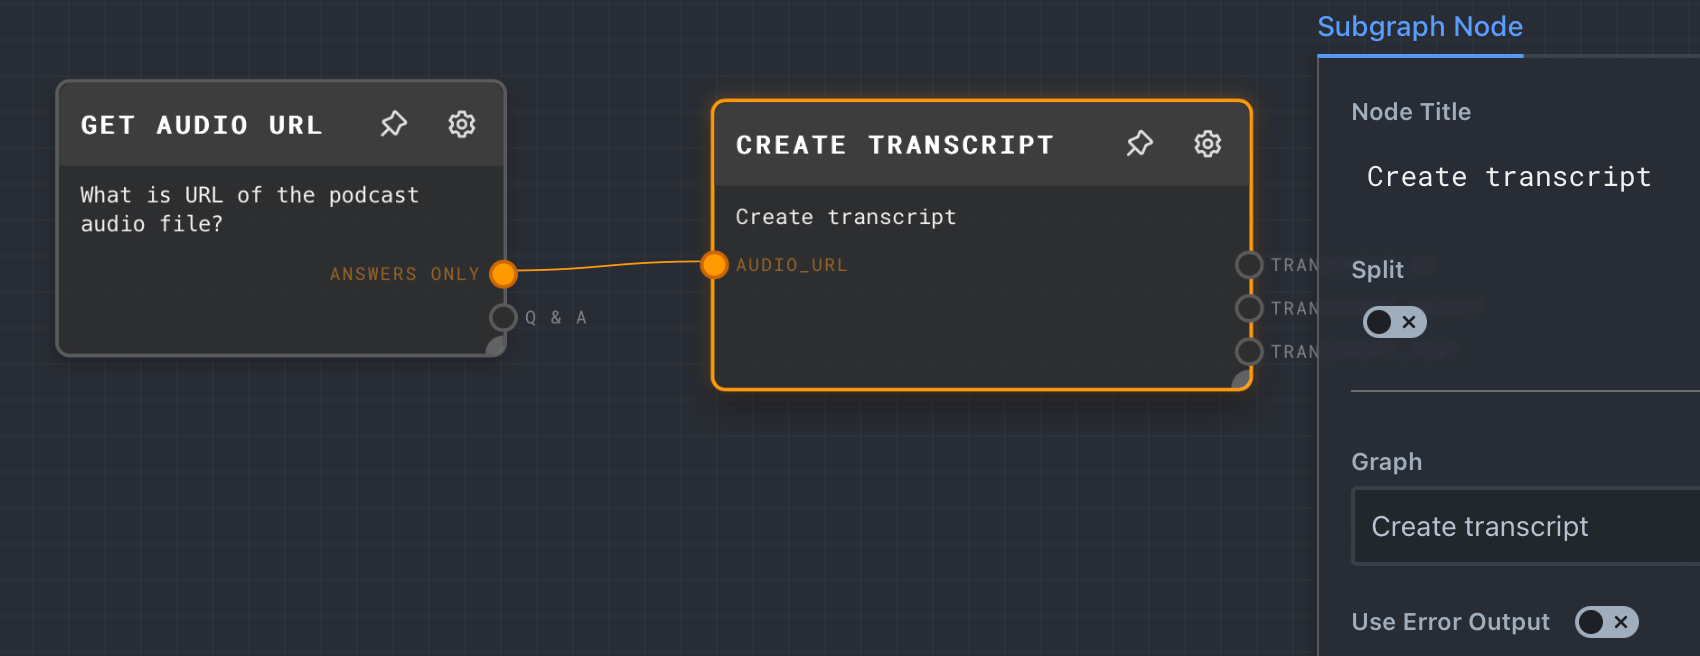
First, select the Q&A graph, and add a User Input node (Add > Input/Output > User Input) with Node Title Get Audio URL and Prompt What is the URL of the podcast audio file?.
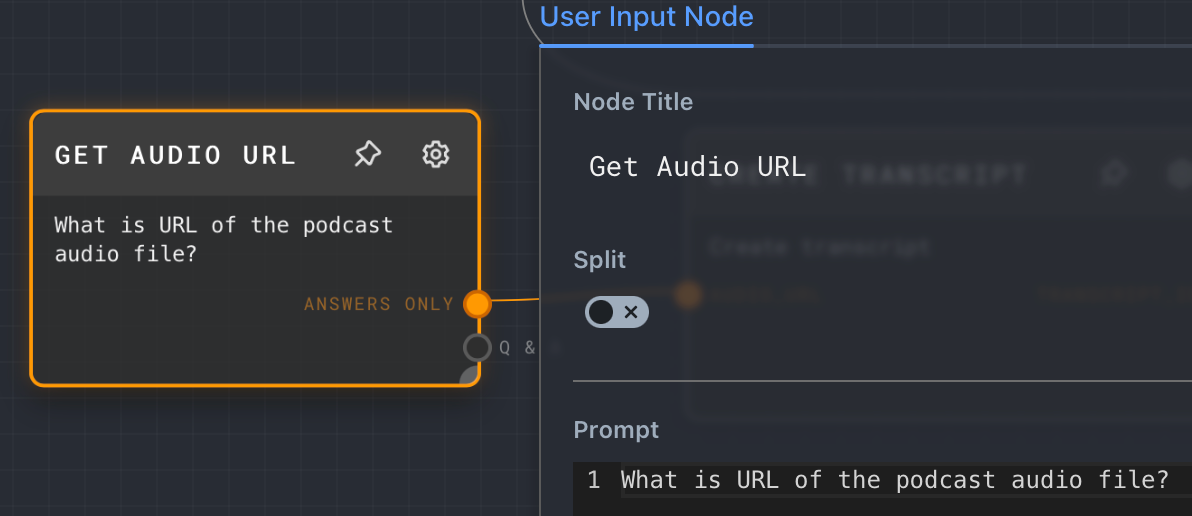
Next, add a Subgraph node (Add > Advanced > Subgraph) with Node Title Create transcript and Graph Create transcript. Connect the ANSWERS ONLY output of the Get audio URL node to the AUDIO_URL input node of Create transcript.
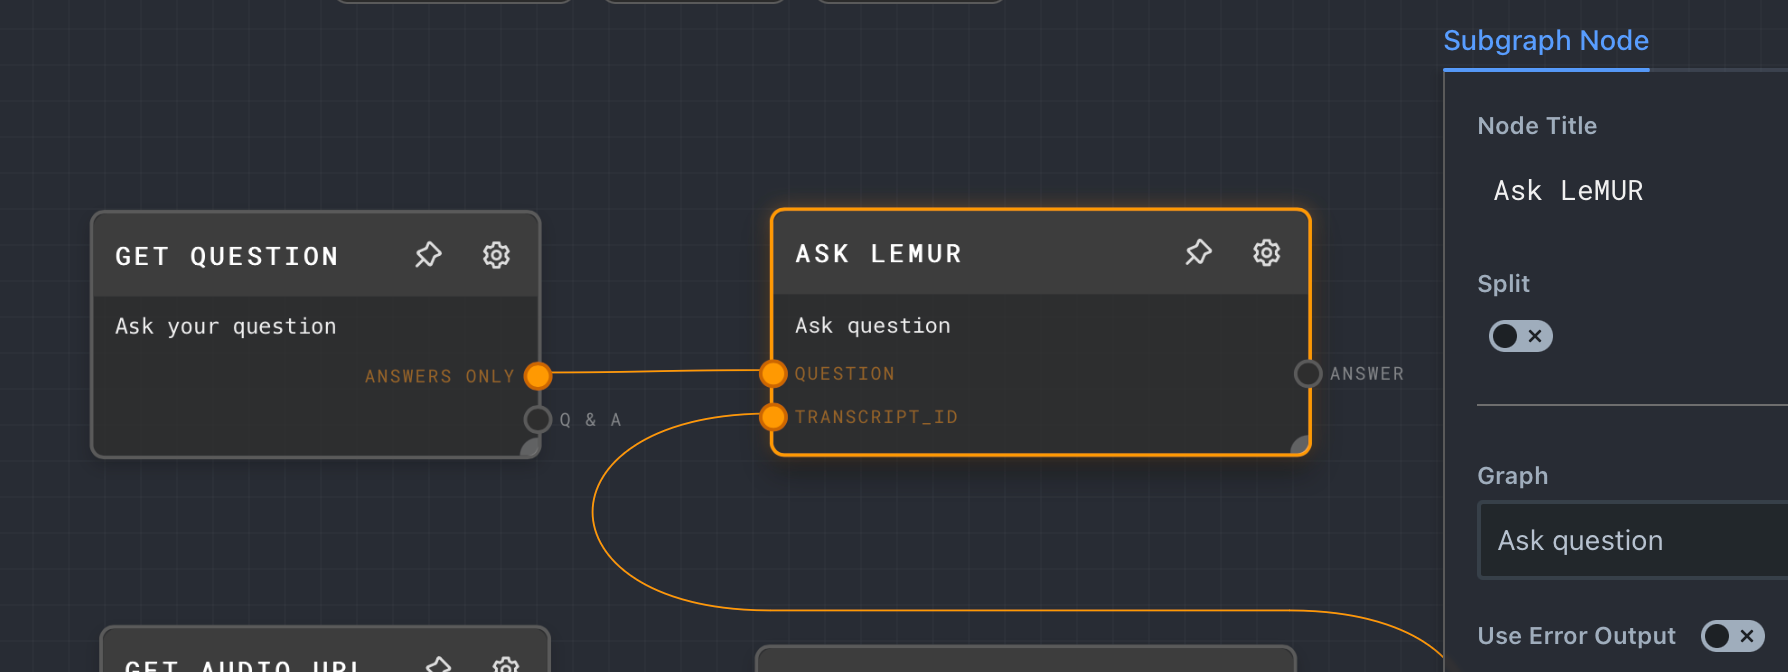
Add another User Input node (Add > Input/Output > User Input) with Node Title Get question and Prompt Ask your question.

Add another Subgraph node (Add > Advanced > Subgraph) with Node Title Ask LeMUR and Graph Ask question. Connect the ANSWERS ONLY output of Get question to the QUESTION input of Ask LeMUR. Then, connect the TRANSCRIPT_ID output from Create transcript to the TRANSCRIPT_ID input of Ask LeMUR.
Now that everything is connected, click the run button, answer the audio URL prompt (audio sample), and ask a question.
Rivet will run your graphs and you'll see the data flow through the nodes as it becomes available.
Integrate Rivet into a Node.js application
Rivet is great for prototyping AI applications, but you can also integrate your graphs into your applications using Node.js. First, save your project to a path of your choice (File > Save Project As …). Now, open a terminal and create a new Node.js project using these commands:
mkdir podcast-qna
cd podcast-qna
npm init -y
You'll use the following dependencies:
@ironclad/rivet-nodeto run Rivet graphs from Node.jsdotenvto load a .env file into your Node.js process environment variables.orato render a spinner to your console while waiting on results.tsxto transpile and run your TypeScript code.
Install the dependencies using these commands:
npm install --save @ironclad/rivet-node dotenv ora
npm install --save-dev tsx
Create a file named index.ts and add the following code:
import * as readline from 'readline/promises';
import { stdin as input, stdout as output } from 'process';
import 'dotenv/config';
import ora from 'ora';
import { globalRivetNodeRegistry, plugins, loadProjectFromFile, runGraph } from '@ironclad/rivet-node';

const rivetProjectFile = './podcast-qna.rivet-project';
const aaiPluginSettings = {
  'assemblyAi': {
    'assemblyAiApiKey': getAssemblyAiApiKey(),
  }
};

function getAssemblyAiApiKey() {
  const apiKey = process.env.ASSEMBLYAI_API_KEY;
  if (!apiKey) {
    throw new Error('ASSEMBLYAI_API_KEY environment variable is not set');
  }
  return apiKey;
}

(async () => {
  const rl = readline.createInterface({ input, output });
  const spinner = ora({ discardStdin: false });
  globalRivetNodeRegistry.registerPlugin(plugins.assemblyAi);

  const project = await loadProjectFromFile(rivetProjectFile);
  const audioUrl = await rl.question('Provide the URL of your podcast file: ');

  spinner.start('Transcribing');
  const createTranscriptResults = await runGraph(project, {
    graph: 'Create transcript',
    inputs: {
      audio_url: audioUrl,
    },
    openAiKey: null as unknown as string,
    pluginSettings: aaiPluginSettings
  });
  spinner.succeed("Transcribed");

  const transcriptId = createTranscriptResults.transcript_id.value as string;

  while (true) {
    console.log();
    const answer = await rl.question('Ask a question: ');

    spinner.start("Generating answer");
    const askQuestionResults = await runGraph(project, {
      graph: 'Ask question',
      inputs: {
        transcript_id: transcriptId,
        question: answer
      },
      openAiKey: null as unknown as string,
      pluginSettings: aaiPluginSettings
    });
    spinner.stop();

    console.log('Answer:', askQuestionResults.answer.value);
  }

  rl.close();
})();
The application loads the Rivet project and then runs the Create transcript graph which outputs the transcript ID. Then, inside an infinite loop, the app asks for a question from the console which is passed onto the Ask question graph. The answer of the Ask question graph is then printed to the console.
Update ./podcast-qna.rivet-project to the actual path of your project file. Then, create a .env file with the contents below and replace <YOUR_ASSEMBLYAI_API_KEY> with your AssemblyAI API key.
ASSEMBLYAI_API_KEY=<YOUR_ASSEMBLYAI_API_KEY>
Run the application using the following command:
npx tsx index.ts
The output will look something like this:
Provide the URL of your podcast file: https://storage.googleapis.com/aai-docs-samples/podcast.mov
✔ Transcribed

Ask a question: What is this episode about?
Answer: This episode is about Andrew Ng's experiences developing deep learning and starting companies in the AI field. The interviewer asks Ng about his time working on autonomous helicopters with his first PhD student Peter Rabiel, starting Google Brain, and founding Landing AI and Deeplearning.ai. Ng shares insights into what motivated him to pursue applied AI work, why bigger data and scale were so important for progress in deep learning, and the challenges of working with small, messy datasets.
Conclusion
Rivet lets you visually build AI workflows to quickly prototype AI applications. You learned how to use Rivet and the AssemblyAI plugin to transcribe audio files and use LeMUR to generate answers. You then saved the Rivet project so you could load it from a Node.js application and run graphs from Node.js.
Want to take this application a little further? You could add support for reading podcast RSS feeds, transcribe multiple episodes in parallel, and ask LeMUR questions for a collection of transcripts.