
Overview
Looking to simplify adding subtitles to your Mux video? In this tutorial we’ll go through how to programmatically create a subtitle track with AssemblyAI's Speech-to-Text API, and add it to your Mux video using Mux’s video API.
AssemblyAI is a API for fast, accurate, automatic transcription of video files. Using the AssemblyAI API, you can quickly generate subtitle documents in .srt or .vtt formats for your videos, completely automatically and in seconds.
There are many options for video hosting providers; for this tutorial, we are using S3 as the storage service for both the video and the .srt file. You can find the complete source code for this tutorial on GitHub.
Prerequisites
To do this tutorial you’ll need
- An mp4 file with speech
- An AWS Account
- Python libraries for Mux and AWS
Assuming you already have an mp4 video, first we have to download the libraries for Mux and AWS. You can install these with
pip install boto3
pip install git+https://github.com/muxinc/mux-python.git
Steps
After we install our libraries for AWS and the Mux Video API, we can automatically add subtitles to our Mux video. The steps we’ll need to do this in order are
- Upload the mp4 file to S3
- Use AssemblyAI’s automatic speech to text automatic transcription to transcribe the video and download the subtitle files
- Upload the subtitle files to S3
- Upload the video to Mux using their video API
Upload to S3
First we’ll upload our file to S3 via boto3, the AWS Python SDK. When we’re done with the script for this part, this is what it should look like after we finish this script.

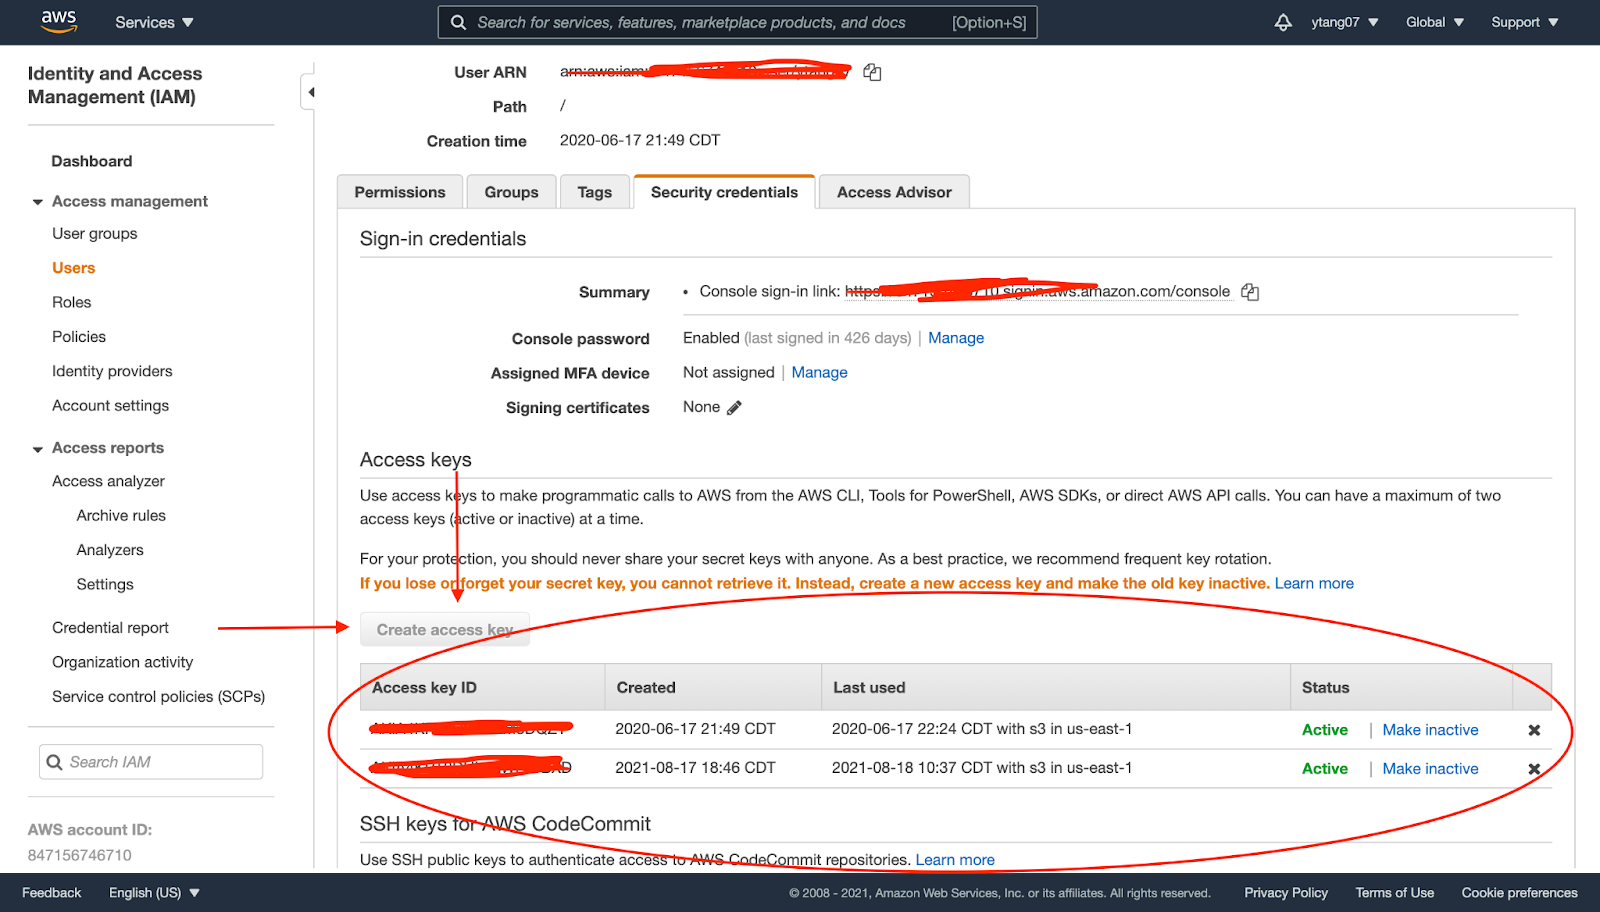
First we’ll import our access key and secret key from AWS, you can get this via the IAM console as pictured. If you don’t have your access and secret key stored, you’ll have to click create access key and save your info.
I put mine in an AWS config file, but you can also use environment variables. For this script, we’ll be asking for the filename, make sure the file is in the same folder as the script, and the S3 bucket that we want to upload to. After getting the location of the file we’re uploading and the bucket we want to upload to, we’ll use boto3 to create an s3 client. Finally, we’ll upload our object and an object Access Control List for it that will make it publicly readable.
import boto3
import logging
from botocore.exceptions import ClientError
from aws_config import access_key, secret_key

filename = input("Input your filename?")
bucket = input("What S3 bucket do you want to upload to?")

s3_client = boto3.client('s3',
   aws_access_key_id = access_key,
   aws_secret_access_key = secret_key)

try:
   response = s3_client.upload_file(filename, bucket, filename)
   s3_client.put_object_acl(ACL='public-read', Bucket=bucket, Key=filename)
except ClientError as e:
   logging.error(e)
   print("Error")
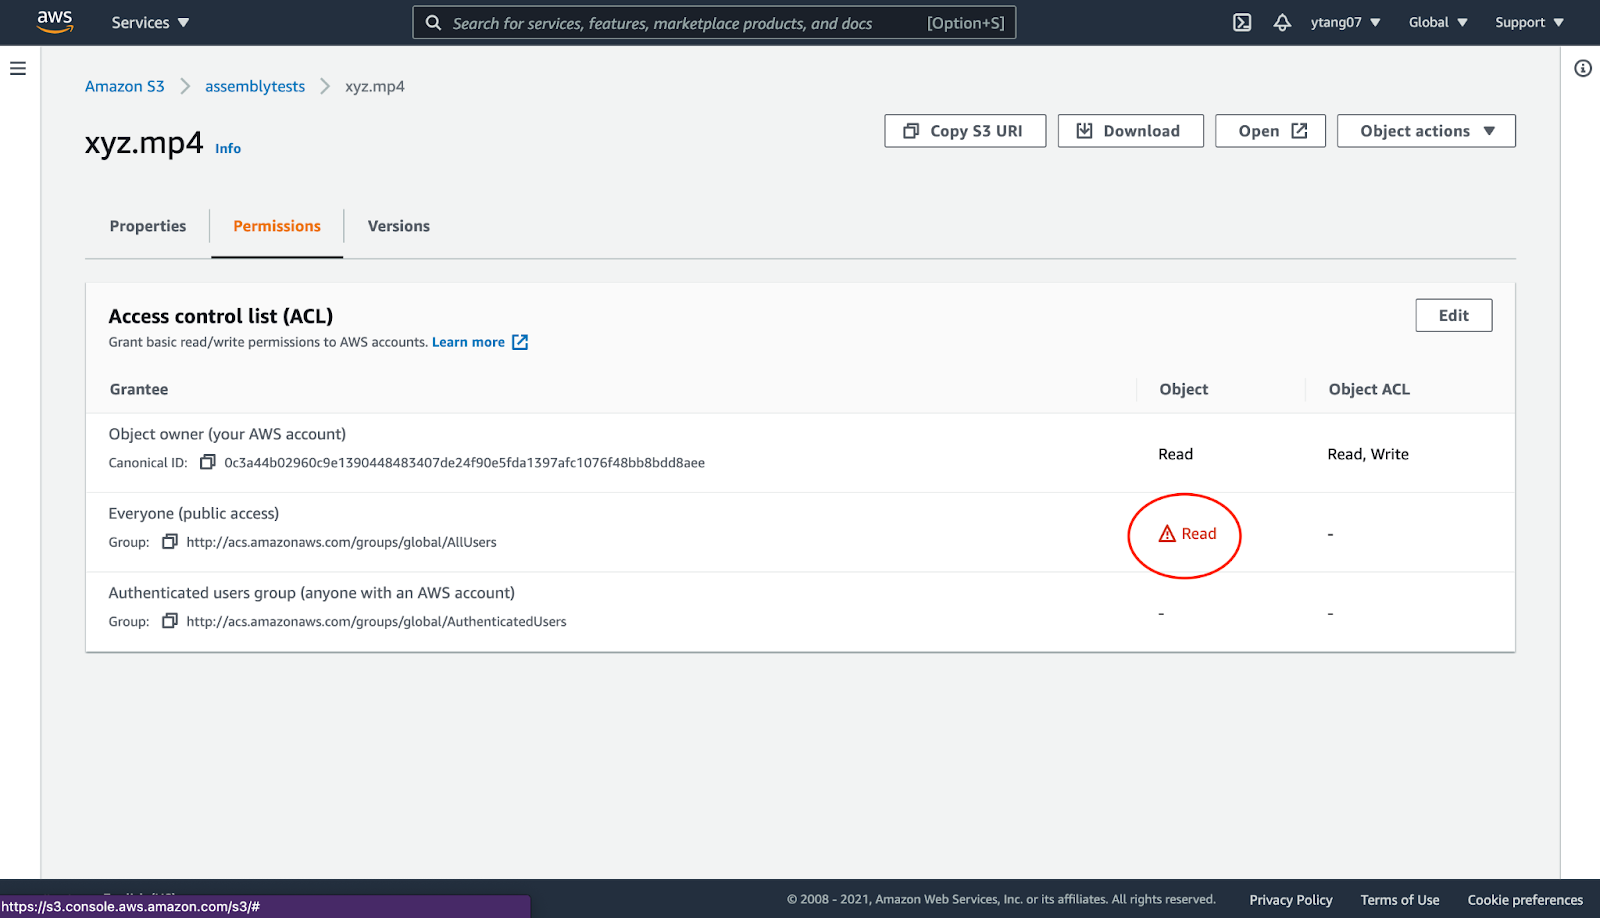
print("Success")After we upload our file, we should navigate over to our S3 console and check that our object is publicly readable. Click the permissions for your mp4 object and make sure that it grants public read access as shown in the image.
Use AssemblyAI’s automatic Speech-to-Text API to transcribe the video
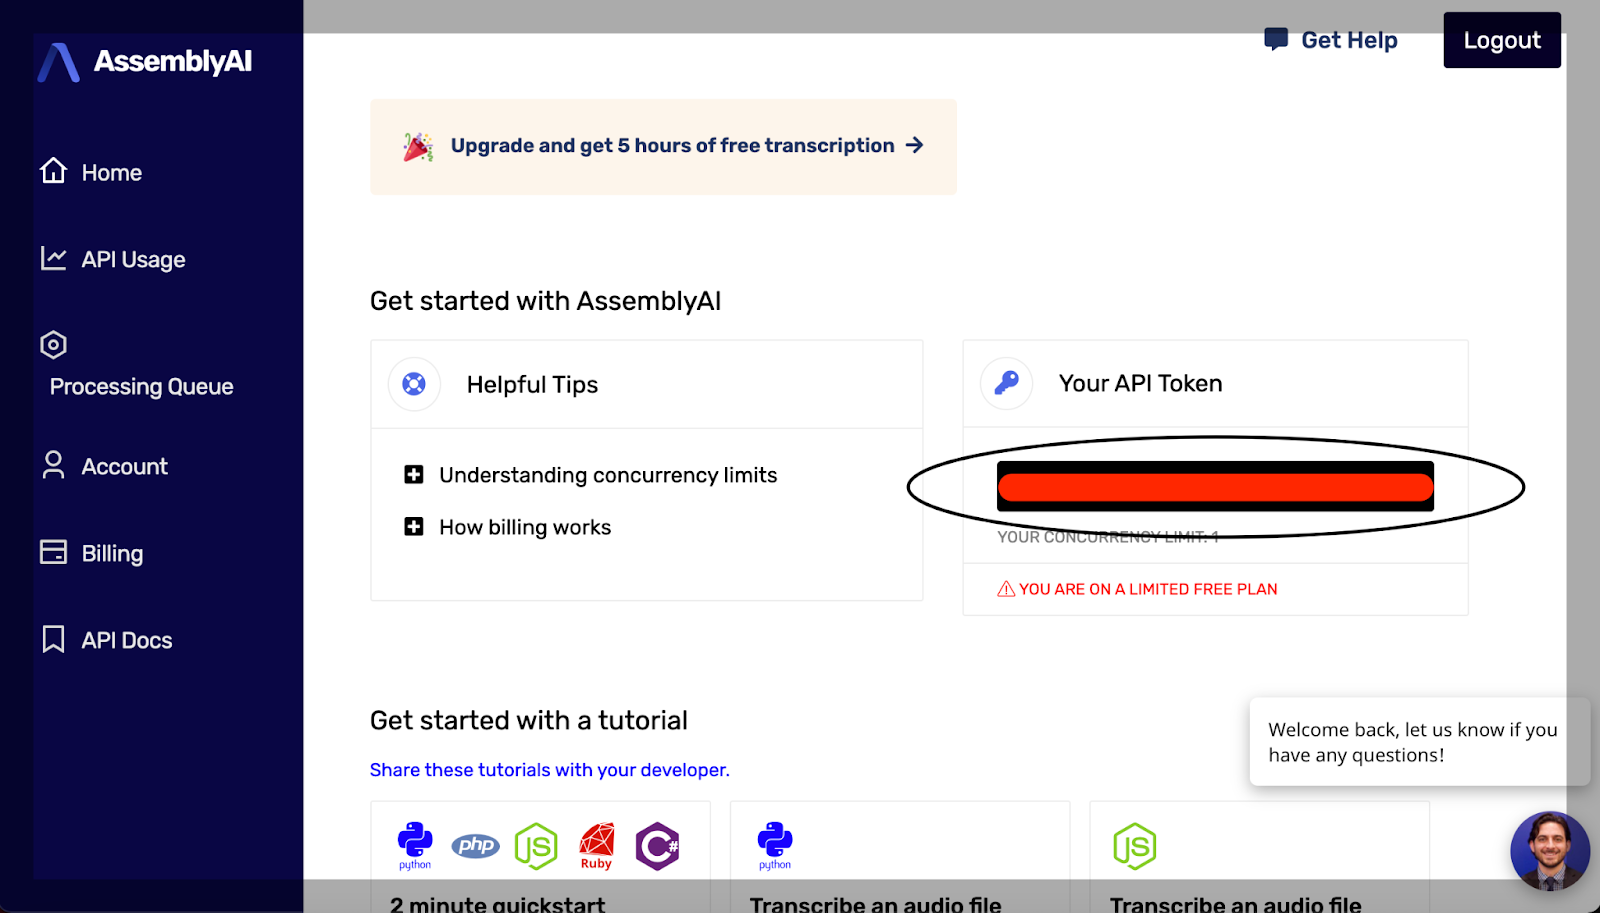
Now that we’ve uploaded our file, it’s time to get the subtitles for it via AssemblyAI’s speech to text API. If you don’t already have an AssemblyAI account, sign up to use their free speech to text API. You’ll need to get an API key, which should be in your console as pictured.
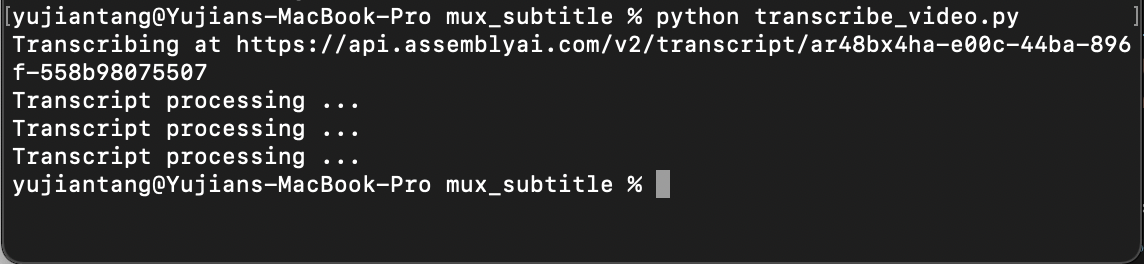
In our recent posts, such as Python Speech Recognition in Under 25 Lines, and How to get the Transcript of a YouTube Video, we’ve used AssemblyAI’s automatic speech recognition (ASR) to do transcriptions on local files that we’ve uploaded. This time, we’ll be passing a URL to transcribe. When we’re done with this script it should look like the image below.
First we’ll create a request to send to AssemblyAI’s automatic transcription endpoint for STT. Once we fire off our request, we’ll poll our endpoint at a regular interval, I’m going to poll at 5 second intervals. Then we’ll fire off requests to AssemblyAI’s speech to text API’s automatically created subtitle endpoints to get the .srt and .vtt files. You should change the video_url to wherever your video is uploaded.
import requests
from mux_config import auth_key
from time import sleep

video_url = "<link to your video>"
transcript_endpoint = "https://api.assemblyai.com/v2/transcript"
headers = {
   "authorization": auth_key,
   "content-type": "application/json"
}
transcript_request = {
   "audio_url": video_url
}

transcript_response = requests.post(transcript_endpoint, json=transcript_request, headers=headers)
transcript_id = transcript_response.json()['id']
polling_endpoint = transcript_endpoint + "/" + transcript_id
print("Transcribing at", polling_endpoint)
polling_response = requests.get(polling_endpoint, headers=headers)
while polling_response.json()['status'] != 'completed':
   sleep(5)
   print("Transcript processing ...")
   try:
       polling_response = requests.get(polling_endpoint, headers=headers)
   except:
       print("Expected to wait 30 percent of the length of your video")
       print("After wait time is up, call poll with id", transcript_id)

srt_endpoint = polling_endpoint + "/srt"
srt_response = requests.get(srt_endpoint, headers=headers)
# print(srt_response.text)
with open("text_track.srt", "w") as _file:
   _file.write(srt_response.text)

vtt_endpoint = polling_endpoint + "/vtt"
vtt_response = requests.get(vtt_endpoint, headers=headers)
# print(vtt_response.text)
with open("text_track.vtt", "w") as _file:
   _file.write(vtt_response.text)
Upload the subtitle files to S3
We can upload the subtitle files to S3 the same way we uploaded the video.
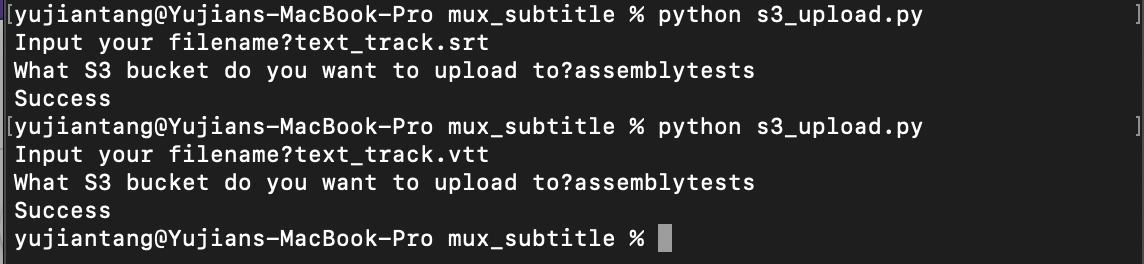
I uploaded both the .vtt and .srt files that we downloaded via AssemblyAI’s ASR transcription. You can download or upload either file, Mux accepts both formats, the only difference is that .srt are marked as closed captions while .vtt are not.
Upload the video to Mux using their video API
Now that we’ve transcribed our video using AssemblyAI’s automatic speech recognition endpoint to transcribe audio to text for free online and get the subtitle files, we can upload our video and subtitles to Mux. When we complete and run this script, we should see an output like below.

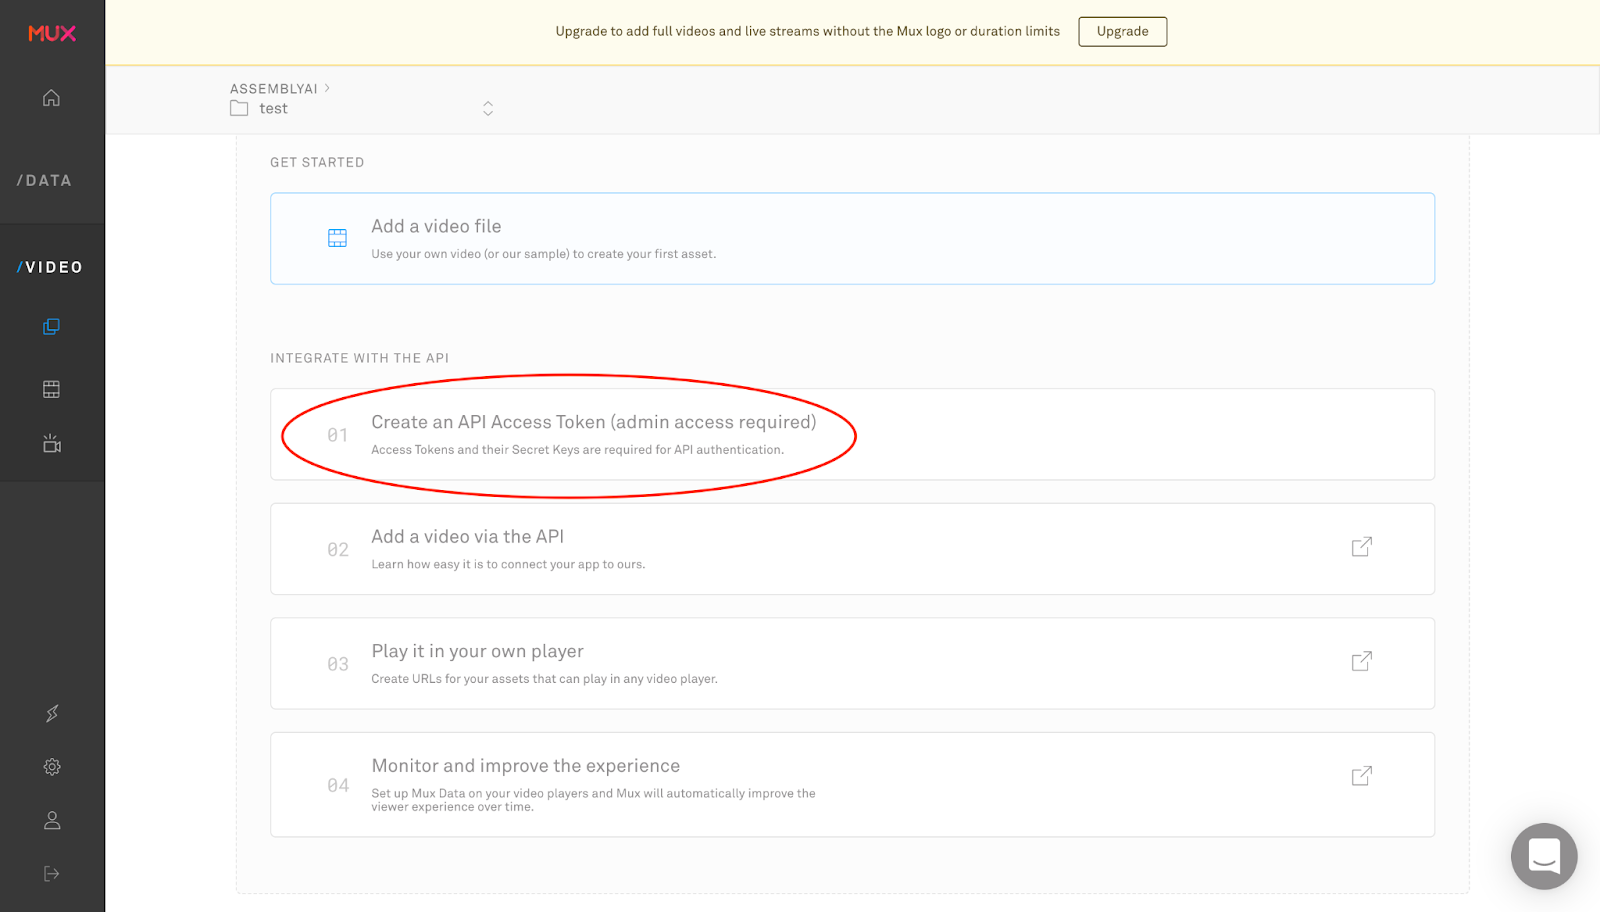
First we’ll have to create an asset API client that Python will use to interact with Mux instead of sending direct requests. We’ll need a token id and secret id from Mux, and save them as the configuration username and password. You’ll need to click “Create an API key” in your new Mux environment to get these as pictured. I save the credentials in a mux_config.py file and then import them. You can also use environment variables.
After we create our Asset API object, we’ll need to make an object to create a track request. We’ll need to pass this object the url of our text track, the type of track (text), the text type (subtitles), the language (whatever your language is, we’ll use en-US), whether or not the file should be marked as closed captions (true for .srt files, false for .vtt files), and a name for the track. In the code I show how to create both the .vtt or .srt file requests. Once we create the requests for our subtitle files that we got from AssemblyAI’s speech to text API, we have to create some input settings for Mux. Our input settings will be a list that contains a url to our video and our create track request object.
Then we’ll make a create asset request to send to Mux’s video API to add our subtitle file. I include the option for a public playback and make sure that mp4 support is set to standard. Once we create this request, we use our Asset API object to send a request off to Mux.
import mux_python
from mux_config import token_id, secret_id

configuration = mux_python.Configuration()

configuration.username = token_id
configuration.password = secret_id

assets_api = mux_python.AssetsApi(mux_python.ApiClient(configuration))

add_captions = mux_python.CreateTrackRequest(url="<link to your .srt file>", type="text", text_type="subtitles", language_code="en-US", closed_captions=True, name="English")
# add_captions = mux_python.CreateTrackRequest(url="<link to your .vtt file>", type="text", text_type="subtitles", language_code="en-US", closed_captions=False, name="English")
input_settings = [mux_python.InputSettings(url='<link to your video>'), add_captions]
create_asset_request = mux_python.CreateAssetRequest(input=input_settings, playback_policy=[mux_python.PlaybackPolicy.PUBLIC],mp4_support='standard')
create_asset_response = assets_api.create_asset(create_asset_request)
print("Created Asset: " + str(create_asset_response))
assert create_asset_response != None
assert create_asset_response.data.id != None
Once our asset is created, we can go to Mux and check our assets out.
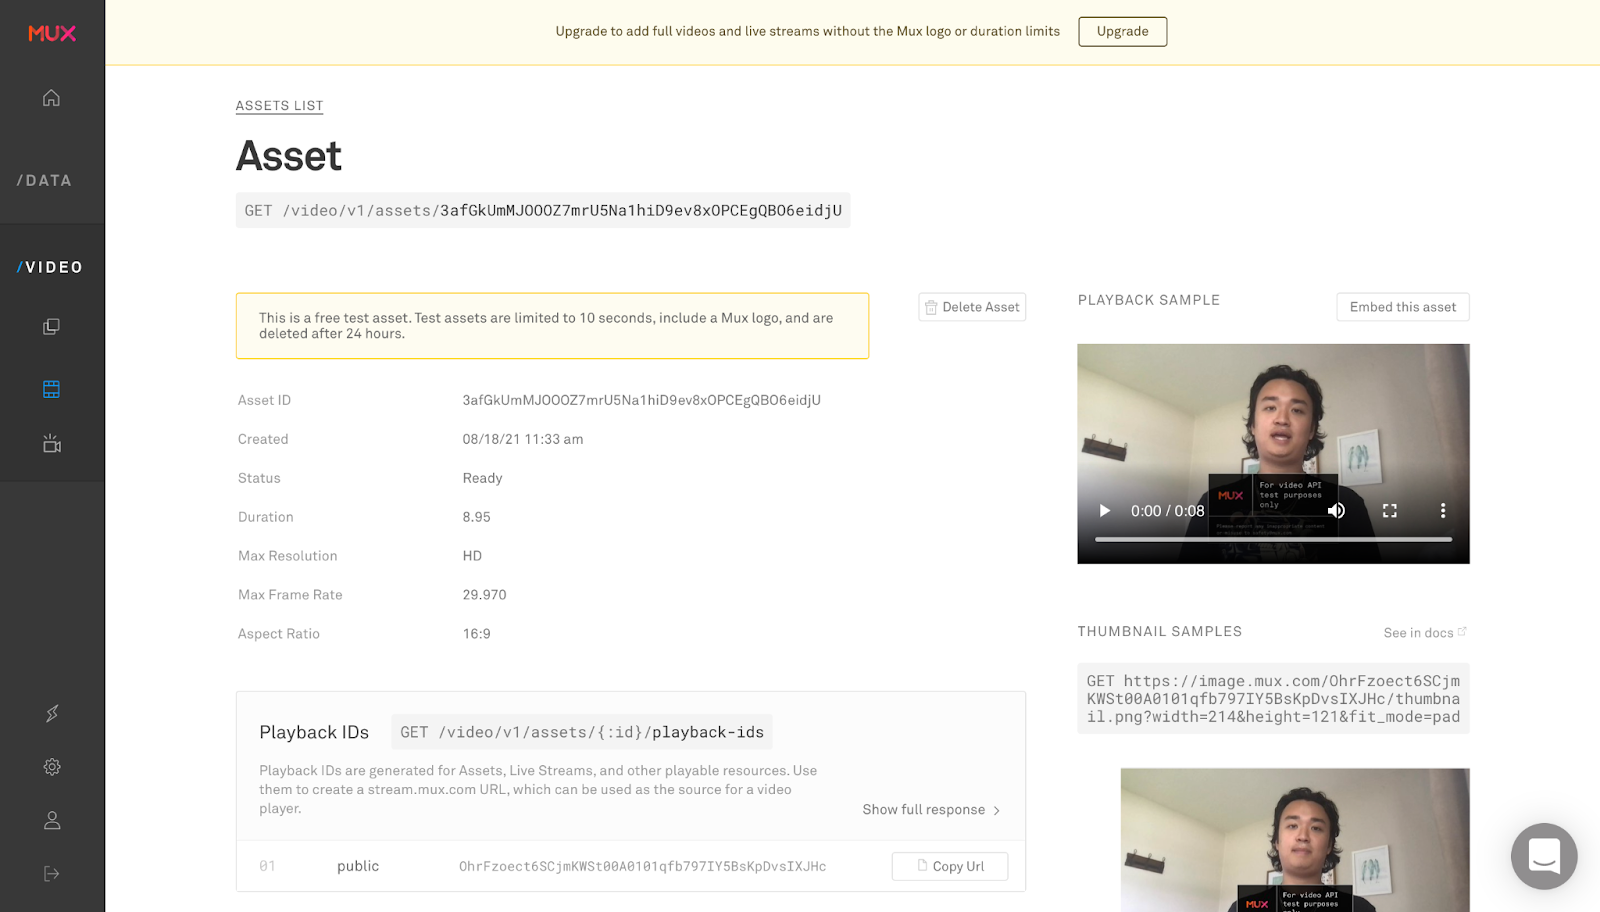
We can click the three dots on the video player and see a “closed captions” sign, which if we click, we should be able to see the subtitles we transcribed via AssemblyAI’s automatic AI transcription
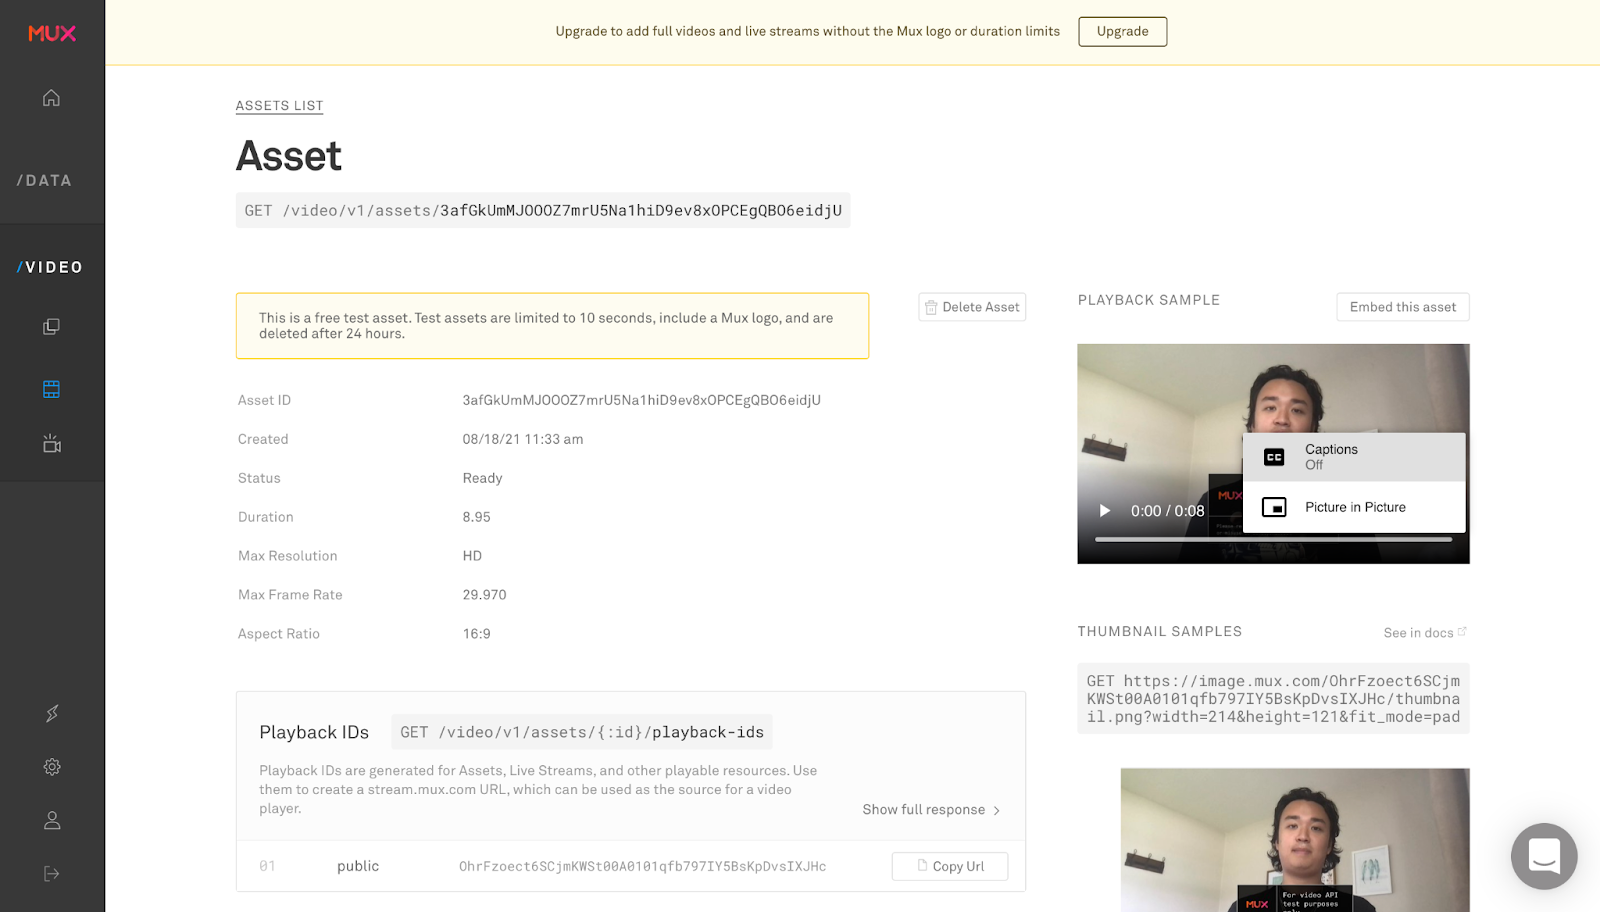
After turning captions on and watching the video, you should see captions as in the linked YouTube video at the top of the page.
Wrapping Up
In this tutorial we went over how to use AssemblyAI’s speech to text API to do automatic speech recognition to create subtitles for your Mux video. We created three scripts, one to upload our objects to AWS, another to do cloud speech to text for an mp4 file, and another to upload our mp4 and a subtitle text track to Mux.
For more information on how to do speech to text online for free, check out AssemblyAI, follow us on Twitter @assemblyai, and follow the author @yujian_tang