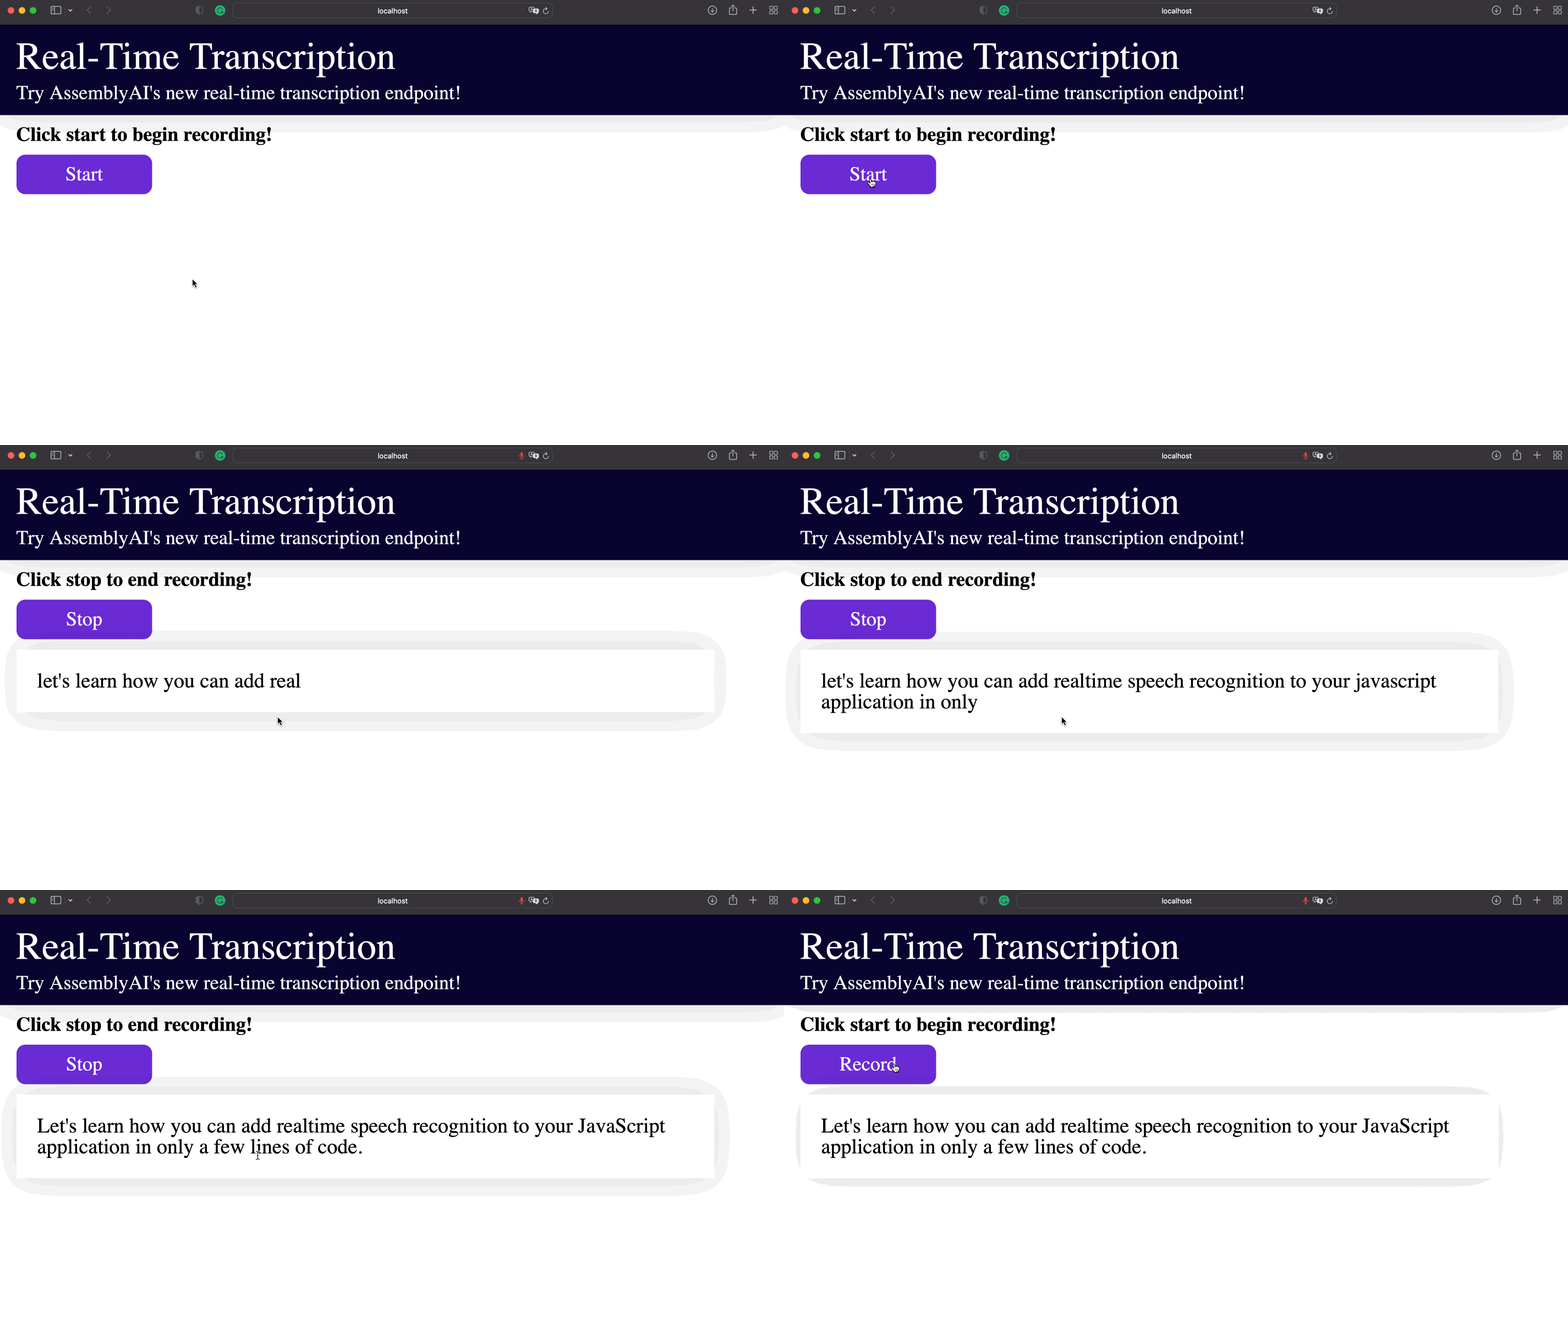
This article shows how Real-Time Speech Recognition from a microphone recording can be integrated into your JavaScript application in only a few lines of code.

Real-Time Voice-To-Text in JavaScript With AssemblyAI
The easiest solution is a Speech-to-Text API, which can be accessed with a simple HTTP client in every programming language. One of the easiest to use APIs to integrate is AssemblyAI, which offers not only a traditional speech transcription service for audio files but also a real-time speech recognition endpoint that streams transcripts back to you over WebSockets within a few hundred milliseconds.
Before getting started, we need to get a working API key. You can get one here and get started for free:
Get a free API KeyStep 1: Set up the HTML code and microphone recorder
Create a file index.html and add some HTML elements to display the text. To use a microphone, we embed RecordRTC, a JavaScript library for audio and video recording.
Additionally, we embed index.js, which will be the JavaScript file that handles the frontend part. This is the complete HTML code:
<!DOCTYPE html>
<html lang="en">
<head>
  <meta charset="UTF-8">
  <meta http-equiv="X-UA-Compatible" content="IE=edge">
  <meta name="viewport" content="width=device-width, initial-scale=1.0">
  <title>Document</title>
  <link rel="stylesheet" href="./css/reset.css">
  <link rel="stylesheet" href="./css/styles.css">
</head>
<script src="https://www.WebRTC-Experiment.com/RecordRTC.js"></script>
<body>
  <header>
    <h1 class="header__title">Real-Time Transcription</h1>
    <p class="header__sub-title">Try AssemblyAI's new real-time transcription endpoint!</p>
  </header>
  <div class="real-time-interface">
    <p id="real-time-title" class="real-time-interface__title">Click start to begin recording!</p>
    <p id="button" class="real-time-interface__button">Start</p>
    <p id="message" class="real-time-interface__message"></p>
  </div>
  <script src="./js/index.js"></script>
</body>
</html>
Step 2: Set up the client with a WebSocket connection in JavaScript
Next, create the index.js and access the DOM elements of the corresponding HTML file. Additionally, we make global variables to store the recorder, the WebSocket, and the recording state.
// required dom elements
const buttonEl = document.getElementById('button');
const messageEl = document.getElementById('message');
const titleEl = document.getElementById('real-time-title');

// initial states and global variables
messageEl.style.display = 'none';
let isRecording = false;
let socket;
let recorder;
Then we need to create only one function to handle all the logic. This function will be executed whenever the user clicks on the button to start or stop the recording. We toggle the recording state and implement an if-else-statement for the two states.
If the recording is stopped, we stop the recorder instance and close the socket. Before closing, we also need to send a JSON message that contains {terminate_session: true}:
const run = async () => {
  isRecording = !isRecording;
  buttonEl.innerText = isRecording ? 'Stop' : 'Record';
  titleEl.innerText = isRecording ? 'Click stop to end recording!' : 'Click start to begin recording!'

  if (!isRecording) {

    if (recorder) {
      recorder.pauseRecording();
      recorder = null;
    }

    if (socket) {
      socket.send(JSON.stringify({terminate_session: true}));
      socket.close();
      socket = null;
    }

  } else {
    // TODO: setup websocket and handle events
  }
};

buttonEl.addEventListener('click', () => run());
Then we need to implement the else part that is executed when the recording starts. To not expose the API key on the client side, we send a request to the backend and fetch a session token.
Then we establish a WebSocket that connects with wss://api.assemblyai.com/v2/realtime/ws. For the socket, we have to take care of the events onmessage, onerror, onclose, and onopen. In the onmessage event we parse the incoming message data and set the inner text of the corresponding HTML element.
In the onopen event we initialize the RecordRTC instance and then send the audio data as base64 encoded string. The other two events can be used to close and reset the socket. This is the remaining code for the else block:
// get session token from backend
const response = await fetch('http://localhost:8000');
const data = await response.json();

if(data.error){
    alert(data.error)
}

const { token } = data;

// establish wss with AssemblyAI at 16000 sample rate
socket = new WebSocket(`wss://api.assemblyai.com/v2/realtime/ws?sample_rate=16000&token=${token}`);

// handle incoming messages to display transcription to the DOM
const texts = {};
socket.onmessage = (message) => {
    let msg = '';
    const res = JSON.parse(message.data);
    texts[res.audio_start] = res.text;
    const keys = Object.keys(texts);
    keys.sort((a, b) => a - b);
    for (const key of keys) {
        if (texts[key]) {
            msg += ` ${texts[key]}`;
        }
    }
    messageEl.innerText = msg;
};

// handle error
socket.onerror = (event) => {
    console.error(event);
    socket.close();
}

// handle socket close
socket.onclose = event => {
    console.log(event);
    socket = null;
}

// handle socket open
socket.onopen = () => {
    // begin recording
    messageEl.style.display = '';
    navigator.mediaDevices.getUserMedia({ audio: true })
    .then((stream) => {
        recorder = new RecordRTC(stream, {
        type: 'audio',
        mimeType: 'audio/webm;codecs=pcm', // endpoint requires 16bit PCM audio
        recorderType: StereoAudioRecorder,
        timeSlice: 250, // set 250 ms intervals of data
        desiredSampRate: 16000,
        numberOfAudioChannels: 1, // real-time requires only one channel
        bufferSize: 4096,
        audioBitsPerSecond: 128000,
        ondataavailable: (blob) => {
            const reader = new FileReader();
            reader.onload = () => {
                const base64data = reader.result;

                // audio data must be sent as a base64 encoded string
                if (socket) {
                    socket.send(JSON.stringify({ audio_data: base64data.split('base64,')[1] }));
                }
            };
            reader.readAsDataURL(blob);
        },
    });

    recorder.startRecording();
    })
    .catch((err) => console.error(err));
};
Step 3: Set up a server with Express.js to handle authentication
Lastly, we need to create another file server.js that handles authentication. Here we create a server with one endpoint that creates a temporary authentication token by sending a POST request to https://api.assemblyai.com/v2/realtime/token.
To use it, we have to install Express.js, Axios, and cors:
$ npm install express axios cors
And this is the full code for the server part:
const express = require('express');
const axios = require('axios');
const cors = require('cors');

const app = express();
app.use(express.json());
app.use(cors());

app.get('/', async (req, res) => {
  try {
    const response = await axios.post('https://api.assemblyai.com/v2/realtime/token',
      { expires_in: 3600 },
      { headers: { authorization: 'YOUR_TOKEN' } });
    const { data } = response;
    res.json(data);
  } catch (error) {
    const {response: {status, data}} = error;
    res.status(status).json(data);
  }
});

app.set('port', 8000);
const server = app.listen(app.get('port'), () => {
  console.log(`Server is running on port ${server.address().port}`);
});
This endpoint on the backend will send a valid session token to the frontend whenever the recording starts. And that's it! You can find the whole code in our GitHub repository.
Run the JavaScript files for Real-Time Voice and Speech Recognition
Now we must run the backend and frontend part. Start the server with
$ node server.js
And then serve the frontend site with the serve package:
$ npm i --global serve
$ serve -l 3000
Now you can visit http://localhost:3000, start the voice recording, and see the real-time transcription in action!
Real-Time Transcription Video Tutorial
Watch our video tutorial to see an example of real-time transcription:


