
In our last React tutorial, we built a Speech-to-Text app using React and the AssemblyAI API. But did you know that we can also build an app that works the other way around? In this tutorial, we will build a simple React Text to Speech app utilizing the Web Speech API.
Ingredients
- React ^17.0.2
- React Hooks
As always, you can clone this article's project repository from Github and play around with it on your local machine. Alternatively, you can view and try a live version of the app here, or fork your own copy on Replit.
Step 1 - Creating our React Text to Speech App
To get things off the ground, we start by creating a brand new React application. Open up a terminal and enter the following commands:
npx create-react-app@latest react-text-to-speech-aai
cd react-text-to-speech-aai
Next, open the React application code in your favorite code editor. We use VSCode, which can be opened from the terminal (if you use Linux or macOS) by using:
code .And finally, start the app by typing:
npm startStep 2 - Basic Cleanup
Before we can start to write our code, we'll first need to remove the React example code inside of App.js to leave only the following code:
import "./App.css"

function App() {
  return (
    <div className='App'>
      <h1>React Text to Speech App</h1>
    </div>
  )
}
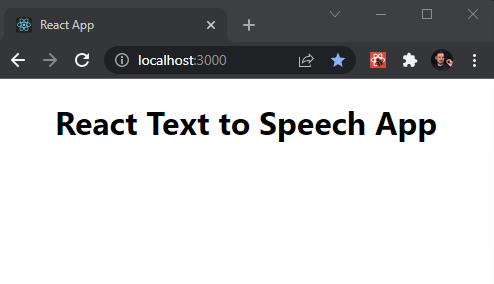
export default AppNow open your web browser (we use Chrome for this example) and open localhost:3000. You should see something like this:
Step 3 - Setting up the Web Speech API
To make the Web Speech API read our text, we need to utilize the SpeechSynthesisUtterance() constructor, which will contain our speech data and information on how the application should handle it.
Let's implement the code first, and then check out a code breakdown to understand what's going on:
import "./App.css"
import { useEffect } from "react"

function App() {
  const msg = new SpeechSynthesisUtterance()
  msg.text = "Hello World"

  useEffect(() => {
    window.speechSynthesis.speak(msg)
  }, [msg])

  return (
    <div className='App'>
      <h1>React Text to Speech App</h1>
    </div>
  )
}

export default App
Code Breakdown
- First, we import the
useEffecthook. - With
const msg = new SpeechSynthesisUtterance()we define a new variable that initiates an instance of the SpeechSynthesisUtterance object. - Setting
msg.textto "Hello World" stores the text that we want the Web Speech API to read out for us. - Finally,
window.speechSynthesis.speak(msg)is the function which reads aloud the text stored in themsg.textvariable. We wrap the whole thing inside of auseEffecthook to prevent it from looping infinitely.
Make sure your React app is running and refresh the browser window that runs your app. Now you should be hearing "Hello World", spoken in a robotic voice.
Step 4 - Getting Dynamic Input
As of now, to change the text that is read aloud by our React Text-to-Speech App, we would have to manually change the string that msg.text holds in our code and refresh the application every single time.
Since this is not practical, let's change the code to make it more dynamic.
To do that, we simply create an <input> field that allows us to enter any text that we want to get read out to us. We also need a <button> to submit our request. We are going to utilize a React Hook for that.
Let's add some more code and then check out the code breakdown below to understand what's going on:
import "./App.css"
import { useState } from "react"

function App() {
  const [ourText, setOurText] = useState("")
  const msg = new SpeechSynthesisUtterance()

  const speechHandler = (msg) => {
    msg.text = ourText
    window.speechSynthesis.speak(msg)
  }

  return (
    <div className='App'>
      <h1>React Text to Speech App</h1>
      <input
        type='text'
        value={ourText}
        placeholder='Enter Text'
        onChange={(e) => setOurText(e.target.value)}
      />
      <button onClick={() => speechHandler(msg)}>SPEAK</button>
    </div>
  )
}

export default App
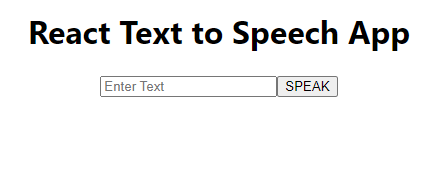
Our app now looks like this:
Code Breakdown
- First, we import the React State Hook with
import { useState } from 'react' - Then we initiate our State Variable, which will store the text we want read aloud, with
const [ourText, setOurText] = useState("")inside of our component - After this, we create the
speechHandlerfunction that takes ourmsgvariable as a parameter. Then we movemsg.text = ourTextalong withwindow.speechSynthesis.speak(msg)inside of this function. This method will execute when we press our SPEAK button. - Then we add an
<input>field to our HTML and give it some attributes:type='text', value={ourText},placeholder='Enter Text'andonChange={(e) => setOurText(e.target.value)}. TheonChangeattribute calls our an anonymous function and ultimately sets theourTextvariable to whatever text string we enter. - Finally, we add a
<button>to our HTML and pass thespeechHandler(msg)function to it.
Step 5 - Testing our App
Now that we have everything in place, let's test our app. Make sure your React app is running, and refresh the browser window of your app.
Enter some text and press the SPEAK button. You should now hear a robotic voice that reads your text to you.
Speech-to-Text with React
In this tutorial, we learned how to use React to create a Text-to-Speech application. If you instead want to do the opposite, meaning you want to implement Speech-to-Text in your React application, you can utilize the AssemblyAI Speech-to-Text API. We have covered how to do this in this article.
Get Started with AssemblyAI for FreeIf you want to implement Speech-to-Text in bare JavaScript, we also put together a guide on how to do that.