Speech-to-Text with Postman and AssemblyAI
Learn how to transcribe audio and video files with Postman and the AssemblyAI Speech-to-Text API!


Sometimes we just don’t have time to write code; we just want to see results!
Using Postman and AssemblyAI, we can get a speech-to-text transcription, complete with awesome features without writing a single line of code.
Postman is a versatile application used for API testing and development. It offers a free tier, which we will use in this blog.
Requirements
- A free AssemblyAI account
- Postman installed on your computer
Get Your Free Speech-to-Text API Key
Access our enterprise-grade transcription API with $50 in free credits - no coding required.
Uploading a local file to AssemblyAI
If the audio file is already publicly accessible via a URL you can skip this part and go to the section "Transcribing an Audio File".
We need to upload a local audio file to AssemblyAI using the API. In response we will receive a URL to that uploaded audio file, that will only be accessible to AssemblyAI. Note that the audio file will be deleted immediately after transcription.
Open up Postman and Create a new request, you may need to create a "Workspace" first.

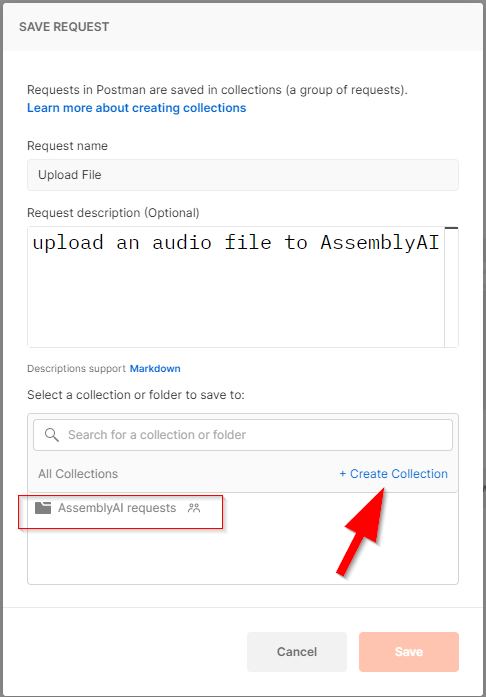
Name your request "Upload File", or similar. You can optionally add this to a "collection", which is a group of requests, or create a new collection if necessary. Press "save" to complete the process.
A new request tab should now be open.
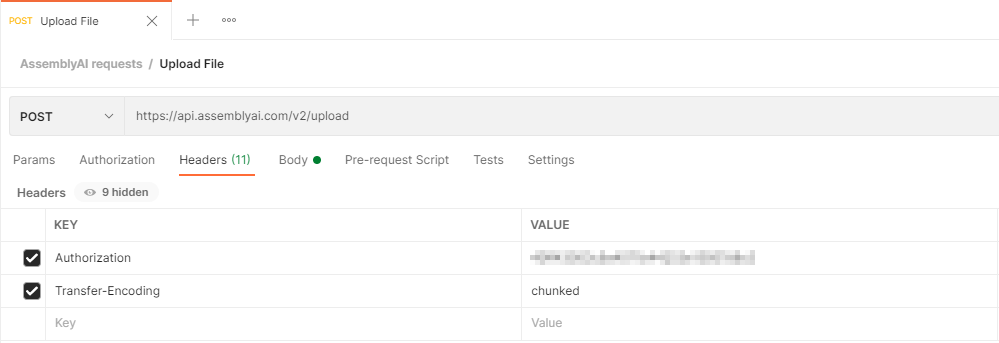
Define the HTTP request up as follows:
- Method:
POST - URL:
https://api.assemblyai.com/v2/upload - Headers:
Authorization: ASSEMBLY_AI_API_KEY
You can find your AssemblyAI API key here.
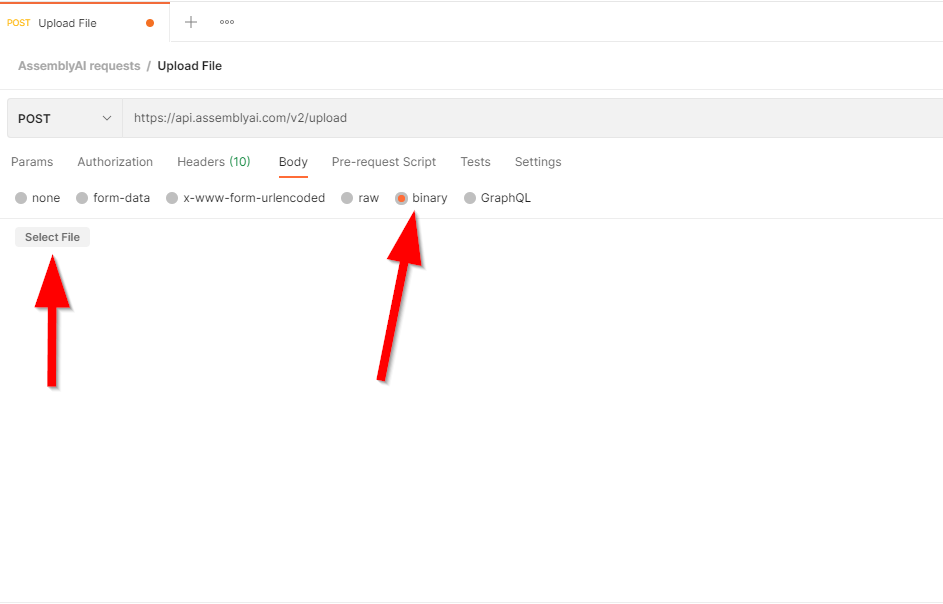
Now that we have the headers set, the final stage is to attach the audio file you wish to upload.
Navigate to the "Body" tab. Select "binary" as the type and then use the file picker to select the audio file from your computer.
The request is now ready to send! Press the blue "Send" button in the top right-hand corner of Postman. Within a few moments you will receive a JSON response that looks like this:
{ "upload_url": "https://cdn.assemblyai.com/upload/UNIQUE_ID_OF_UPLOAD" }
Transcribing an Audio File
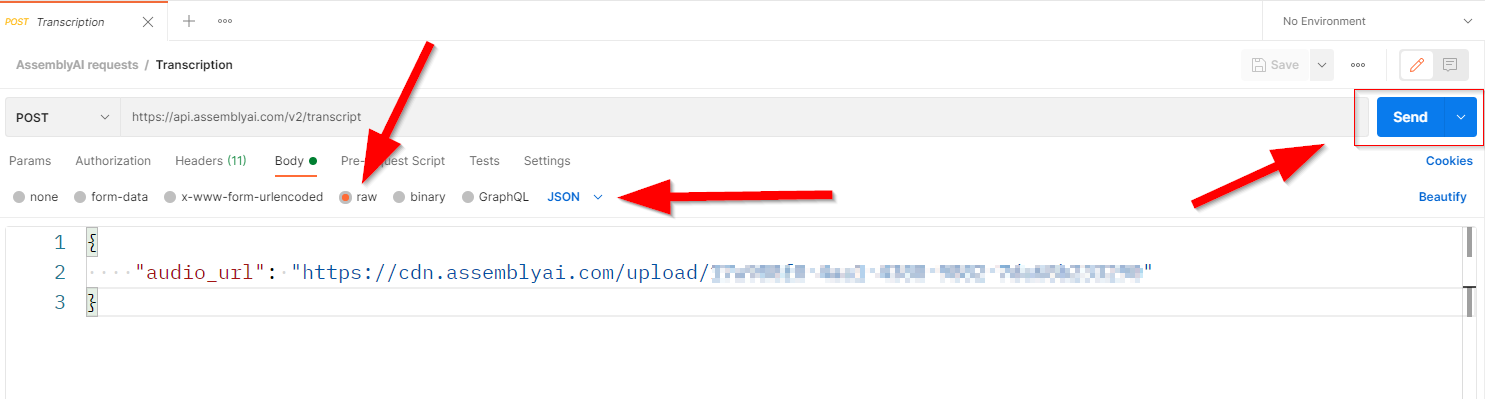
The next step is to request the transcription from AssemblyAI. Let’s create a new request in Postman, naming it "Transcription".
Define the HTTP request up as follows:
- Method:
POST - URL:
https://api.assemblyai.com/v2/transcript - Headers:
-Authorization: ASSEMBLY_AI_API_KEY
-Content-Type: application/json
Then from the Body tab:
- Body:
Raw - Content type:
JSON(from the drop-down menu)
Next, we need to set the request body. You can use the URL returned from the file upload request we made previously, or you can use any publicly available audio file URL.
The basic format of the JSON body request should be as follows:
{ "audio_url": “AUDIO_FILE_URL” }
If you wish to toggle on or off any of the awesome features available from API, such as PII redaction, diarization, alternate acoustic model to name but a few, then you can do so within this JSON request body.
For example:
{ "audio_url": “AUDIO_FILE_URL”, "speaker_labels": true }
For a full list of available parameters please refer to the AssemblyAI docs.
Your transcription request is now ready to send. Once again you can hit the blue "Send" button and wait for the response.
The response should look something like this, changing based on any parameters set in the request:
{ "acoustic_model": "assemblyai_default", "audio_duration": null, "audio_url": "AUDIO_FILE_URL", "confidence": null, "dual_channel": null, "format_text": true, "id": "TRANSCRIPTION_ID", "language_model": "assemblyai_default", "punctuate": true, "status": "queued", "text": null, "utterances": null, "webhook_status_code": null, "webhook_url": null, "words": null }
The important part to us here is the "id" value. We will need this value to retrieve our transcription.
Retrieving a transcription from AssemblyAI
The final step to getting our transcription is to make a GET request to AssemblyAI using the transcription ID returned from the previous request.
Create a new request in Postman, naming it something like "Download transcription".
Create a third HTTP request as follows:
- Method:
GET - URL:
https://api.assemblyai.com/v2/transcript/TRANSCRIPTION_ID - Headers:
-Authorization: ASSEMBLY_AI_API_KEY
-Content-Type: application/json
Note that we need to include the "id" as a parameter on the end of the URL.
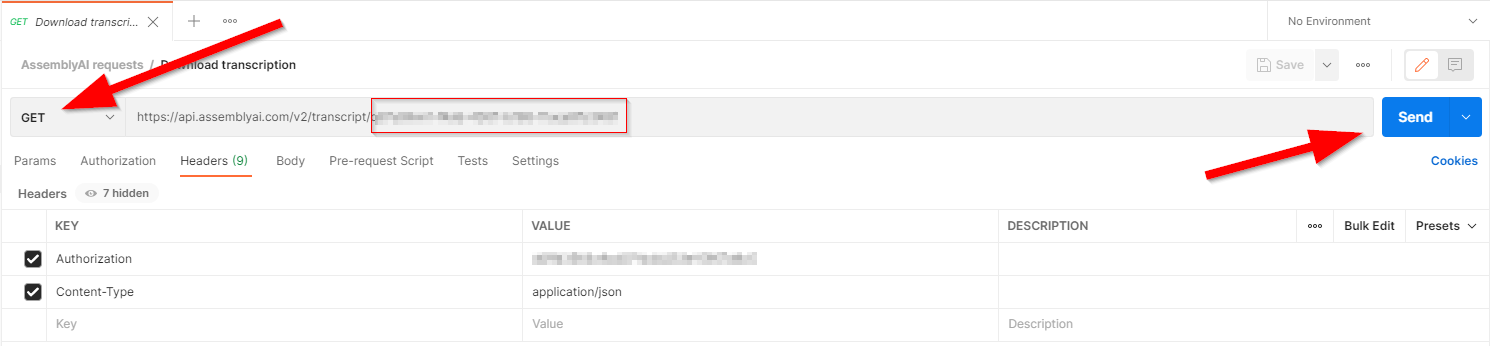
As this is a GET request, we don’t add a "Body" to the request.
Finally, press the blue "Send" button and wait for the response.
If the AssemblyAI is still processing the audio file, the JSON response will have "processing" as the status, unless there is an error - see a full list of status codes in the docs.
If the transcription is ready, the response will contain the transcription text along with the certainty of each word and any other data requested.
Summary
By using Postman, we’ve quickly created one way to obtain transcriptions without writing any code. This is an awesome and convenient way to trial the services provided by AssemblyAI. It could also be used to obtain a transcription quickly on the fly.
Depending on the licensing tier of Postman that you have chosen, you may also have the option to share your API collections amongst your team.
Happy transcribing!
Lorem ipsum dolor sit amet, consectetur adipiscing elit, sed do eiusmod tempor incididunt ut labore et dolore magna aliqua. Ut enim ad minim veniam, quis nostrud exercitation ullamco laboris nisi ut aliquip ex ea commodo consequat. Duis aute irure dolor in reprehenderit in voluptate velit esse cillum dolore eu fugiat nulla pariatur.
Related posts