Transcribe Audio Files in an S3 Bucket with AssemblyAI
Learn how to transcribe audio files stored in an AWS S3 bucket with AssemblyAI in 3 simple steps.


AssemblyAI's Speech-to-Text APIs can be used with both local files and publicly accessible online files, but what if you want to transcribe an audio file that has restricted access? Luckily, you can do this with AssemblyAI too!
Read on to learn how you can transcribe an audio file stored in an AWS S3 bucket using AssemblyAI's APIs.
Intro
In order to transcribe an audio file from an S3 bucket, AssemblyAI will need temporary access to the file. To provide this access, we will generate a presigned URL, which is simply a URL that has temporary access rights baked-in.
The overall process looks like this:
- Generate a presigned URL for the S3 audio file with boto
- Pass this URL through to AssemblyAI's API with a POST request
- Wait until the transcription is complete, and then fetch it with a GET request
Prerequisites
In order to transcribe an S3 audio file with AssemblyAI, you'll need to satisfy two prerequisites:
AssemblyAI Account
First, you will obviously require an AssemblyAI account - you can sign up here for a free account if you don't already have one.
Next, you'll need to take note of your AssemblyAI API key, which you can find on your dashboard after signing in. It will be on the right-hand side of the screen under Your API Key
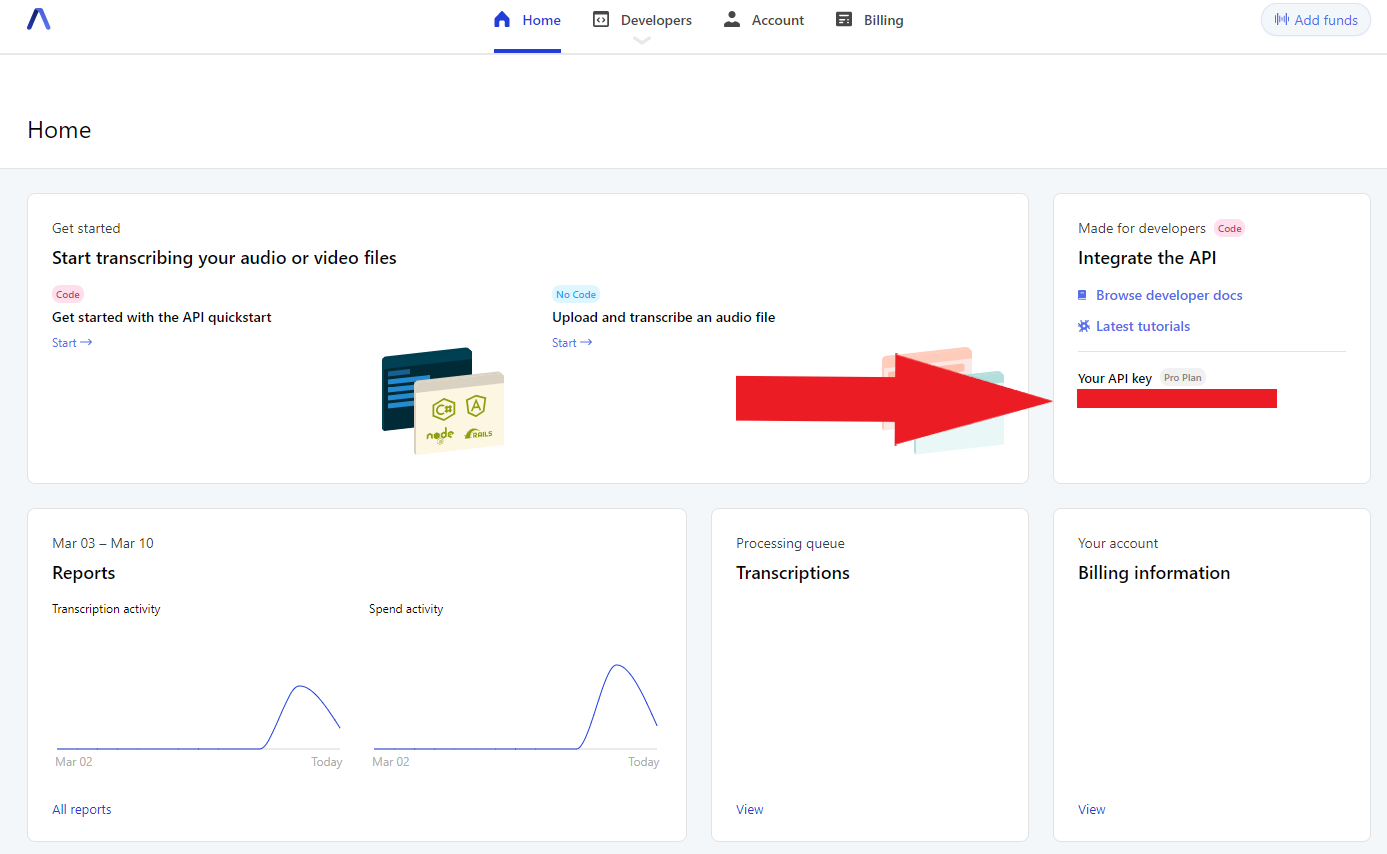
You'll need the value of this key later, so leave the browser window open or copy the value into a text file.
AWS IAM User
Second, you'll need an AWS IAM user with Programmatic access and the AmazonS3ReadOnlyAccess permission. If you already have such an IAM user and you know its public and private keys, then you can move on to the next section. Otherwise, create one now as follows:
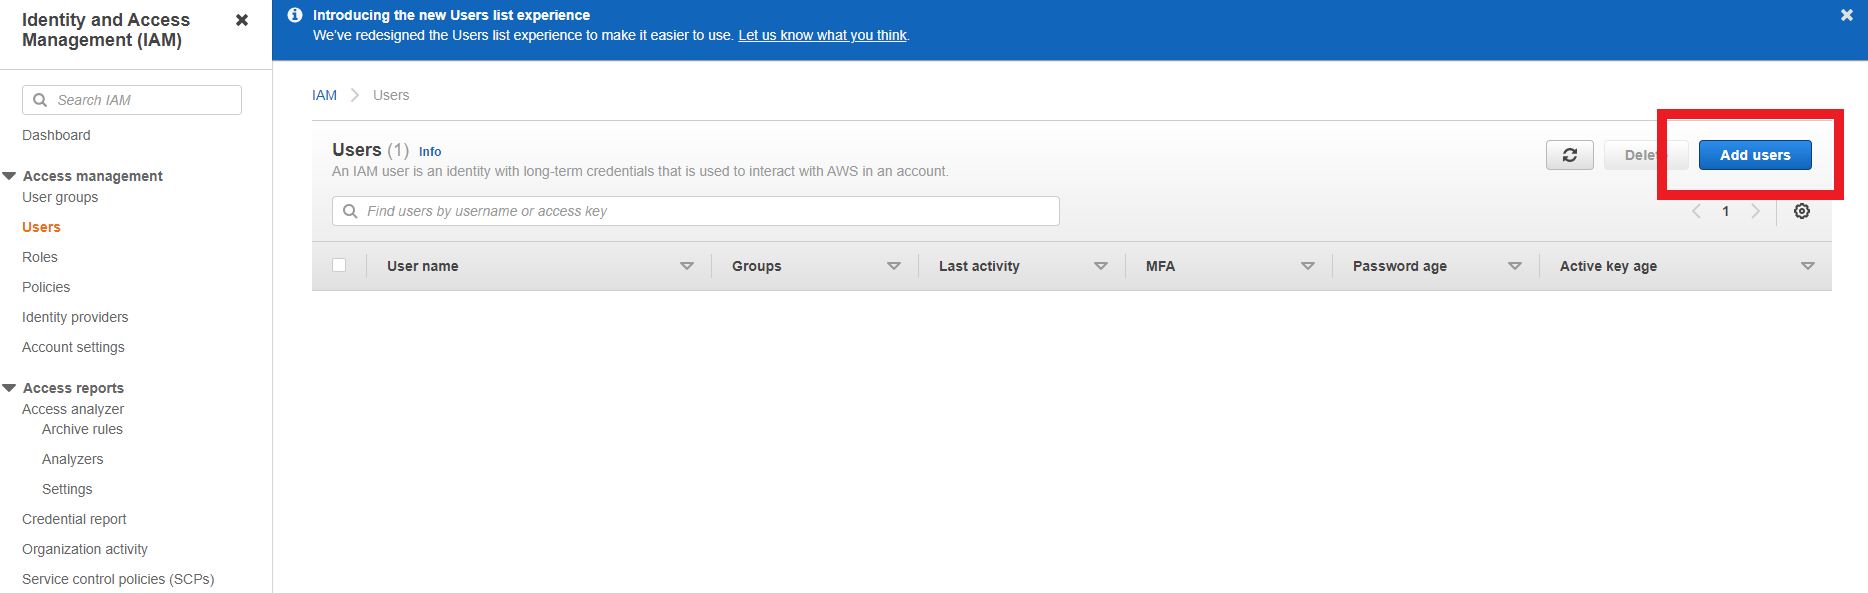
First, log into AWS as a root user or as another IAM user with the appropriate access, and then go to the IAM Management Console to add a new user.
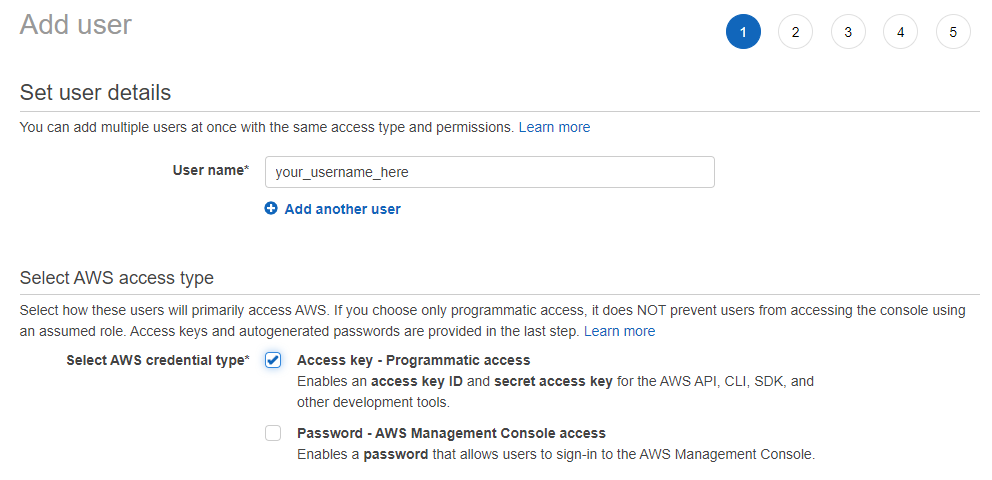
Set the user name you would like, and select Programmatic access under Select AWS access type:
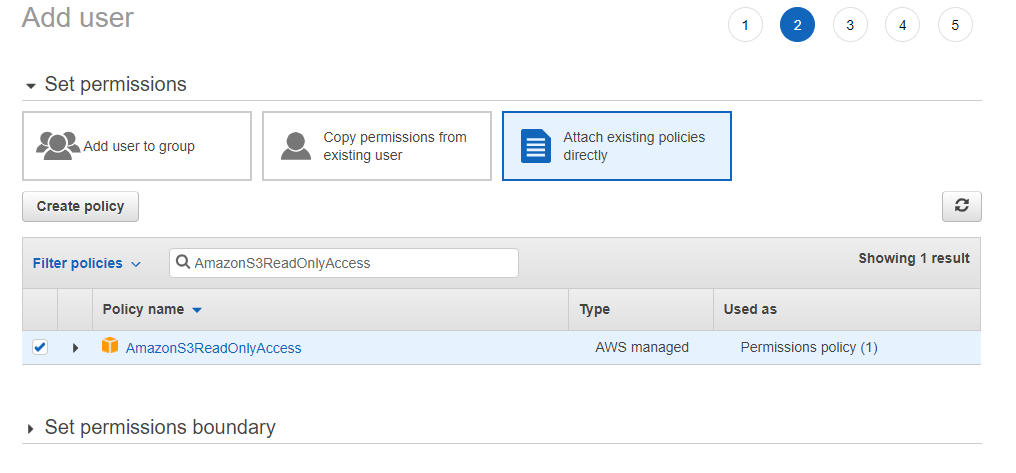
Click Next, and then Attach existing policies directly. Copy and paste AmazonS3ReadOnlyAccess into the Filter policies search box, and then add this permission by clicking the checkbox next to it:
Click Next and add tags if you wish. Then click Next and review the IAM user profile to ensure that everything looks copacetic before clicking Create user:

Finally, take note of the IAM user's Access key ID and Secret access key. Again, we will need these values later, so copy them into a text file before moving on.
Clone AssemblyAI GitHub Repo
Now we can move on to actually generating and fetching the transcription of the S3 audio file! First, clone the associated repo from AssemblyAI's GitHub by entering the following in the terminal:
git clone https://github.com/AssemblyAI/transcribe-from-s3-bucketOnce the repo has been cloned, create and activate a virtual environment and then install the necessary dependencies with:
pip install -r requirements.txtGet the Transcription
To get the transcription of an S3 audio file, open transcribe_from_s3.py and edit the following variables to be equivalent to the relevant values for your application
bucket_name- the name of your AWS S3 bucketobject_name- the name of the audio file in the S3 bucket that you want to transcribeiam_access_id- the access ID of the IAM user with programmtic access and S3 read permissioniam_secret_key- the secret key of the IAM userassembly_key- your AssemblyAI API key
Once this is done, simply run transcribe_from_s3.py to see the transcription of the S3 audio file printed in the console!
If you're interested in learning what's happening under the hood, read on to the next section to learn more.
Under the Hood
This section details how transcribe_from_s3.py works, so you can modify the code to suit your needs.
First, the necessary packages are imported and relevant variable values are set:
import boto3
from botocore.exceptions import ClientError
import logging
import requests
import time


# Set relevant values
bucket_name = "<BUCKET_NAME>"
object_name = "<AUDIO_FILE_NAME>"

iam_access_id = "<IAM_ACCESS_ID>"
iam_secret_key = "<IAM_SECRET_KEY>"

assembly_key = "<ASSEMBLYAI_API_KEY>"
From here, we simply follow the sequence outlined in the introduction of this article:
1. Generate a presigned URL for the S3 audio file with boto
# Create a low-level service client with the IAM credentials
s3_client = boto3.client(
    's3',
    aws_access_key_id=iam_access_id,
    aws_secret_access_key=iam_secret_key)

# Generate a pre-signed URL for the audio file that expires after 30 minutes
try:
    p_url = s3_client.generate_presigned_url(
        ClientMethod='get_object',
        Params={'Bucket': bucket_name, 'Key': object_name},
        ExpiresIn=1800)

except ClientError as e:
    logging.error(e)
2. Pass the presigned URL through to AssemblyAI's API with a POST request:
# Use your AssemblyAI API Key for authorization
headers = {
    "authorization": assembly_key,
    "content-type": "application/json"
}

# Specify AssemblyAI's transcription API endpoint
upload_endpoint = "https://api.assemblyai.com/v2/transcript"

# Use the presigned URL as the `audio_url` in the POST request
json = {
    "audio_url": p_url
}

# Queue the audio file for transcription with a POST request
post_response = requests.post(upload_endpoint, json=json, headers=headers)
3. Wait until the transcription is complete, and then fetch it with a GET request:
# Specify the endpoint of the transcription
get_endpoint = upload_endpoint + "/" + post_response.json()['id']

# GET request the transcription
get_response = requests.get(get_endpoint, headers=headers)

# If the transcription has not finished, wait until it has
while get_response.json()['status'] != 'completed':
  get_response = requests.get(get_endpoint, headers=headers)
  time.sleep(5)

# Once the transcription is complete, print it out
print(get_response.json()['text'])
Final Words
That's it for this tutorial!
If you're looking for answers to other FAQs, you can check out AssemblyAI's Help Center.
If you're looking to learn more about building with AssemblyAI's Speech-to-Text API, including information on Audio Intelligence features like Auto Chapters, Sentiment Analysis, and Entity Detection, check out the docs.
If you're just looking for more awesome content, check out the AssemblyAI Blog and follow our newsletter.
Lorem ipsum dolor sit amet, consectetur adipiscing elit, sed do eiusmod tempor incididunt ut labore et dolore magna aliqua. Ut enim ad minim veniam, quis nostrud exercitation ullamco laboris nisi ut aliquip ex ea commodo consequat. Duis aute irure dolor in reprehenderit in voluptate velit esse cillum dolore eu fugiat nulla pariatur.