How to Automatically Transcribe Zoom Calls in Real-Time
Learn how to automatically transcribe a Zoom meeting in real-time with this simple tutorial.


In today's increasingly virtual world, old business problems require new solutions. With more and more meetings happening remotely via platforms like Zoom, it has become difficult to effectively document the contents of meetings. Luckily, modern Automatic Speech Recognition technologies are capable of automatically transcribing these remote meetings, allowing you to let ideas and discussion topics flow freely without rushing to take notes or worry that you missed something important.
In this tutorial, we will learn how to automatically transcribe a Zoom call in real-time by adding a recall.ai bot to the call. This bot will use AssemblyAI in the background to transcribe the call in real-time, handling every step of the transcription process for you while you focus on your meeting. Let's take a look at how to implement this solution now.
#What is Recall.ai?
Recall.ai provides a single API for accessing real-time meeting data from platforms like Zoom, Microsoft Teams, Google Meet, and more. Real-time meeting integrations require a lot of moving parts, so recall.ai provides a unified framework that simplifies this process. Recall.ai makes it easy to trigger actions based on who is speaking, when people join or leave a meeting, and more, all with a single API for every platform which helps lower development time and upkeep costs. The API can be used with both audio and video streams, even for meeting platforms that do not have a publicly accessible API.
#Preliminaries
Before we can get to the actual implementation, we will need to make sure all required tools are installed. Let's go ahead and follow the installation procedure now to install everything we will need.
1 - Install Node.js and npm
First, we will need Node.js, a JavaScript runtime, and npm, a package manager. Check to see if Node.js and/or npm are installed by opening a command prompt (terminal) and entering the following commands:
node -v
npm -v
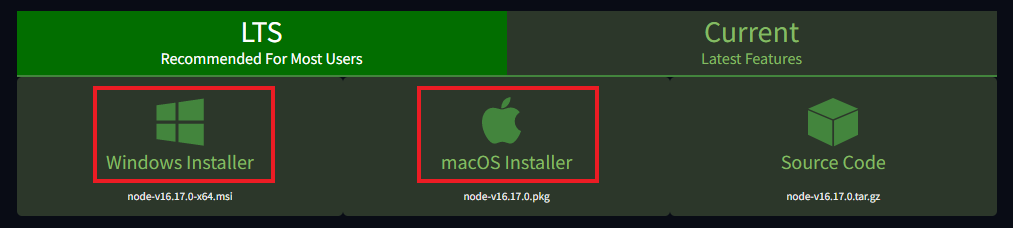
If these tools are installed, you will see their versions displayed in the terminal. In this case, you can jump down to the next step. Otherwise, you will need to install them. Go to the node website and download the installer that is appropriate for your machine, likely the 64-bit Windows installer or the 64-bit macOS installer.
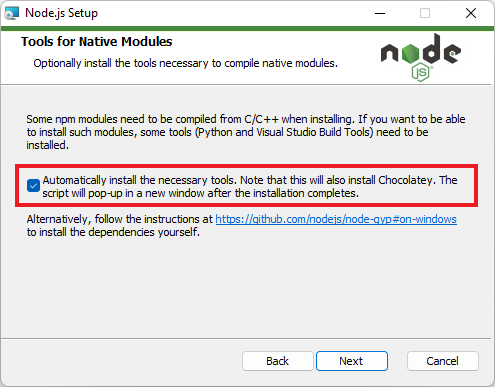
Once the installer is downloaded, click on it and follow the installation prompts. You can keep clicking "Next" to go through the prompts without changing anything except checking the "Automatically install the necessary tools" checkbox.
After the installation is complete, a terminal will open in order to install some other tools. Allow these tools to install, after which your computer may restart. After restart, check proper installation by opening a terminal and typing npm --version, which will display the version of npm that was installed.

2 - Install Ngrok
Next, we need to install ngrok, a reverse proxy that lets you expose your local machine to the internet safely. Install ngrok with one of the following commands, selecting whichever one is appropriate for your OS:
# MacOS
brew install ngrok/ngrok/ngrok

# Windows
choco install ngrok
Note that you may need to install chocolatey first if you are on Windows. Alternatively, you can download a ZIP file from the ngrok website and run the executable inside it instead. If these commands do not work, or if you are using another OS like GNU/Linux, look for the corresponding ngrok installation procedure on its website.
3 - Get an API key
Now that we have the above tools installed, we finally need to get a free recall.ai API key. This is an identifying value that tells recall.ai who you are and gives you access to its services.
To get a key, go to the recall.ai/AssemblyAI webpage and click "Get the integration". Currently, this service is available by invite only, but exclusive access is provided for AssemblyAI customers.
Repo Cloning and Environment Setup
With all preliminary steps completed, we can move on to cloning the project repository and setting up our environment. First, clone the repo and navigate into it with the following terminal commands:
git clone https://github.com/AssemblyAI/assemblyai-recallai-zoom-bot
cd assemblyai-recallai-zoom-bot
If you do not have git installed, you will need to install it before running the above commands. Next, install all necessary npm packages with
npm install
Finally, save your recall.ai API key as an environment variable by editing the .env file and replacing <YOUR-KEY-HERE> with your recall.ai API key.
RECALL_API_KEY=<YOUR-KEY-HERE>
Saving the key as an environment variable omits the need to hardcode the key into a script which is insecure and inelegant. The .env file is listed in the .gitignore file to avoid the accidental upload of the key to e.g. GitHub; but if you would like a more secure solution then save your key as an environment variable on your local machine.
#How to Automatically Transcribe a Zoom Call
Now that the setup procedure has been completed, we are finally ready to transcribe a Zoom call in real-time. First, we will use ngrok to generate a URL for our webhook by entering the following command in the terminal:
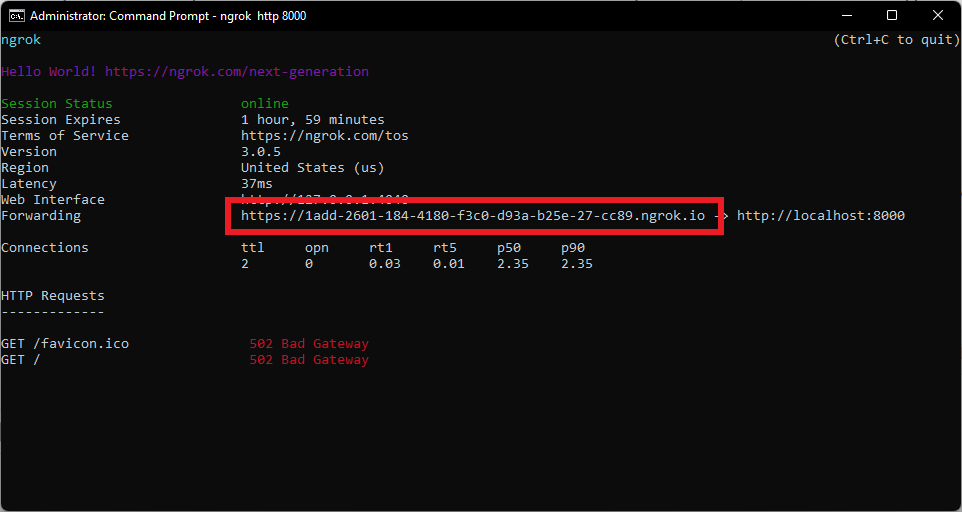
ngrok http 8000
The 8000 specifies the port to which requests will be forwarded. The above command will output something like the below screencap to the terminal. The address after "Forwarding" is the publicly available address that we need.
Copy this address and save it as an environment variable by editing the .env file in the cloned repo and replacing <WEBHOOK_URL> with the copied address.
WEBHOOK_URL=<YOUR-URL-HERE>
Leaving the ngrok terminal open, open another terminal, navigate into the project repo, and start your webhook service with
cd path/to/repo/assemblyai-recallai-zoom-bot
node webhook.js
Finally, leaving both the ngrok and webhook terminals open, open another terminal, navigate into the project repo, and start your Zoom bot with
cd path/to/repo/assemblyai-recallai-zoom-bot
node zoomBot.js
You will see a prompt in the zoomBot.js terminal which asks for the URL of the Zoom meeting to which you would like to add the transcription bot. To get this URL, go into your Zoom meeting and click the arrow next to "Participants", and click "Invite".
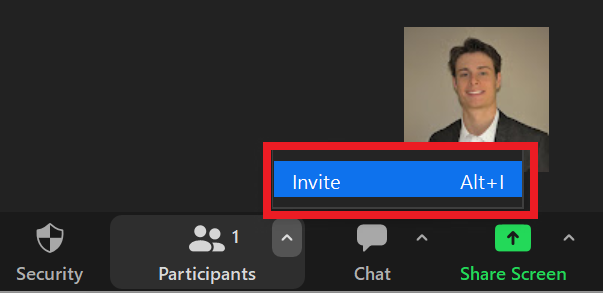
Then click "Copy Invite Link".
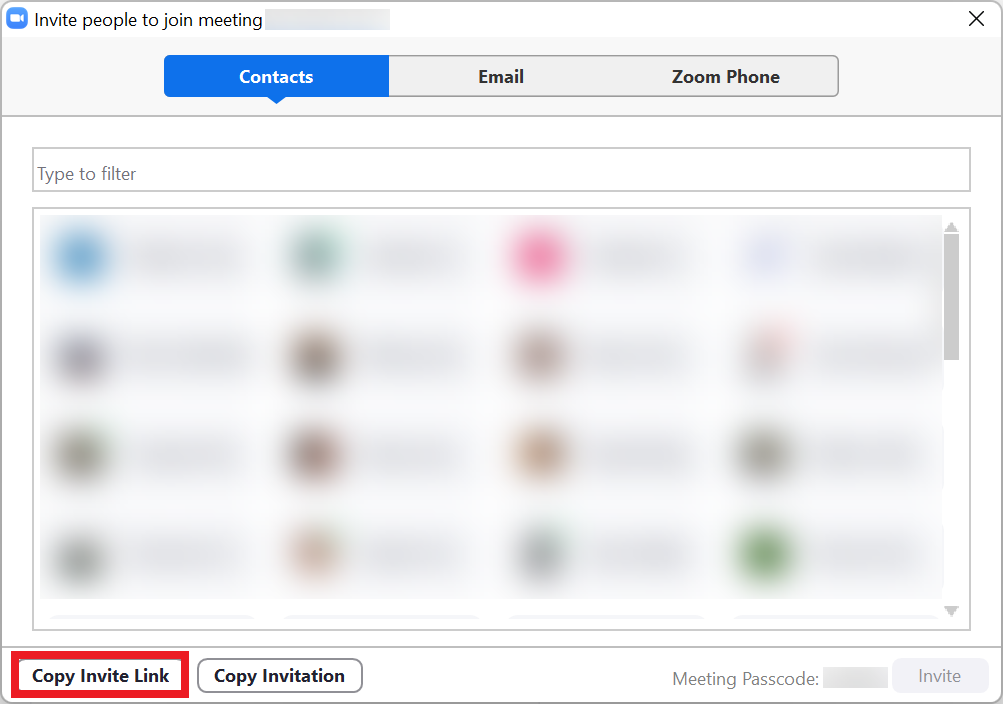
Paste the copied URL into the zoomBot.js terminal after the "What is your meeting URL?:" prompt and click "Enter". You'll see the transcription bot added to your Zoom meeting.
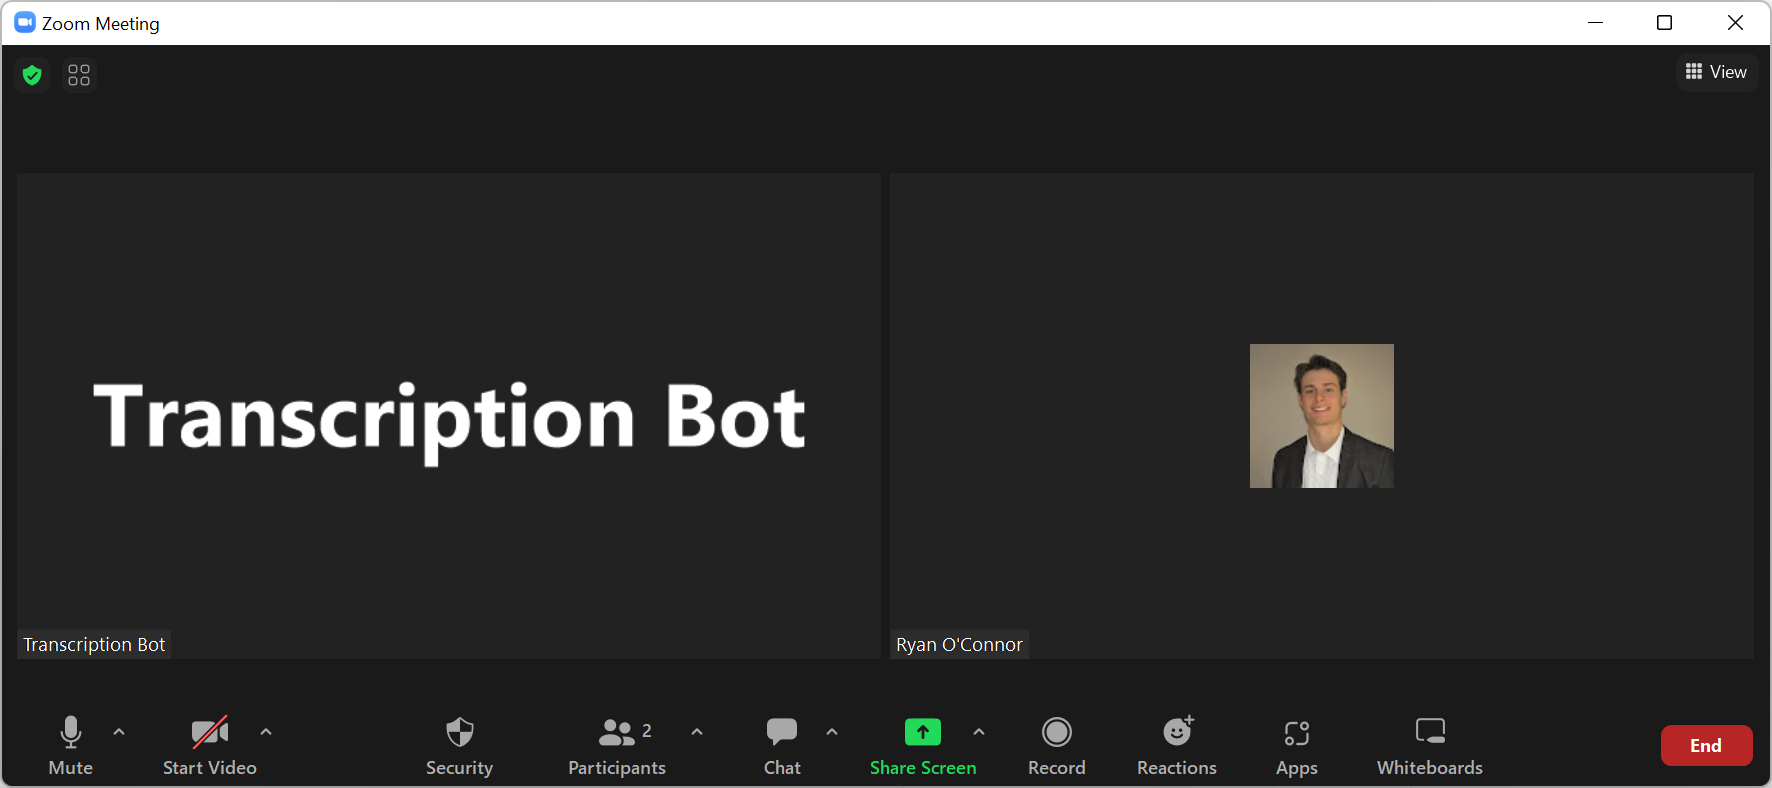
Back in the webhook.js terminal, a real-time transcript of the meeting is generated, including speaker identifiers.

That's all it takes to transcribe a Zoom call in real-time!
#Final Words
In this tutorial, we learned how to add a real-time transcription bot powered by recall.ai and AssemblyAI to a Zoom call using ngrok and Node.js in just a few simple steps. To learn more about recall.ai or sign up for an API key, check out their website.
If you're looking for more content related to Machine Learning, like articles on How DALL-E 2 Actually Works or information on Topic Detection in NLP, feel free to check out our blog! You can also follow our newsletter to stay in the loop for upcoming content.
Lorem ipsum dolor sit amet, consectetur adipiscing elit, sed do eiusmod tempor incididunt ut labore et dolore magna aliqua. Ut enim ad minim veniam, quis nostrud exercitation ullamco laboris nisi ut aliquip ex ea commodo consequat. Duis aute irure dolor in reprehenderit in voluptate velit esse cillum dolore eu fugiat nulla pariatur.