
The Definitive Guide to Python Click
A tutorial on how to use the components of the Python Click library to intuitively and easily build simple to complex command line interface (CLI) applications. This tutorial covers styling, passing context, creating your own pass decorators, nested commands, and how to use multiple command groups.


What can Python Click do for you? At the end of this guide, you’ll be able to create your own command line interfaces that can pass context, with commands that can take mandatory or optional arguments, and nested commands. This example Python project will show you how to interact with different click commands from the building blocks such as click.command to the more advanced commands such as click.make_pass_decorator. If you have any questions please don’t hesitate to reach out to me @yujian_tang. You can find the source code here.
Click, or “Command Line Interface Creation Kit” is a Python library for building command line interfaces. The three main points of Python Click are arbitrary nesting of commands, automatic help page generation, and supporting lazy loading of subcommands at runtime. Click provides their own rationalization as to why you should use Python Click over other Python CLI libraries. My reasoning, as a developer, for picking Click is that it’s easy to use and it provides the necessary capabilities to create complex command line interfaces.
Let’s get started, the first thing we’re going to do is create a group, in click, a group is a set of (supposedly) related commands. This group that we’re going to make is going to be based around interacting with a JSON document, you can either download this from the link, or follow the tutorial towards the bottom of the page that will show you how I generated it using AssemblyAI, which we’ll load as a dictionary. All of the commands in this group will interact with our loaded dictionary, so we will use the pass_context decorator to keep the dictionary stored in context. The context is an object that holds all the context of the execution of a command. In a group command, the context object is used to pass information between commands.
Upon creation of our group and declaring it in main, we should have an automatically generated "--help" option, like so:
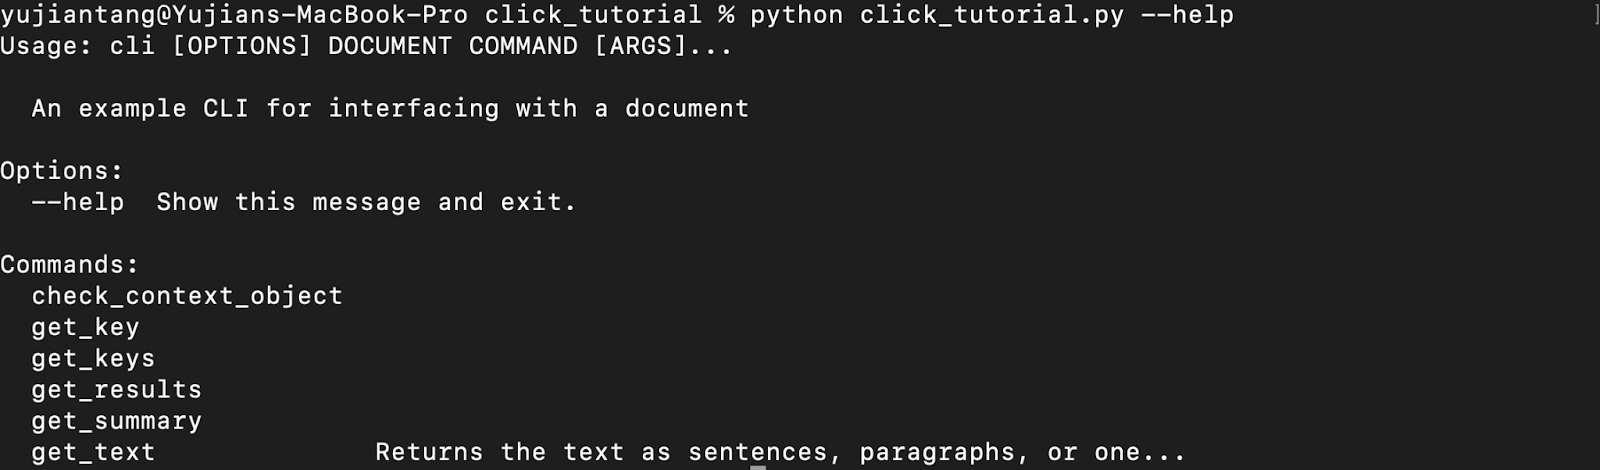
Yours shouldn’t have all the commands listed yet, but that’s just a sneak peak at what we’re going to build. NOTE - all commands must be defined between main() and our click.group decorator.
Now that we’ve created our first group in Python Click, let’s add our first command to it. Let’s make a command that will check the context for us to confirm that we have the right type. Earlier we said that we want to load our object as a dictionary into our context, so we should expect a result like:

All we have to do to make this command a part of the group we created earlier is decorate our function with the decorator <group name>.command(<command name>). To make sure that this object is able to access context, we also use the pass_context decorator.
Passing Context in Python Click
Now that we have some familiarity with decorators and Python Click, let’s use Click’s functionality to make our own pass decorator. Why would we make our own? So that we can pass a specific type of object through (later we’ll also demonstrate how to use pass_obj). Let’s make a pass decorator to specifically pass a dictionary object through, we'll call it pass_dict.
''' Here we'll make a pass decorator, which we can use to pass the last object stored of a type of our choosing in the context by using click.make_pass_decorator(<type>) ''' pass_dict = click.make_pass_decorator(dict)
Let’s make a command that will use the pass_dict decorator to pass in the dictionary object that is stored. The Python Click library will search for the innermost object (in context) of the type we specified above (dict) and pass that to our function. When we call our get_keys function, it should look like this:

All we’re going to do is pass the dictionary in using the pass_dict decorator and then extract the keys and use Click’s echo, style, and secho commands to print our keys out in different colors.
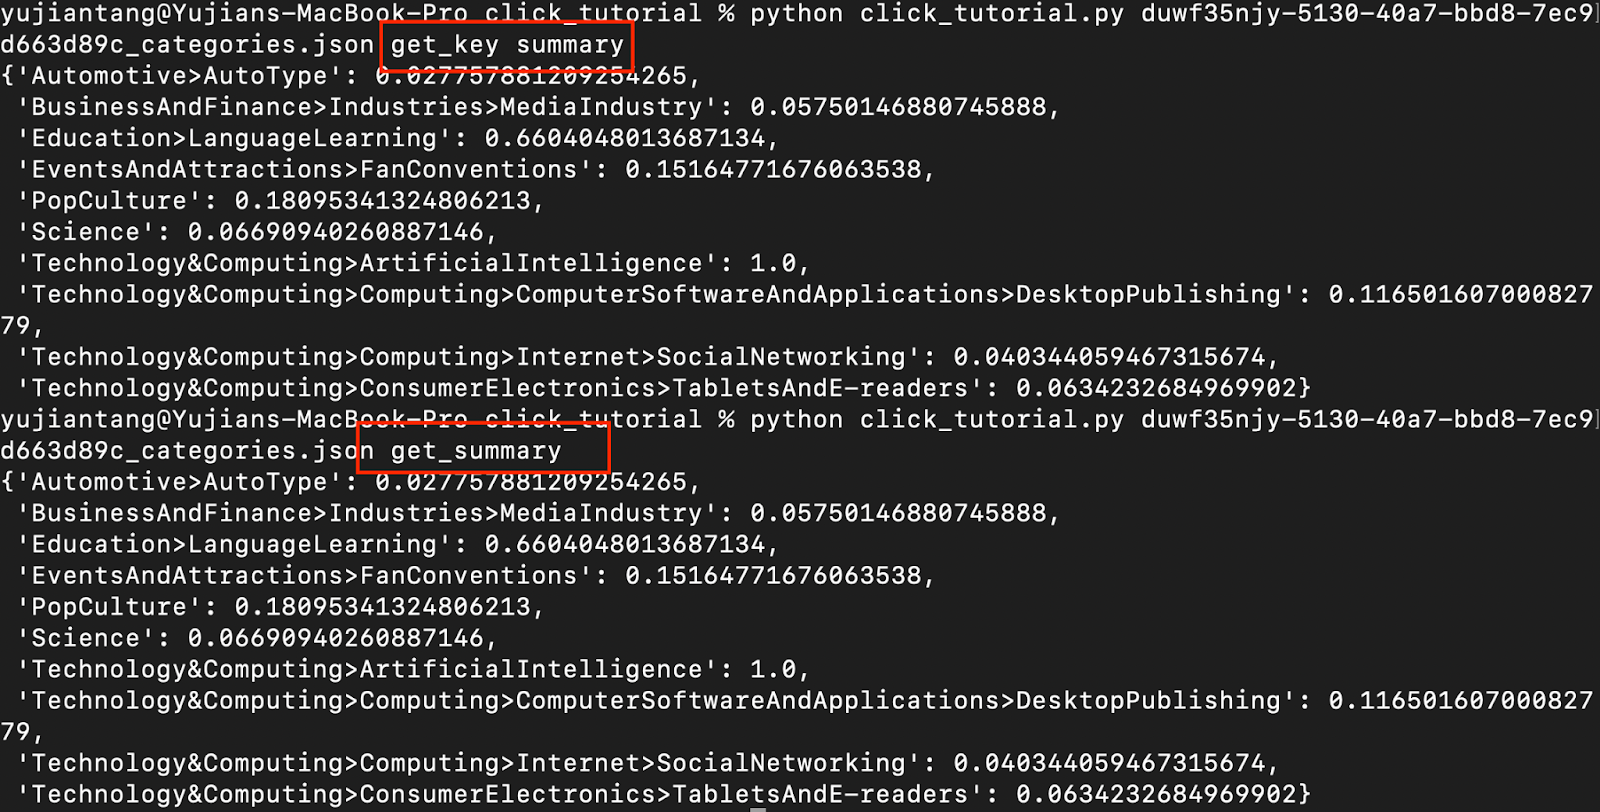
Okay, now that we know what keys are in our dictionary object, let’s create a command that will get the value to a key that we pass. We’re also going to decorate this with pass_context because we’re going to use this command to demonstrate one of the three tenants of click - arbitrary nesting of commands. We’ll create a second command after get_key that will get the value of the summary key by invoking the get_key command.
Both should result in the same output as shown:
Adding Optional Parameters to Your Command Line Interface
Now let’s go through how to use the click.options decorator. This decorator is used when you want to pass optional parameters to your commands. It can be used to pass an argument, or to be passed as a flag. If you want your option to be passed as a flag, set the is_flag parameter to True when using your decorator.
In our example, we’re displaying the "results" key of our dictionary. You’ll notice that I also passed in the --key option that we coded up above and chose to get the text of our results.
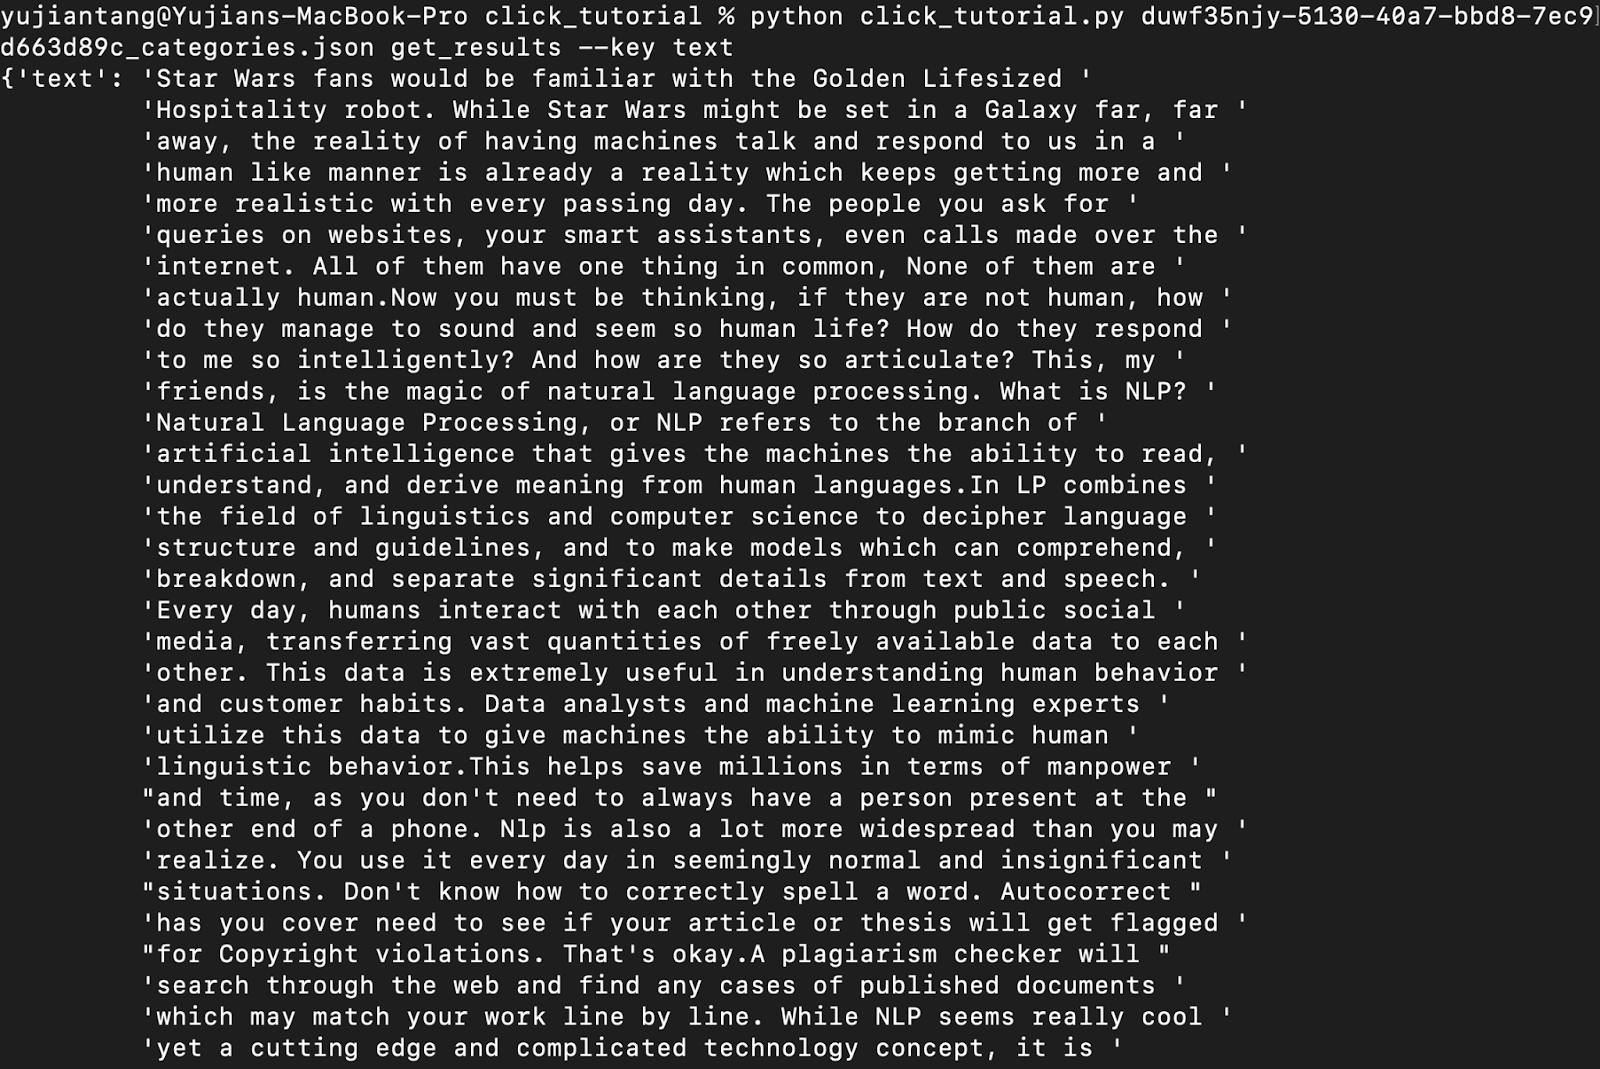
If I also pass in -d or --download, the command will download the file to a .json document instead of displaying it in the terminal.

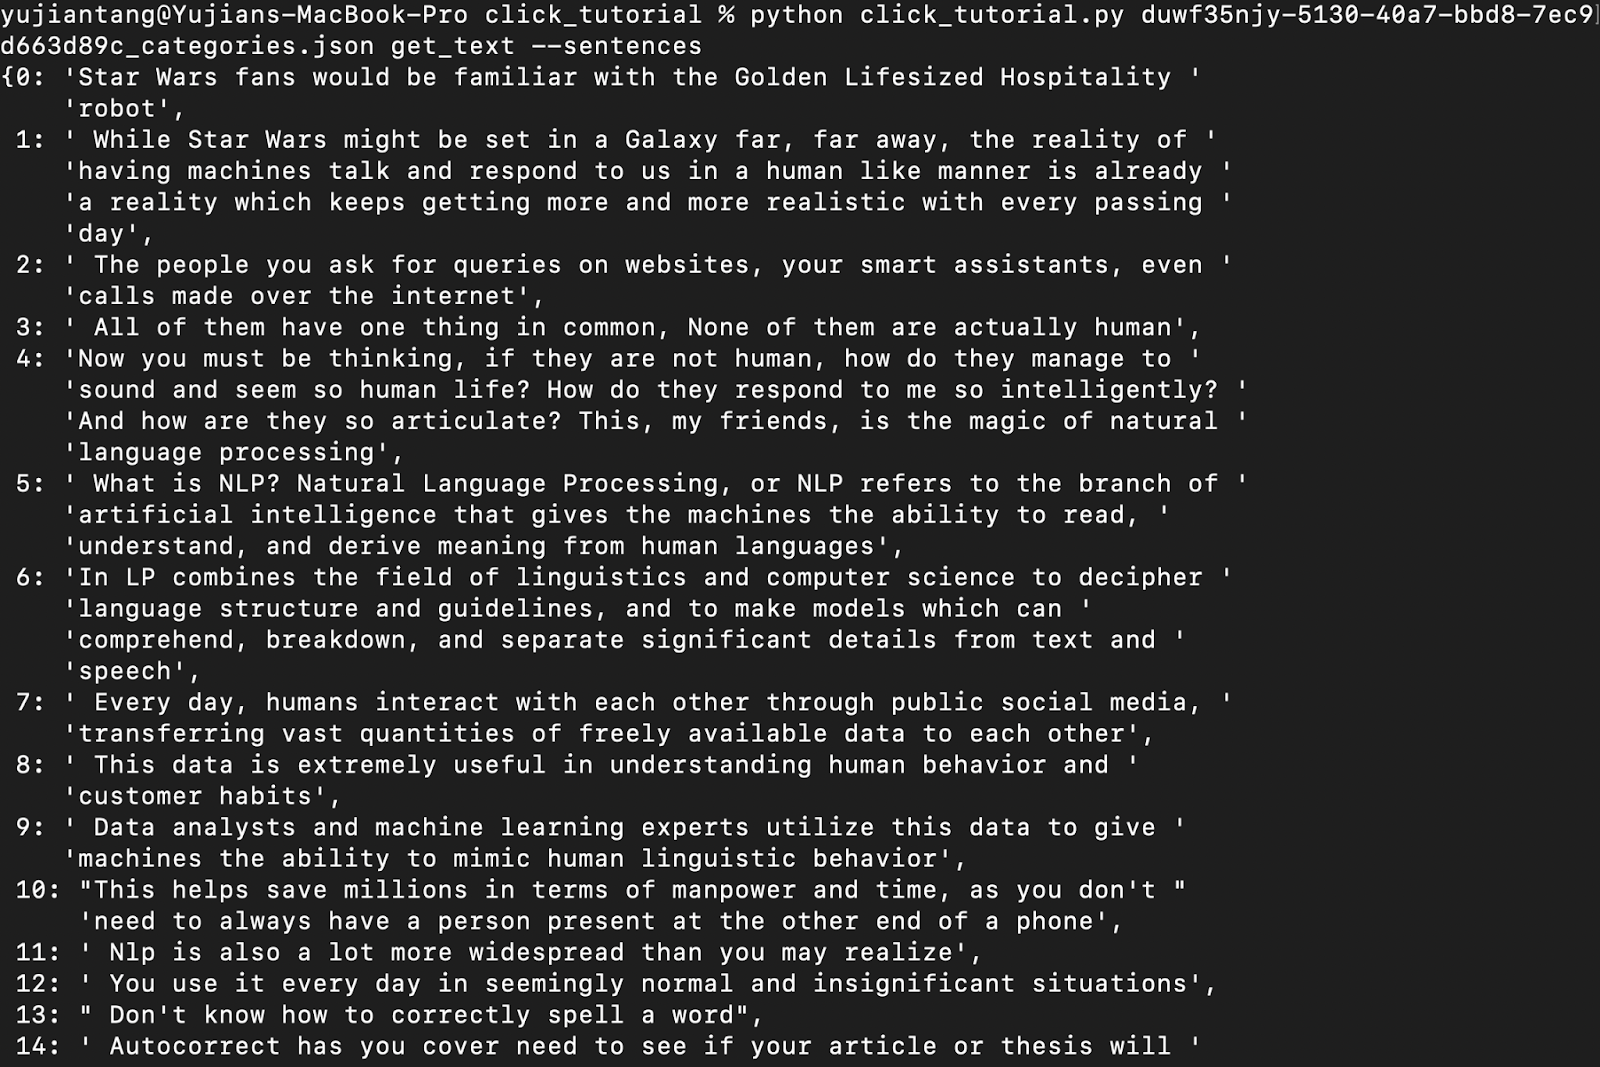
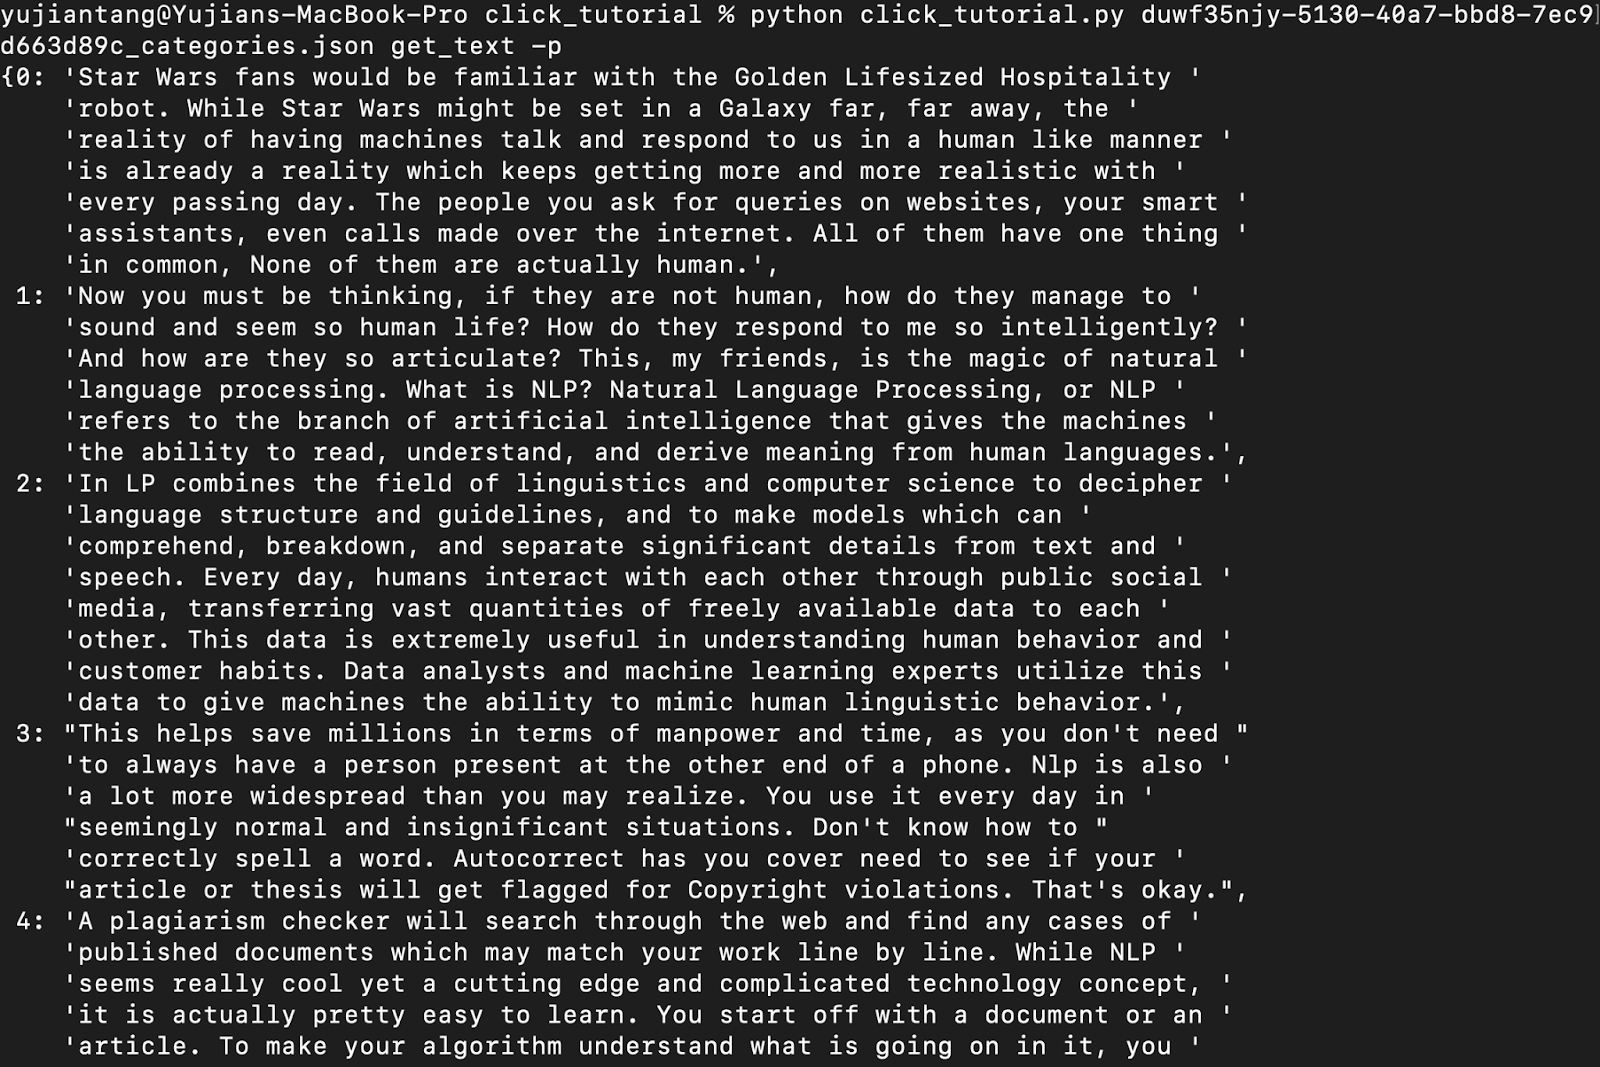
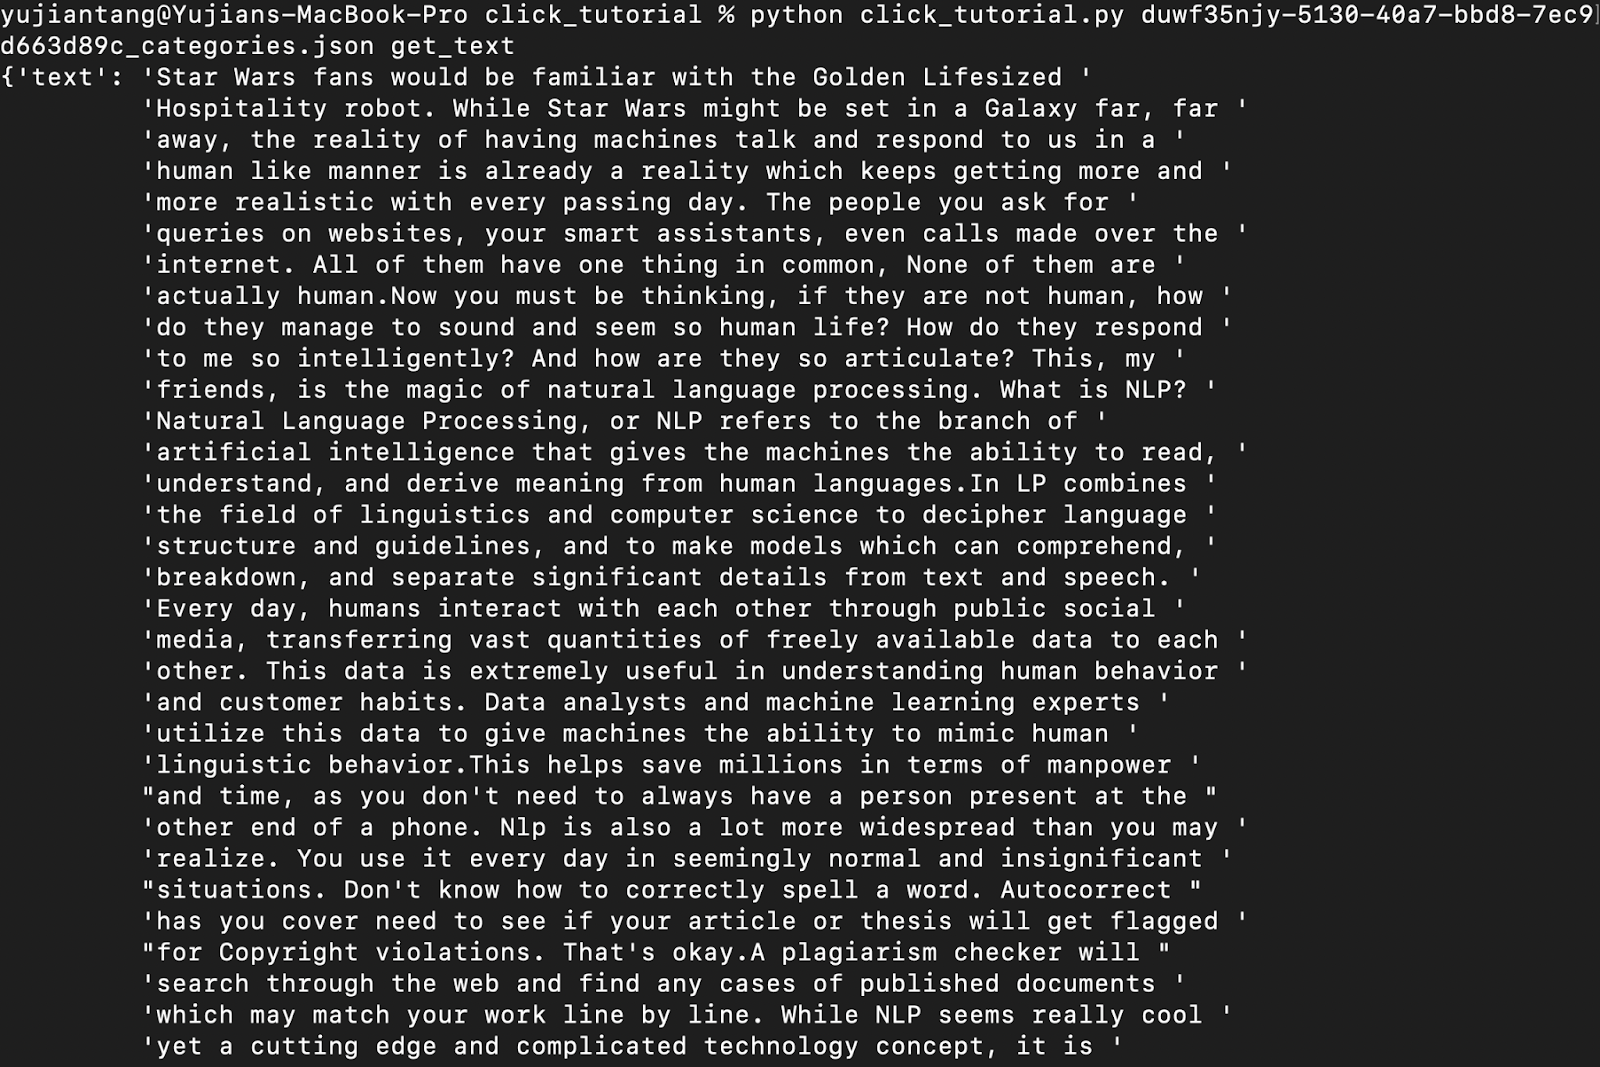
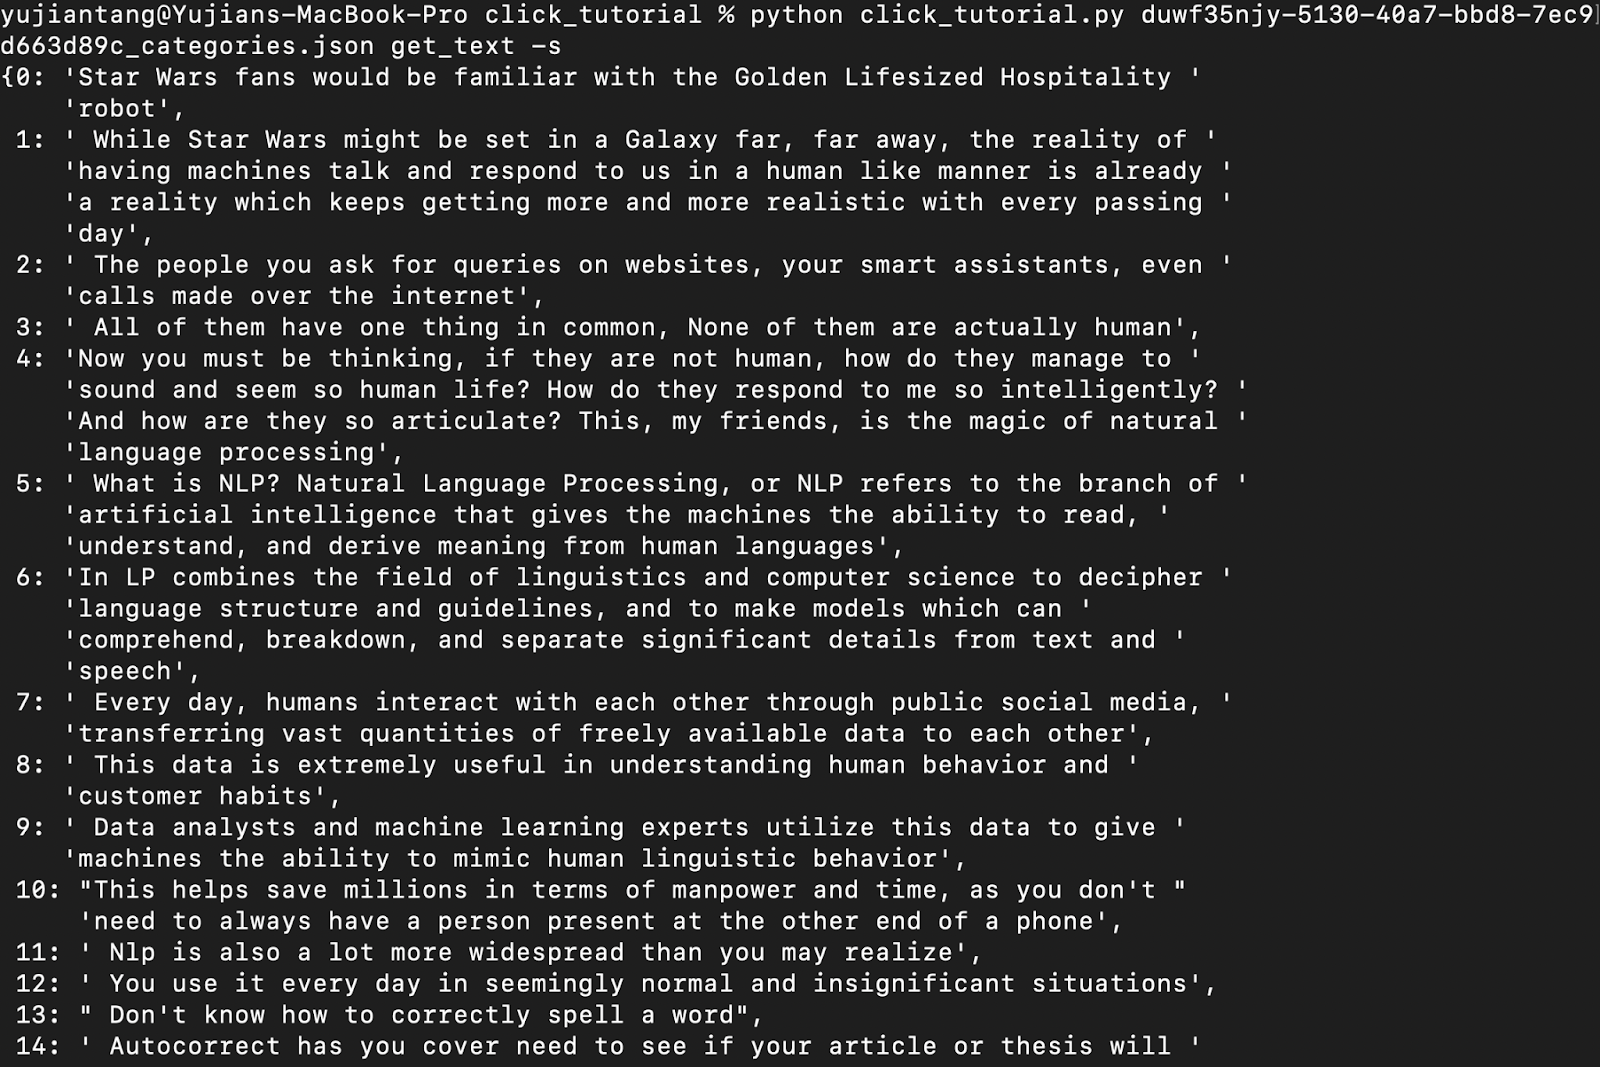
Okay, the last click decorator that I want to introduce is pass_obj which acts just as we would expect it to act based on our experience making a pass decorator earlier and pass_context with Python Click earlier. We’ll also do something fun with our text, we can grab our text in three different formats. As one big text block, which I will set as the default, by sentence, or by paragraph.
This is what the responses should look like:
Sentences:
Paragraphs:
No optional parameters:
Alright now I’m going to demonstrate how to have two different Click command groups running from the same file. What we’re going to do is allow users to pass either a JSON file structured in the way our example JSON file is, or any .mp3 file. To follow the rest of this guide, you’ll need an API key from AssemblyAI. What we’re going to do is go over how to do exactly what we did with the text option above, but we’ll get our sentences and paragraphs directly from AssemblyAI.
For just an example of what it looks like to have two python click command groups running, skip down to the last code segment.
The first thing we’ll do is declare some global variables and our imports. Notice that I’m importing my auth key from a configure file. It’s recommended that you store your API keys in a separate file to avoid uploading and exposing them. We’ll need requests to send requests, sleep from time to automatically poll our endpoint, and auth key from configure to access the AssemblyAI API.
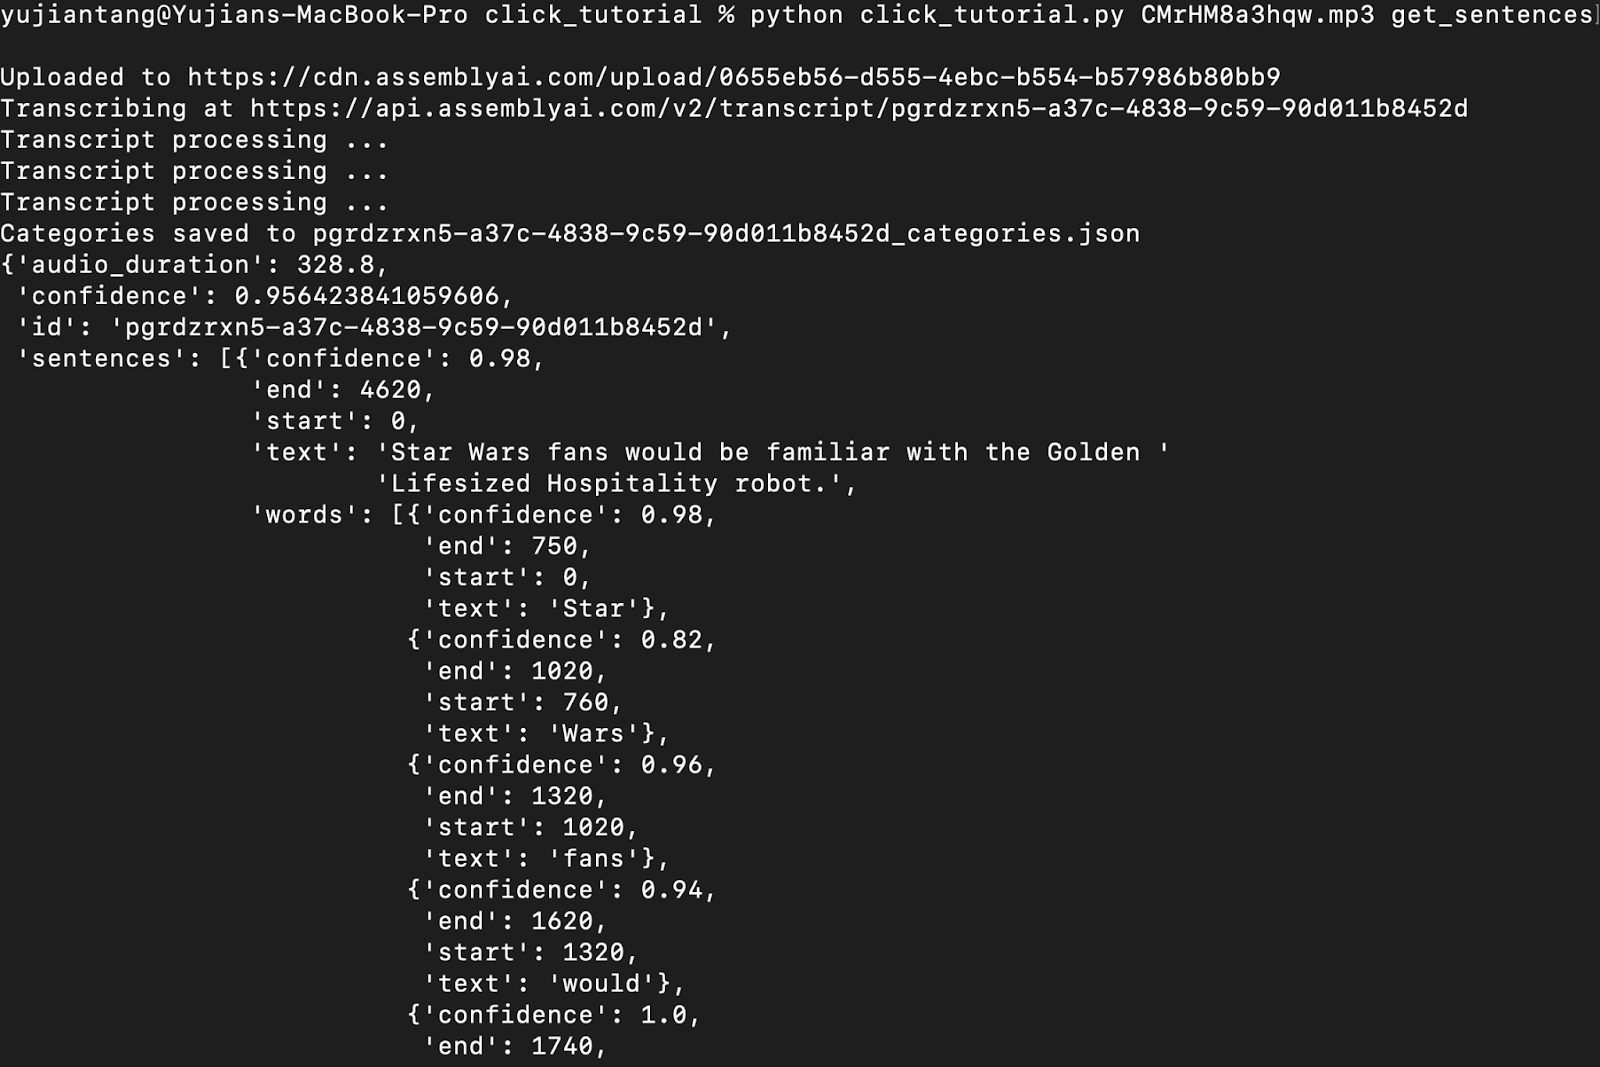
Let’s create our second group. I’m going to name this one "assembly" since we’re using it to interact with AssemblyAI’s API. I’m going to have the function that creates the group also take our mp3 file, upload and transcribe it, and save the returned id to context. We’ll use the id later to easily get both sentences and paragraphs from an API endpoint.
Thanks to the brilliant design of AssemblyAI’s API endpoints, we can have the functions to get paragraphs or sentences be almost the exact same function. All we need to do is construct the endpoint, and then send an HTTP GET request.
Alright now that we’ve got a couple example commands in our assembly group, let's cover how to actually have both command groups running at the same time and run a different group “intelligently” (based on our input). What we’re going to do is convert our main() function to check if our first argument contains a JSON file or an .mp3 file.
As you can see from the two images below, our new command line tool can recognize input and run the commands correctly from that.
Now we’re at the end of our tutorial on how to use Python Click to make a command line interface. If you have any questions regarding how to use Click, tweet me @yujian_tang or reach out to me on LinkedIn. For more information on how to use the AssemblyAI API, check out this tutorial to do Python Speech Recognition in Under 25 Lines or this tutorial on building a YouTube Transcriber and follow us @assemblyai
Lorem ipsum dolor sit amet, consectetur adipiscing elit, sed do eiusmod tempor incididunt ut labore et dolore magna aliqua. Ut enim ad minim veniam, quis nostrud exercitation ullamco laboris nisi ut aliquip ex ea commodo consequat. Duis aute irure dolor in reprehenderit in voluptate velit esse cillum dolore eu fugiat nulla pariatur.

.png)